Background:
After the removal of the brake booster the weather turned cold and I have not had a chance to clean and treat the booster and brake reservoir. I used the POR15 prep and ready as a rust treatment. The old lacquer was gently removed by a drill and rotary wire brush. That didn’t take long, the prep and ready took about 45 minutes or so. To see how badly it had rusted click here for Part 1.
Preparation for spraying:
The booster was sprayed with the Por15 Prep and Ready, it was kept wet as required and then washed of and allowed to dry. This left a rust treated coated surface ready for painting. I had an idea a little while ago to get this as close to natural metal as possible. I decided that I would try a silver wheel spray by Simoniz. I wasn’t sure how this would come out but I would give it a go, at worst I could always start again. I have learned that this restoration lark is very subjective to what you want, it’s trial and error with me. This was a trial with an untested outcome.
The booster and reservoir were dry and ready for the spray. I wanted to keep a little character of the old pitted surface. So as the base metal was almost the same colour I was about to spray, I decided that an undercoat of silver would be enough.
Make Shift Sling:
I had a problem, how do I spray something that is round without it touching the surface and marking it? After Christmas I invented my Dremel rail. I am not going to pay Dremel prices for a hook on a stand in order to use the Flexi-shaft. So what I made was basically a sliding rail to move my Dremel where I wanted on my bench. The design was fairly thick string attached to a couple of cross beams from my man cave roof. I placed a hook on a nylon washer tube and it was able to slide between the two points. As I already had the string there I thought I would suspend the booster and spray it that way. Here are the pictures of the sling and how I suspended it. Simple and it worked. Remember where you read it first. Again I used an old shower curtain to stop the spray going everywhere.
Spraying:
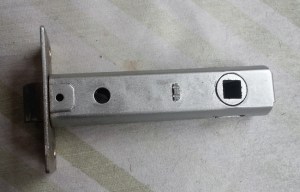
I used the Simoniz Wheel Silver for this to see how it would look. Obviously I didn’t want to mess up the booster so I had another idea. I found something with a similar metal that I could spray first. Also this would give me an idea of drying times as well, I used a door catch. This has got to be the most pampered door catch ever. I liked the colour and the way it sprayed, time to move onto the booster and reservoir. Shake the rattle can for two minutes at least 30cm away and light thin layers applied. Then I sprayed the other side of the catch for comparison drying times. I repeated the process 3 times both for the front and back of the booster. Each time spraying the catch, paint on paint drying times could be assessed properly . How did I stop the booster spinning on the string? A peg at the top to hold it still. I checked the catch for touch dry etc. After the third coat I then applied two coats of lacquer, also to the catch.

What’s the orange thing jammed in the front of the booster? That is a old garden hose spray, it was tapered and so I wound a little insulation tape around it and wedged it in the hole to stop dirt and spray getting into the booster. You like that?
Reservoir spraying:
This was very much a repeat of the booster. As I was working on a shape that was easier to handle I was able to spray it on my bench. I sprayed the cap after a gentle rub with wire wool to make it as smooth as possible. Again three coats and two lacquer. The reservoir itself was sprayed with a Rustoleum matt black, followed by two coats of matt black spray, finally two of satin lacquer.
Results:
I am well pleased with how these have come out. They look almost like the natural metal after I rubbed them down the first time. I can now go and refit them back into the car. Job done.
Total cost was £14 for two tins of spray.


