Spotless Washing?

It’s known that I’m a bit of car cleaning weekend warrior. Not just my Mustang at car shows, but my daily drivers too. There is a problem with wet washing which drives me mad, hard water. In my area of the country the water is notoriously bad. I will explain this in a bit more detail as I have been looking into various water filtration options, so this post and an article all in one. Hope its not to long.

​What Exactly Is ‘Hard Water’?

​In simple terms, hard water is the stuff that comes out of your mains water supply with a high mineral content. While rain water is naturally soft, as it percolates through the ground into our reservoirs and aquifers, it picks up bits of calcium, magnesium, and sometimes even chalk or limestone. By the time it travels through the pipes, get treated at water plants and add chlorine to that as well, it then travels down miles of pipes and reaches your household taps and your garden hose, it’s a mineral cocktail.

​While some minerals might be fine for you, they are the absolute nemesis for a clean car. When you spray that tap water onto your paintwork and let it dry, the H2O (water) evaporates back into the air, but the minerals stay left behind. They can bond to the surface, creating those stubborn unsightly “water spots” or “limescale” marks that we all dread as car detailers, or even the weekend warriors who just want a shiny car. This is a reason why car detailers carry their own water around to make their life easier and avoid those water marks. Sometimes these marks looks like a small octopus has climbed over your car, the rings look exactly like that, but whitish. ​Most people think water spots are just an aesthetic nuisance, a bit of white dust that can be wiped away. ​The real danger lies in what happens when those minerals from the mains water are left to bake in the sun. Calcium and magnesium (also bird mess) are alkaline. When they sit on your clear coat (or your single-stage paint if you’re still running an original classic paint), they begin a process called etching. It’s like a tiny, slow-motion chemical burn taking place. The minerals actually eat into the surface of the paint. If you run your finger over a bad water spot, you might feel a slight indentation. That’s not dirt sitting on the paint; that’s the paint itself being damaged. Once it reaches that stage, no amount of washing or polishing will fix it.

​Damage Control: Removing Water Spots Without Killing Your Wax

​If you’ve found your pride and joy covered in these white rings, you need to be careful before diving into removal. Most people reach for household remedies, but if you’ve spent all Saturday applying a high-quality carnauba wax or a high-tech sealant, the wrong “fix” will strip that protection off in seconds.

​1. The Chemical Route – The Professional Way

​Before you start rubbing the paint, try a dedicated Water Spot Remover. Products like CarPro Spotless, Gtechniq W9, Chemical Guys Heavy Duty Water Spot Remover Gyeon Q2M water spot remover etc. are all specifically formulated with mild acids that break down the bond between the mineral and the paint while being as gentle as possible on the underlying surface.

​2. The Vinegar Dilemma

​A 50/50 mix of white vinegar and distilled water is the classic “old school” fix. The acetic acid in the vinegar is great at dissolving calcium.

​The Catch: Vinegar is an acid. While it’s great for the spots, it is brutal on car wax. If you use vinegar to clean your spots, you are effectively stripping away your wax protection. It leaves the paint naked as such and vulnerable to the next lot of hard water or UV rays. If you do use this method, you really should re-wax the area immediately.

​The “No-Go” List: Chemicals That Destroy the protection of your wax and sealants while fighting hard water, avoid these like the plague:

​All-Purpose Cleaners (APC) & Degreasers: Many people use these to “boost” their wash. Don’t. High-alkaline cleaners are designed to break down oils and waxes. They will leave your sealant patchy and ineffective.

​Dish Soap (e.g., Fairy Liquid or Dawn Ultra etc.): These are an ultimate sin, yes they clean, but often have elements of salt as a stabilizer. We know what salt can do cars – rust! Dish soap is designed to strip grease from pans, it will strip every bit of wax off your car, leaving the paint dry and prone to more severe water etching. Addition of salt that could be left behind, you are making things worse.

​Bleach-Based Cleaners: Never let anything containing bleach near your car. It will dry out your rubber trim and chemically attack the clear coat.

​Aggressive Household Limescale Removers: Products meant for your bathroom tiles are far too acidic. They won’t just remove the water spots; they can stain the paint and permanently dull the finish.

​Alcohol-Heavy Sprays: While Isopropyl Alcohol (IPA) is great for prep, using it as a “quick fix” for water spots, it will also instantly dissolve any wax or polymer sealant you have on the car. Good for starting from scratch if you want to rewax your car to remove old tired layers of wax or sealants.

Abrasive Pads: Dish scouring pads or bathroom cleaning pads, you know the sort with the sponge and a layer of plastic nylon to get seriously aggressive with stubborn cleaning jobs. They will destroy your paint and can even lead to having a respray, DON’T do it. Polishing pads used by professionals are virtually always foam, sometimes lambs wool for deep cutting or heavy paint correction. I don’t need to mention steel wool pads either do I? That is obviously, down to bare metal stuff.

All of this now leads into what I’ve just bought to save me time and effort to remove water spots; ‘Prevention is better than correction’. I have been looking into the ‘Spotless’ washing systems. This is treatment of the water that you put on your cars which will stop the water spots appearing in the first place. My purchased was a Spotless water system by ‘SpotBye’ and I’ve used it to create a review. I have created that page here, or click the link below for the complete setup guide, and a review of the results. Spoiler alert, it’s a game changer!

https://onemanandhismustang.com/spotbye-water-deioniser-system/

​If like me you’re stuck with hard water from the tap, you have to change your strategy. You can’t really just drench the whole car and then dry it at the end, well you could, but it won’t be a great finish. This is especially true on my black cars that shows the world and his mate for any marks what so ever. Try working smarter, not harder with a couple of tips from me:

​The Sectional Wash: Work on one panel at a time. Wash the roof, rinse it with the hose, and dry it immediately. This prevents the tap water from sitting long enough to evaporate and leave minerals behind. Move onto the hood, then the fenders and doors etc. Work your way down the car, the dirtiest part of the car is always lower down.

​The “Sheet” rinse: Take the nozzle off the hose. Let a steady, gentle stream of tap water flow over the panels. This “sheeting” effect leaves much less water on the car than a high-pressure spray which will leave droplets on the surface of the paint.

​Drying Aids: (A useful process I often use). While the car is wet, spray a product like Chemical Guys After Wash, Gyeon Q2M WetCoat, Meguiar’s Hybrid Ceramic Wax, Dat Wax Hydrophobic Protective Sealant or a quick detailer etc. These products lubricate the surface and help neutralise the minerals, making them much easier to wipe away before they can bond or dry out on your paint.

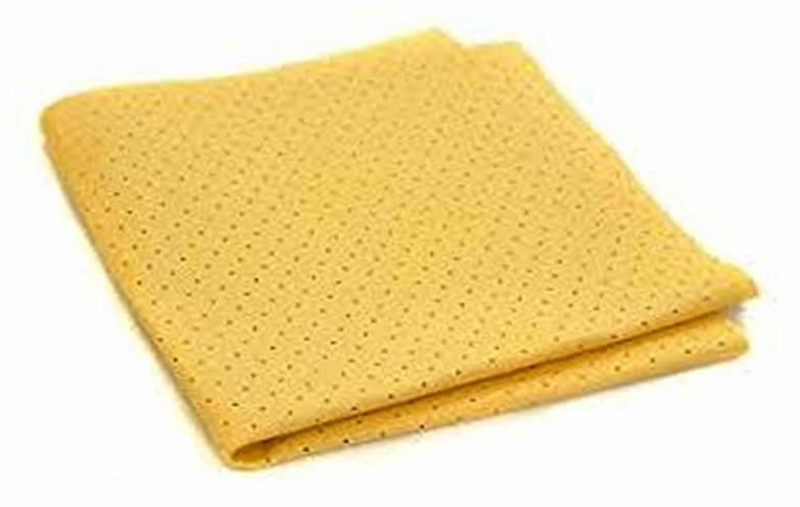
​Use a good quality microfibre cloth: A plush “twisted loop” drying towel is essential like Chemical Guys Woolly Mammoth or Slim’s Drying Towel. These towels are designed to pull the moisture and the minerals from the surface of the paint in a single pass rather than dragging them across the surface.

My new setup:

​There are multiple ways to soften the water, that will save you time and effort in the long run. There are canister style, an inline tube, wall mounted, dual filters all the way up to the professional pumped options.

Before I show you the setup and use, this is NOT a sponsored post, the product was purchased with my own hard earned money. I have been trying to talk myself into this for a couple of years now. As I now have two black daily driver cars, this turned out to be a quick discussion and I didn’t put up much of an argument with myself after struggling to keep the cars presentable. I did my research and I bought ‘SpotBye’ canister system. Depending on your needs this may not be for you, but from what I have seen, its a great purchase.

These next few steps shows a quick setup guide for the equipment. The FULL setup details and downloadable manuals are in the link here or the link above.

SpotBye is a basically De-ionising Resin vessel. It’s a cylinder that connects inline with your hose. They remove 100% of the minerals.

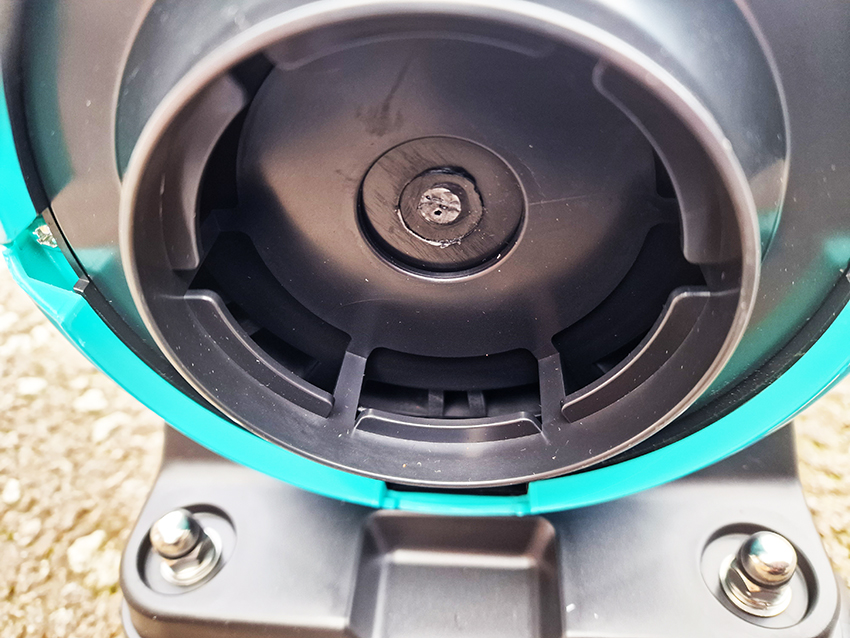
The setup was quite simple, although the instructions are dire to be honest. After unpacking you need to add a resin into the canister carefully so the resin doesn’t get into the centre tube. The centre tube which passes the treated water out the canister is removable. Open the vacuum packet resin packet (5ltr) and carefully fill the canister, this is the media that filters the water. SpotBye does supply a rubber cap to prevent the resin going into the tube.

Screw the cap on and attach the standard size fittings for your hose.

The supplied water testing tool shows just how bad our water is. The classification level for hard water is anything over 120 ppm (parts per million). From my tap drinking water tap it was 309ppm!!

Attach the garden hose (yellow) to the ‘In’ and another shorter hose to the ‘Out’ fitting (green) for the water spray attachment you want to use. Allow the water to run a couple of minutes to flush the hoses through and get the resin working. The reading after a couple of minutes was astounding, 20ppm in this picture, but even went down to 18ppm. However, it’s noted that the filtration should be 0ppm according to SpotBye. But, an improvement of 96% was good enough for me. The green hose was all I have left which is sometimes use for syphoning a water feature. A new one is on order as I write this up.

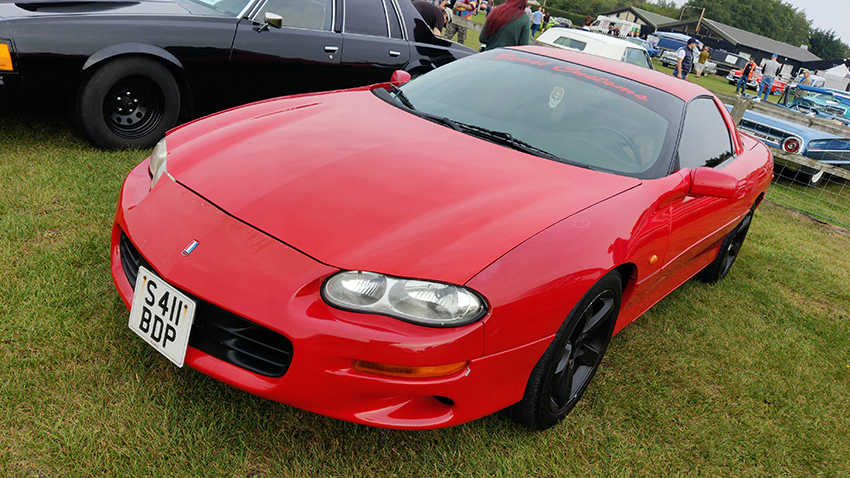
I deliberately left my car to get dirty (such is the sacrifice I make for these reviews)! It was bad as there has been some ‘Sahara’ sand which was mixed in with the UK’s famous rain which leaves this nasty mess which looks even worse on my black cars.

Washing the car was a breeze, even on a warm day in direct sunlight and on a hot car, all of which are big no-no’s by the way for cleaning a car. There was copious amounts of suds from the car shampoo which lasted a long time on the car, something I haven’t had before, to this degree anyway.

With the car cleaned it was rinsed of and again deliberately not dried to see what happens if the dreaded water spots showed up. There was some light sheeting marks which dried of wit h a drying towel without any effort.

The pic below left of the door mirror shows what I mean, the rinsing ran of the car instead of sitting on the panel on the right pic.

The image here is dotted to show where I half dried the door in the sun.

Close-up of a black car door showing water droplets and a reflection, with a red dashed line marked along the surface.

Once dried there was no water marks even in this extreme scenario of hot weather, hot panels and in direct sunlight. From the image below in the shadow on the left there is no water marks. The white bits you can see is in fact the paint pearl effect glinting in the sun, you can also see the pink, green, blue, red and yellows of the pearl paint. The phone was having trouble to trying to focus but settled on the reflection of the fence.

Close-up view of a shiny car door reflecting sunlight and the surrounding environment, with some dirt and smudges visible on the surface.

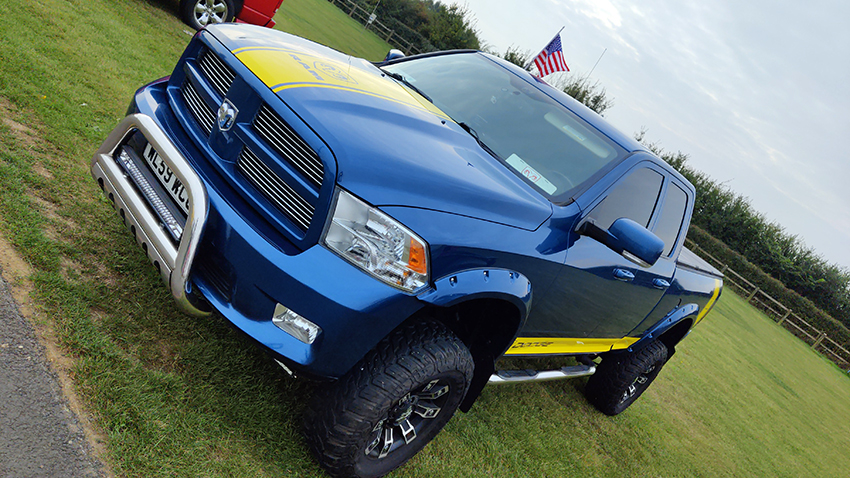
With the car dried the car was literally ‘spotless’ as this type of washing technique is referred to. I was also interested to see what it would be like after a quick detailing. Why? Just because I could. The results were even better than when I picked the car up from the showroom.

Here are some close ups of the paint with no water marks, the bottom right is the reflection of the house taken on the hood looking forwards, which is why it looks upside down!

To get a great finish the paint needs to be smooth to give a uniform reflection of light. Having no contaminates on the surface goes a long way to help with the desired reflective gloss. All of this comes at a cost though, to keep the water pure as it can be the resin which decontaminates the water needs to be replaced, around £35 for 5ltr which is what my canister holds. The harder the water the quicker the resin will need to be replaced. The recommended output is 520gallons at 200ppm. The fact that the car wash literally took half the time and was so much easier that cost is worth it to me.

​At the end of the day we spend a lot of money on fancy shampoos and waxes to keep our cars looking their best. It seems a bit mad to ruin all that hard work by drenching the car in liquid limestone from the garden hose.

I hope that gives a little insight to the finer points of detailing. Yes its over kill for some, but saving time back for myself and saving physical effort in order to get that good result is worth the small amount of money per car wash. I even save on not having to by products to correct a problem. Buying a few bottles of products to overcome these problems would outweigh the cost of the system I just bought.

Share my Content

Wallpapers

Everybody likes a customised wallpaper either on their home desktop PC, Laptop or mobile phone. With that in mind I have selected a few I use and decided to share them with you. I have and added to a new Menu option called “Downloads”, click on the link and you will be taken to a page where I intend to add more as I go along. Let me know what I should add or you would like to see on there.

Website navigation menu highlighting the 'Downloads' section.

Once you found what you like, from the Desktop options three so far, or the mobile device options (six so far) click on the ‘Download’ button. They are all free and I haven’t added any watermarks. Lets face it, even if I did, you could remove them with various tools available.

The desktop options are these at the moment, a manor house with a Mustang. Two AI generated scenes, sunset and evening with the cars lights on.

The mobile device options are varied, all high quality photos. They are a large sized images which should allow you to move them around and zoom in and out depending on you device. You could use them as your main screen or maybe just a lock screen.

This a photo of my phone using the first image which is zoomed in to fill the width of the device (Samsung S26 Ultra).

There’s plenty of space at the top to add your favourite apps.

A smartphone displaying a blue vintage Ford Mustang parked on a gravel road, surrounded by greenery, with app icons visible on the screen.

Next month my pride and joy will be backed out the garage for a pre season clean and service. That’s tends to be a full weekend process. Oil change, air filter clean, fluids and tyres and brakes checked. Once all the dirty stuff has been done, I then remove the old wax, apply base sealer, coloured base wax (blue), first layer with a top quality wax which is allowed to cure for twenty four hours. The final top wax allowed to cure for a further two hours then buffed to a shine. Glass polished, seats, carpets and not forgetting the headliner all given an interior detail. The trunk are is emptied out, as more often than not the odd bit of grass creeps in when putting my chair away. Chrome is polished all over the car. After the service, the engine bay is cleaned out and the engine given a degrease and wipe down. While the car is draining the oil and the filter changed, it’s an ideal time to clean the oil pan, gearbox pan which is chrome, and the suspension a clean. I exhausts me just thinking about it, but it’s worth the effort.

With the current state of affairs around the world fuel has gone up stupid amounts here in the UK. So it will be painful to fill up with the premium fuel, my car only seems to like Shell V-Power, anything else and the car runs rough.

But, it’s all about the smiles per gallon, not the miles!

Share my Content

Do You Believe In Hype?

Over the winter there isn’t much to update on my blogsite, there are no car shows, the Mustang is winterised and sits the garage all tucked up ready for the spring. Although I do have a little project to do before the next car show, which I will post soon. I like to keep an eye on the detailing world and follow a number of forums on Instagram, WordPress and YouTube to see what the latest developments are. Regular followers will know that I review a lot of detailing products which are all purchased with my own money and not influenced by being sponsored or freebies. I’m not a fanboy of any one product, I mix and match products to get the best results I want from the multitude of manufacturers. My reviews are from an independent point of view where I write the reviews how I would like to read them, rating, ease of use and big question – would I buy them again? Here is the menu I use to review many various products. Clicking on each section will open a page to the products and clicking on the image will take you to that review. There have been a few conversations with the WordPress support to try and sort it out. Apparently I have to do it this way, as my blog ‘Theme’ won’t allow massive menus sadly. On the other hand, it does force me to keep things neat and tidy.

Towards the end of last year and the beginning of this year there has been a bit of a push on Social Media from a company called Hydro with their new V2 Spray Bottles and bundled products. I decided to join in the hype and buy the ‘Full Spray Bundle’ which consists of two bottles and two products at a special new years sale bargain price of £55 instead of the usual £79. That’s still a lot of money for something I hadn’t used or a company I hadn’t heard of before.

I ordered the bundle in the first week of January and they arrived promptly a few days later and nicely packaged. With the bad weather I hadn’t had a chance to use them until today. Although it was cold, I braved the chill. I found out that my trainer had developed a leak it which allowed the cold water to seep in and slowly freeze my toes, one at a time as the leather got progressively soaked. I sucked it up and got on with cleaning our cars as I wouldn’t be long. By the time I had finished and came in for a hard earned rest before writing this, I could have sworn I was on the way to getting trench foot!

Anyway, the cars needed a clean a few weeks ago, but I waited for them to get proper grubby, before trying my nice new bottles and products out on a real life scenario.

The Hydro videos showed us that using ‘Pre’ and then going over the top with ‘Snow’ while using their V2 Spray Bottles is a game changer, obviously I was excited. Well, excited as car detailers get.

The bottles are two litres each with interchangeable nozzles for a spray (Snow) or a more direct application (Pre) if you wanted to use the same bottle of only had one. I set mine up one for each of the products, the red nozzles for snow foam and the silver for the pre wash.

The pre wash started fine and the spray was good on both cars. The ‘Pre’ is to soften the worst and lift the dirt. Similar to other Citrus pre wash products.

It was left to dwell for a few minutes, which was just enough time to mix up the dilution ratio for the ‘Snow’ foam in the other bottle which is used to drag the dirt down off of the paint. I pumped up the bottle along with my expectations at the same time.

By the time I walked to the car and pressed the trigger there was nothing. OK, so I hadn’t tightened up the seals properly. I checked and they were all good, I pumped up again to pressure and started spraying. Below left was the start of the spray, and on the right literally a second or so later of spraying, a damp dribble.

I had to pump again and this time I could hear a hissing from the trigger, the bottle is faulty. I could have decanted the product and used the other bottle, but I couldn’t be bothered as my right foot was getting cold and I wanted to get this over and done with as quick as possible. After all, a couple of sprays and jet wash then I could get back in the warm.

To get around the dribbling nozzle, I was walking around the car holding the trigger down to get a reasonable spray, while the other hand was going rapid on the plunger to keep up some sort of pressure. From a distance looking a some bloke’s arm pumping up and down while walking around a car could have looked very odd. Luckily there was only one lady walking her dog spotted me with a jolly ‘Morning’, I turned round to reciprocate the greeting, making sure that I showed my actions were pumping the top of a pressure bottle and nothing else.

I left the snow foam applications on each car to dwell for a few minutes again while I got the jet wash ready. On the Hydro sales video, a jet washing after the Pre and Snow products left the car sparkly clean, he even swiped the paint with his finger which showed no dirt. I jetted my cars to remove every last little bit of debris just like in the videos. Yep, while wet, all looked good.

I had seen a good tip on another video, somebody get a cotton wool pad and gently wiped the surface of their car to see how clean it was. I did the same with both cars too, this wasn’t looking good.

When I allowed the cars to dry out there wasn’t much difference, but there was some improvement.

The cotton pads tell the story that I was now going to have to wash the cars properly with a couple of buckets and some of my lovely PH neutral car bubble bath. My hands were now cold, my trench foot was properly numb and the air was turning blue as my hands turned from a rosy pink to a pale and slightly blue tone of colour. After the washing and drying was completed, I tidied up put everything away. I was cold, I now had the hump that I had spent my money on some products that didn’t live up to the hype. I came inside changed out of my damp clothes and started to research some more. The instructions on the product said 4:1 for the Pre and 6:1 for the Snow on the bottles, I had followed the instructions carefully. However, different write ups and reviews say different amounts of dilutions. Perhaps I need to reduce the dilution to a stronger mix and try again another day to give the product the benefit of the doubt on a nicer day. My day wasn’t good as a supposedly fifteen minute car wash turned into a couple of hours. On top of that, I now had a spray bottle that was faulty and not even good enough to spray indoor plants. I have emailed the company to see what they have to say, which is the first time I have ever complained to a company about their detailing products.

I have written a full review of the Hydro V2 Spray Bottle here and I will review their pre contact wash products properly shortly.

So my point is; in a moment of weakness, I fell for the Hydro hype and regretted it. Perhaps the products are better in my jet wash bottles, I shall give it a go. I’m normally quite sceptical over these super products that make claims to be the next best thing on the market. Hopefully my open wallet surgery for the bottles will make you think twice and research more before leaping into the unknown, as the the old saying goes; ‘if it’s to good to be true, it probably is’!

Share my Content

Classics At Glemham 2024

As I write this post I didn’t realise that this going to be my last show of the year. There were a couple of others that I was scheduled to go to after this one, but the weather was predicted to be raining, as my car doesn’t get wet (if I can help it), I didn’t attend sadly. The weather app was correct and the rains did arrive on those days, shame as this year was a really good year for lots of shows. Glemham Hall, or ‘Classics at Glemham’ as its called, is another well supported car show with a huge variety of cars. Many of which are not that old, so I didn’t take to many of those, just the cars that grabbed my attention.

The weather was looking a bit grey to start with, and a few spots of fine rain. I stood in the garage door way to asses the situation, do I or don’t I? the other side of the village I could see clearer skies and the direction I would have to travel looked better. The car was loaded up, I got in and backed out promising myself that if it rained on the way, I would turn back. I had a thirty one mile drive across country, or stick to the main roads for a forty four mile journey. The backroads aren’t bad, but they can be busy if you get stuck behind some farm equipment with nowhere to really overtake. The main roads were quiet and not much traffic. There was a few spits of rain on the screen, but nothing more than that and the roads remained dry.

The sat nave was being a bit of pain and needed resetting a could of times, but luckily the roads were fairly straight forward. There wasn’t much of a queue and drove in fairly slowly to the field. The first thing to cross my mind was that they could of cut the grass. The cars were arranged by year and club stands. Parking up was regimented and left a little bit of room to the car next to me. The sun was now starting to shine as I grabbed some refreshments, and opened the hood.

I spent a few minutes with the car before taking to the rows of cars for a few pictures. The plan of action was to work counter clockwise and end up back at the car. The far end of the field I spotted a few friends and had a quick chat with them.

The Lotus stand was interesting with a few different engines on stands to have a good look at.

The paint job on this E-Type was just spectacular, the photos don’t do it justice. On the inside it wasn’t as pristine, but still a nice place to be.

I don’t know if I’m being a car snob or not, but why put a Chevy in a Ford Cobra kit car? I appreciate it will go very well, but…..

This Corvette got my vote for best car, it was just immaculate.

I have said in the past this Countach was my poster car (in white) as a teenager, it’s not often you see one opened up all over like this. I actually got to see the trunk which was just about big enough for a book of matches, with that terrible lack of luggage space in mind, I still want one!!!

Eventually I got back to the car for a well earned rest and refreshments.

I think that the threat of rain on the day kept a few people away, it nearly kept me away. That could well be the main reason that it wasn’t as busy as other years. Still a great show with lots to see.

I left a little early to miss the rush, as it’s always a bit of a nightmare to get out from here with the narrow roads. The trip home was relaxing and enjoyable taking the long way round again. Well, there was one teenager in a Vauxhall Corsa, windows down, an aftermarket loud exhaust the size of my filler cap, over took me coming of a round about onto a dual carriageway. He was making loads of noise and not getting very far, all show and no go! I’m not sure what came over me when I decided to give mine some gas and pull up along side him with a rumbling V8. He glanced over and dropped a gear (I think), to try and pull away, he didn’t. I just laughed and let him go with a point proven; a fifty eight year old car still kept up with that hunk of junk.

Once I got home the car got a quick wipe over to get the field dust of the car before I put it back in the garage and covered it up.

That’s it, car show season 2024 is over me and my Mustang and a bit gutted to say the least. I have made new friends, meet old friends and been to new venues. I shall look forward to meeting more friends next year.

Don’t worry, (not that you were), as there will be more updates on my little ol’ blog. There will be a special post for something amazing in a couple of weeks time. There will be more car detailing reviews with a requested review and things that I wanted to try. A couple of little things I want to do on the car which I will post about when I get round to them over the winter and the weather is kind, there’s no rush at this time of year.

Like all classic cars – they are never finished!

Share my Content

Truth Or Myth?

I was told about a ‘scratch hack’ many years ago that removes light scratches from car paintwork, within seconds and cost virtually nothing. Sounds to good to be true right? I’m talking about the trade (not so) secret of the commonly used product WD40. I often wondered if it was true but never had a reason to find out. If I had a problem with paint, I would correct and protect it properly.

A little about WD40 first.

I was first developed around the early 1950s by Rocket Chemicals based in California who later changed their name on the basis of their product. The name WD40 stands for Water Displacement 40(th formula). The actual formula is a trade secret and only been held in secure vault in San Diego California since 2018. The product has not been patented to this day, to do so the ingredients would have to be disclosed. So if you want to copy it you could, if you try and reverse engineered like many others have and call it a different name.

The actual product hasn’t been changed for many, many years. The product was initially developed for a company to protect the outer skins of a super delicate skin of a ballistic missile from rust and corrosion. It later went on to find a host of household uses such as lubrication, protection and cleaning when it became commercially available in the very late 1950s. I won’t go into that side of it, you only have to look at YouTube or TikTok for various household hacks, from removing sticky labels, worktops, hinges, freeing up bolts etc.

I just want to look at this product from a car detailing point of view. It can be sprayed under the car to freshen things up, stop squeaks, apply a coating prior to winter to stop door rubbers sticking, short term storage or just polish up a bit. There are other products out there can do these dedicated tasks better than WD40, but not all of them together like this versatile ‘Jack of all trades’ product can.

Now of course there will be pros and cons for this ‘hack’;

Pros

  • Cheap, cost of a cup of coffee
  • Quick to use
  • Instant results
  • Looks OK
  • Disguises light scratches
  • Forms a protection barrier
  • Can prevent rusting
  • Long shelf life

Cons

  • Temporary fix
  • Only light scratches disguised
  • Body shops hate it
  • Often used to make cars look better than they actually are
  • Can be messy
  • Oil based
  • It can mess detailing pads up

The fact is that if you are spraying WD40 on anything, you are spraying an oil based type of product. Like I said in the cons, it’s only a quick fix and the old scenario of the car lot salesman showing you a gleaming car gives this hack a bad name.

The opportunity I had to try this hack out was that I had to remove a couple or stuck on hard plastic sill protectors on a car. Once they were removed it had left a couple of light scratches on the paint, even with my gentle panel removal tools. They are difficult to see but they are there.

So the tip so simple; spray a little on the paint and wipe over. Nothing could be easier, you don’t even have to rub it in just spread it about a bit.

The result is a miraculous cover up so the exposed paint could be seen again without the scratches.

So, does it work then? Yes – sort of

On the deeper scratches it improves it, but it doesn’t wipe them out. On lighter scratches does.

How? It’s all down the way light is reflected from the paint. The oil settles into the scratch and makes the light ray dispersion more uniform thus it disguises the scratch or swirl. This is a similar principle to car paint glaze which is a more durable option which needs a wax to protect it. I explain this paint defect principle in much more detail here. or cut and past this to your browser: htts://onemanandhismustang.com/difference-between-waxing-polishing-and-your-paint-job/

The general rule of thumb is if you can feel the scratch with your finger nail, you have a problem. If you can’t feel the scratch then it can be buffed, glazed or hidden in one way or another.

As the WD40 is oil it will eventually disappear due to the elements if on an exposed area. If the product is rained on a lot, it will need regular applications. So, if you want to mask or ‘hide’ a light paint surface imperfection, then you could use this product on a temporary basis. If you are going to buy a car, gently feel the paint to see if there is a oily film to the surface.

Another down side is that dust can settle in the WD40 spray and stick to it, so wiping it away could introduce more problems. The reason body shops don’t like it is the fact it’s oil based and once on your hands can be transferred all over the workshop. To clean it up properly in order to spray paint anything properly, this makes it all the more time consuming.

I tend to carry a small ‘sample’ sized can for a couple of reasons;

If you get a stone chip and can’t get to fix it for a while, spray the area with the WD40 and it will form a temporary barrier until you can fully remove it later to fix the chip.

If you are suffering from damp in your distributor cap (back to old school cars now) or HT leads etc, you can spray this to disperse the water. After all that was it’s sole purpose for development.

Did you know?

To get those super smoky burnouts in Hollywood films easily, they used an application of WD40 on the tyres! Not that you should ever do that of course, as it could be frowned upon by the local law enforcement agencies. 😉

Share my Content

Hands On Or Off?

Last weekend I had the chance to use my new bit of detailing equipment. The particular item isn’t my first venture into this area of car detailing. I’m talking non-touch drying or air blow drying.

There are various methods to dry a car after a good wash and shampoo pampering;

Chamois leather, old school method.

Pros:

  • Great for large surfaces
  • Very efficient at absorbing water
  • Only one is required to dry your entire vehicle.

Cons:

  • Requires water to use, not ideal for waterless eco-friendly sprays
  • Potential to scratch vehicle if used incorrectly
  • Dries hard, not as convenient to store

Synthetic Chamois Leather, modern take on old school

Pros:

  • Great for large surfaces and small areas
  • Very efficient at absorbing water
  • Softer than traditional chamois
  • Easier to store

Cons:

  • Needs water to work, not for waterless washing
  • Potential to scratch vehicle if used incorrectly
  • Needs regular rinsing and wringing to use

Micro Fibre Towel, modern technology

Pros:

  • Great for large surfaces and small areas
  • Super efficient at absorbing water
  • Comes in many various sizes
  • Varying levels of plushness
  • No need for water, ideal for waterless cleaning
  • Can be used inside and out

Cons:

  • Cheap cloths can leave small fibres
  • Can leave streaks
  • Easy to store

Air Drying, dedicated air stream (hence non touch)

Pros:

  • Great for large surfaces, gaps and small areas
  • Very efficient at drying
  • No water spots
  • Non Touch drying

Cons:

  • Needs electric power to work
  • Can blow lose debris on the car if used incorrectly
  • Bulky to store
  • Expensive
  • Can be noisy

My new equipment is the Carbon Collective Air Force 1 Car Dryer Limited Edition (but only the colour) where I just completed a full in depth review. Carbon Collective are better known for their quality coatings and treatment products more than their accessories. This car drying unit of theirs is a cylinder design which is very similar principle to a follow along vacuum cleaner, but it blows air instead of sucking up dirt. The point of this unit is blow a filtered jet of air over the area to be dried. Not just a car, but anything that needs drying like; motorbike, cycle, household use, boat etc.

The forced air stream will dry the area without the need to touch the paint so it won’t cause any marks or swirls on the paint from the drying process itself, unlike a chamois or microfibre drying towel which could introduce swirls or marring. Not wanting to repeating myself too much (from the review here), there is a 5m mains cable, a generous reinforced 5m hose, adjustable air flow dial and an optional fan heated function. The base unit has lockable casters in each corner to stop or allow movement as required.

The nozzles are silicon tipped so any accidental contact with the surface being dried will not mark it. Each of the fittings has a bayonet style locking feature with a sealing ring to stop any unwanted air direction. With a maximum of seven cubic meters per minute being forced out through a small nozzle opening it needs to be securely held in place.

Perhaps the most important thing about this product is the filtration. Not one filter, but two, even though the accompanying book of words states one filter. If air is being sucked into the unit that low to the ground, then accelerated out with 900g of force, then any debris moved at that speed has the potential to be literally fired at the paint work. Think of hail stones, but on a much smaller scale. The removable filters are washable or cleaned with an air line.

Am I converted to this ‘non touch’ method? Well yes. Apart from the cost of running a 2800w motor and potentially a 600w heating element on top of that at the same time. The cost of running this for one hour (as this is published) will be approximately one British Pound per hour. Saying that when being caught out at a car show when it rains then the microfibre towel is still used of course.

I have lost count of the number of times I have gone to wax a car and found a water drip or a water spot left on the paint surface, it’s rather annoying at the best of times. This process does away with that as the air gets into the gaps and hidden areas where the water can sit. The down side is getting the equipment out, setting it up and putting it away again. Compared to taking a drying towel out the storage draws wipe over the car and put the towel in the washing basket when finished, there is more to it. But, the air drying is more thorough, providing you make it more thorough.

You will need to be careful with the air stream at the lower parts of the car not to blow loose debris around and potentially back on the car. Turning down the air force can be a real help under the wheel arches or on wheels etc. Once you master the technique is great. Probably not for the average weekend washer of the daily family car. But for a detailer this is a great addition to the detailing inventory. Not the cheapest of items, but I will get good use out of it.

I tried to film the process with hand on the phone and the other drying in the left hand video. The right hand video is just to show the force of the air from the wide opening nozzle blowing water around on the floor.

I do have another blower which is hand held MetroVac Air Force Blaster Sidekick SK1.

This is a 950w single hand held unit which has advantages and some disadvantages over the Air Force 1. I will get round to reviewing this bit of equipment very soon.

Nearly back to starting car shows again, and looking forward to that and getting some fresh air, well as much fresh air as you could get around classic car fumes! 😉

Share my Content

More Reviews Coming

A few months ago I was approached by Jim Jeffrey from a car detailing website called World Of Shine. We got to talking about a topic that was a confusing international problem. We had some good chats and he liked my chart that I had put together in December 2019 and posted on my pages here. This was my big article explaining the actions of various dual action pads and why you need them. The DA colour comparison chart comprises of the big name manufacturers on the DA pad market. Jim asked if he could share my chart with his subscribers to which I agreed. He wrote that article called “pick A Color – Any Color” which was posted here august 7th 2022, where he referenced my chart.

To download my original PDF format of the DA Comparison Chart, click here.

Thanks to my friend over the Pond Jim for giving me a shout out.


Now that the car show season (in the UK) has now all but finished, the next few posts will be focusing on little upgrades, tweaks and a few more reviews. With that in mind, a good friend of mine Craig had just bought a new car for himself, a MK 7 Golf GTI (2.0ltr turbo in fact). He brought the car over for me to have a look at and an excuse for take it for a drive. Once he was here it was a good reason for me to have a little drive (OK thrash) around the relatively deserted roads of my village.

The car looked a bit grubby when we had finished, so we had an impromptu detail session. We got out the snow foam, Absolute Rinseless Wash, spray wax and final quick detailer.

I will be reviewing the new products we used very soon which comprised of a rather expensive sponge, spray bottle and P&S Absolute Rinseless Wash which has been making some good noises around the detailing circuits.

The finished result was pretty good for a day’s work. To do it properly we should have clayed the car first, clean slate removal of old products and layered up the waxes and protection. We didn’t have time for the full process, so we just made sure it looked clean on the way home.

No sooner had he parked up at home, it started to light rain on our hard work, but the beading was good to look at.

The only down side? Craig ate most of the donuts! 😂

Share my Content

Americana (last) Car Show of 2021.

This show was held at Stonham Barns organised by the Knuckle Busters Car Club on the 19/9/2021. This particular car show was for American cars only and is usually well supported and this time around that was no exception. I arrived early and I was asked if I wanted to attend in the centre ring. Why not? Early bird gets the worm and all that. I parked up next to some stunning cars which made my car look like a Matchbox or Dinky toy!

I parked next to a massive Buick that could only be described as a ‘land barge’, such a nice car it was too. Me and the owner sat in our chairs and chatted most of the afternoon.

I decided to have a wonder round and take the pictures before the public came in.

I thought I would batch the Mustangs together here, but there wasn’t as many as I thought there would have been.

A car I had seen a couple of shows earlier, but I couldn’t get that close to before. Another iconic car from Ford – the Torino. I wanted that car so bad as a little boy. My nan even knitted me a Starsky jumper. Thinking about it; I still want one!

This Corvette was beautiful.

The ones next to it weren’t to shabby either.

Back to the other cars now and in no particular order.

Truck Time. I was speaking to the guy who owned the Viper powered truck, he said it scared him on two levels; one the petrol it used and the other was that the truck wanted to kill him!

We have to pause and and look at what Pontiac did when they created this gorgeous and much coveted car.

And my no means least, I was also strangely drawn to the taxi as well.

Throughout the day there was music and a really good live band with plenty of 50’s rock & roll with a little dancing as well.

The day was dry and warmish and didn’t rain for a change. A great day and so much American iron I wanted to drive home. But, I could only drive one home and that was my little lady.

So that’s it, my last car show of the season and the drive home was the scenic route to make it last that bit longer. I was sad the shows were over. There are some New Years day runs, or Boxing day runs but I don’t attend them as the weather is usually bad or there is salt on the road.

When I got home the car was wiped over with a quick detailer that is carnauba infused. The chrome wheels were waxed but not buffed off, the wheels also got a squirt of Gibbs Brand into the seams to protect over the winter. The tyres given a heavy coating of tyre treatment before being put in the garage. Even though my car’s garage has a radiator to keep the frost out and a dehumidifier as well that runs day and night; the car still needs protection. I intend to get the car out over the next couple of months to give the car a polish and proper wax ready for next years shows, providing I have two clear days of dry weather to do it. The wax I use is recommended to leave on and cure as long as possible. Which in my case is overnight. The next day I will buff and shine up.

I will still be doing updates and I aim for some car detailing product reviews, so keep an eye out.

For Sale:

I have been selling a few of these ‘T Park Lock’ handles and the feedback has been good. I even sold out my first batch and now the second has arrived. I’m even throwing in a free little key ring as well now while the stock lasts. Click here to go to the For Sale page to buy one. Press to lock system and simple to fit with no modifications needed at all to your car.

It was a good year for 2021 car shows, let’s hope there is more of the same for next year. But, this is the UK after all and it rains – a lot! So I’m not gonna hold out to much hope that they will all be dry and sunny. We can live in hope though.

Share my Content

It’s Snowing All Year Round

I have been asked a few times about snow foam when I have been to car shows. I do use it now, depending on the product and how you use it can make a nice difference or leave you bitterly disappointed. When i started out with snow foam I just didn’t get it, what was I doing wrong? Combinations of equipment and product trials I eventually managed to get results worth talking about. I decided to create a little article of my own which I hope will help and guide you through the pitfalls and hype between products, or why we even consider using it. I mean it wasn’t around fifteen years or so ago so do we need it and why?

Snow foam looks amazing from a distance and often gets a few looks when you use it. Before this step was introduced, you used to get as much car shampoo bubbles on the paint to wash it right? This cleaning process has now been separated out into two steps. The snow foam and the shampoo. We will only be dealing with the shampoo step here.

Put very simply snow foam step is there to reduce the likelihood of damage to the paint during the cleaning process, a “Pre Wash” non touch step. This snow foam process is not necessarily restricted to car detailers or professionals, but also the weekend washer.

When you wash a dirty car with a sponge or a single bucket wash, the chances are that you could introduce paint damage by microscopic particles damaging the surface of your paint as they cling to your sponge or microfibre wash mitt. The deeper the damage, the worse the paint will look. I have explained these principles in depth on another article here and how to fix them. The basics are highlighted in the picture below to show the varying degrees of damage.

Common Terminology:

  • Pre-wash: A treatment that helps to make contact washing your car easier and more effective. 
  • Non Touch: Cleaning without any physical contact with the paint.
  • Contact Wash: Any part of the washing process that touches your paint.
  • Contact time: How long your cleaning solution is in contact with the dirt on your car.
  • Dwell Time: How long the product needs to be left in order to work its magic.
  • Foam Consistency: Thick snow foam clings to cars, so it has a high contact time. Watery snow foam will dribble off your car, less contact time and won’t be as effective. 
  • Cling: The ability of the product to stick to the panels without falling off.
  • Dilution: Reduction of concentrate to make the correct mixture operate effectively without waste.
  • Canister: The container where the mixture is held.
  • Snow Foam lance: A special nozzle for your pressure washer that turns the snow foam liquid into a thick foam. Also referred to as Snow Cannon, Snow Gun etc.
  • Nozzle: The end of the lance/cannon/gun which controls the amount of product and how it applies the foam to the car.
  • pH neutral: A substance which is neither acidic nor alkaline but chemically neutral.
  • Water Spots: The marks left behind from the hard water drying out on the paint work.

We know that (contact) washing a dirty car will make it look better, but done wrong that short term cleanliness will be taken over by swirls, marring scratches etc. So before you even think about putting a wash mitt or similar cleaning item, the less debris that there is on the car, the better.

This is where ‘Snow Foam’ comes in. The snow foam is designed to cling to the paintwork, which will in turn moisten and loosen up any of the surface dirt. When you rinse and wash off the snow foam it should take the dirt and grime with it. This in theory will leave you with a much cleaner surface to clean with significantly reduced chances of damage to your car’s paint job.

The ideal scenario is a foam that will dwell on the paint for a while, then roll off the paint prior to rinsing taking the dirt with it.

How does a Snow Cannon work?

In a nut shell; the water pressure from the jet washer creates a syphon that lifts the snow foam mixture from the canister via a pipe into the pressurised water stream. The wire mesh inside the the cannon body agitates the mixture up into foam. More water the less dense the foam and will lasts longer. The nozzle is the key as to how the foam is sprayed onto the car, anything from a jet spray to a wide angle fan. These cannons can vary from £15 to £100 depending on style, fitting(s) and quality of build.

Misconceptions:

+ The thicker the foam the better.

To a degree this true, but what is the point of a great foam if it sticks to the car, but doesn’t clean it? If the snow foam is more like a bubbly water and bounces straight of the paint then again it has done no good. There is a happy medium based on the car’s requirements and is explained a little further down.

+ PH Neutral is a must.

If you start researching snow foams, at some point the chemical composition will show up. So all you really need to know is the difference between pH neutral and non-pH neutral (or alkaline) snow foams.

The pH obsession has arisen due to information propagated by self-professed experts on the internet. In actual fact, most damage to car finishes is caused by tiny particles stuck onto a road film or dirt that cause abrasive damage when being removed by washing with mitt or sponge. Thus inducing the swirls, hologram, scratching and paint wear depending on the severity of damage to the paint.

Even some manufacturers of ‘ceramics’, last stage products and waxes insist on a pH7 (neutral) shampoo or cleaners.

This intrigued me, so after a quick bit of Google research it showed me that the normal range for rain water is pH 5-6. (Look it up if you don’t believe me! ‘pH balance of rain water’.) This is one of the main reasons that your car wax/sealants tend to loose their effectiveness over time and need reapplication.

+ pH Differences

A pH neutral snow foam is generally gentler on your car’s paintwork, so it’s worth getting if your car is valuable or needs to look its best for a special occasion. This comes at a cost as heavy debris is still there.

A normal or regular alkaline snow foam isn’t quite as good for your paintwork, but it is more effective at removing dirt. However, you can easily mitigate some of the effects on your paintwork by giving your car a proper wash and wax, though, which will put a new layer of protective wax onto your car. If you have the protection on the car, the alkaline snow foam won’t remove the wax protection or touch the paint anyway. It’s certainly not a caustic mixture for your car.

The damage from a heavy alkaline product is; caustic soda (sodium hydroxide). This can dull and leave paint finishes matt and lifeless when used on a long-term basis.

Perhaps you may need two types of snow foam, regular maintenance wash for light soil using pH neutral product, and a stronger alkaline for the heavier soiling when needed.

+ You need a jet wash or pressure washer

Nope. The jet wash is not the be all and end all of the snow application to the car. Some snow foams are quite happy to be applied by a hand held pressure pumped bottle. As long as the foam product is the correct dilution, is applied to the paint and allowed to dwell before its removal – then its job is done.

+ All Snow Foam lances are the same

Nope. They come in all shapes and sizes. Some brass body, some made of cheaper metals or plastic. You get what you pay for.

Honestly, I had a Karcher cannon that could barely muster a lather no matter the product. The Autbrite snow cannon with the same mixture was an incredible difference. My only advise here is to make your choice wisely.

+ You must use Snow Foam

Well sort of. You could use some good quality shampoos at a push. But their pre-wash cleaning ability is not as good as the snow foams. Most car shampoos tend to have additives to allow slick washing and glide the cleaning applicator (mitt of sponge) over the paint and a level of protection. It’s best to get a product designed as a snow foam.

Types of Snow Foam:

Apart from the pH values as we have discussed above most snow foams are pH neutral. The main differences are the cost per litre when mixing for the dilution ratio. The cling properties which varies a great deal, their proclaimed cleaning properties, colour and the scent. Some of these scents are sublime; water melon, lemon, citrus fruits, strawberries, cherry, beer etc. Or nothing if just want a no gimmick product that does the job. I have used a few in my time:

Some have been worse than useless, some have been better than others and one is my now go to product.

Application:

Mix your snow foam as per the manufacturers recommendations. This is usually a ratio of around 1:10 or 1:20 etc. some are even 1:100.

Next attach the snow lance to the jet wash, adjust the mixtures and apply (if needed). This will take a little tweaking for the ideal balance between dilution ratio, the water pressure, size of the nozzle and the product you are using.

Different products on the same foam cannon will be very different and need further adjusting to suit.

Most of the products advise not to allow the product to dry out. The product can be affected by the Sun, warm paint, wind rain etc. Most manufacturers go on to say apply ‘in the shade’ and ‘apply to cool paint’ etc in order to mitigate the drying out process of the product.

Always start from the bottom and work up. The huge majority of debris and soiling is on the bottom half of the car. As you get to the top less show foam is needed.

Types of application.

A snow foam application will solidify into nothing eventually and slide off the car. If the snow is to thick it will fall of the car (no clinging properties) in clumps before it has had a chance to work. So, thicker is not always better. But it does look good below.

After a few minutes of dwell time it will look less impressive.

Some of the poorer week applications look half dead before they are applied and very watery. These products tend to run off and dry out very quickly.

If the product starts to dry out, there is no harm in reapplying more.

Some of the better quality products have ‘wetting’ agents in them to aid in keeping the product wet on the paint to avoid it drying out. This product application is a little thin now, but was taken after a few minutes. Although below looks less, it has in fact been doing it’s job well and was staying like this without additional applications.

Once the dwell time has elapsed, rinse of with a medium force jet wash. You can then wash the car as normal to avoid any water spots.

Results:

The results vary considerably by product. I have some before and after pics to show what it was before the application and what was there after rinsing.

Here is a very well known market leader product that has a very good cling and thick foam. But, it left a film of dirt and didn’t wash off the dirt.

Another very well known brand but is a cheaper product. Thin application, not very good cling and failed to wash of dirt. the dirt was still on their without being moistened.

A Premium brand, clings well, but failed to wash the dirt off completely. The dirt was moistened and was easier wipe off with a finger. So it did help.

This is well know brand to those in the detailing world. The foaming qualities not great and are to be desired. But when this runs of the paint it takes the dirt with it.

This is the result you want. The dirt and film is gone ready for a proper contact wash. It even cleaned some brake dust off!

Summary:

Don’t believe all the hype. The snow foam step is not a magical ‘foam the the car and it’s clean’ process. This foam step is to pre wash the car and should be treated as such. You need to manage your own snow foam expectations depending on the product. I have done a number of snow foam reviews on this website now.

I have been sceptical of the snow foam step even critical to a point. I saw it as the latest fad with no benefit to be honest. I have learned the hard way by working up the ladder. I tried the weaker brands which put a bit of foam on the car and emptied my wallet for no reason. I tried the big name brands which gave a great clinging foam but not much else. I tried premium brands which gave a good enough foam and decent moistening to the dirt. I tried the in the know ‘detailers’ brands. These later ‘detailer’ brands were by far the best performing of all the brands I have used so far.

Some brands are so much better than others to the point I haven’t even reviewed some of them, I used them up as a patio cleaner. After application of some brands, the dirt was not loosened and was still difficult to remove with a finger even after rinsing, like you shouldn’t do by the way. If the dirt is difficult to remove after the snow foam step then you are potentially going to washing a little harder to get the debris off the paint, in turn potentially introducing damage that you are trying to avoid in the first place.

If you are careful and use top quality shampoos with a two bucket method, then you can do away with this step as we have done for decades way before all this snow foam malarkey.

This snow foam step is trial and error which works for you. I have tried at least six products before I found something came close to something i could review or even partially liked. You may need to do the same, or look out for fellow detailer’s product reviews.

Share my Content

A Big Milestone….

Eight and a half years ago, way back on October 28th 2012 I wrote my first post on my little ol’ blog. I had nothing planned other than to share with a few friends what I was getting up to and how I was getting along with my Mustang restoration. Ultimately I could look back in a few years time and take a trip down memory lane with the photos I had taken a certain points of the restoration.

Delivery of my project car 17th September 2011, before it went to Mustang Maniac where I had professional help & guidance on my restoration over the years. Those guys have become some of my best mates of mine as a result.

When I attend car shows or via my blog and emails etc. I often get asked how I clean and detail my cars;

Some of the Car Shows and photo opportunities;

I get asked how I fitted things, how I upgraded this or that, I even get asked for advice on their own restoration projects.

That got me to thinking about adding extra sections like the tools (a selection of them here), that I used on project and since use, considering that I’m just a weekend warrior with a spanner.

Products that I used to keep our daily cars clean and the Mustang fully detailed.

My merchandise I bought over the years or have been given since I started my journey with the Mustang.

I even get requests to review items, all of which I buy if I think I could use them myself. As a result of all these things, my blog has evolved into an entity of it’s own.

Fast forward a number of years to 2021 where I my little ol’ blog has reached a massive milestone. This is not intended as some bragging rights by the way, but more like myself being proud of the result. Somebody within the USA this morning 15th May 2021 made my day:

My blog has just passed 1,000,000 hits!

I am absolutely amazed to think this could ever happen, I remember getting excited about getting ten hits in one day!

I value every single one of you that has followed me or just pops in for a quick read, like or even the odd comment. I would like to say a massive “Thank You” from the very bottom of my heart.

I don’t actually get anything from my blog/website on WordPress, other than some add money that goes straight to the hosting and my domain fees. It’s sort of self sufficient in a way. If anything I’m out of pocket, but reading the comments and seeing the views more than make up for it. Hopefully I can help somebody, somewhere with something.

My first follower was Debbie Nuessle (click here for her latest venture), from across the pond. We both started blogs within a few days of each other, both revolving around our love of American Muscle cars, especially Ford Mustangs of course. We keep in touch outside of the Blog circle and have become good friends.

I have a number of followers who ‘like’ the posts I put up after even after all these years, thank you all, it means a lot to me. I have such a range of followers; a very talented and well-known Soprano opera singer; Charlotte Hoather (click here for her blog), mechanics, engineers, oil rig mover, artists, photographers, builders, wildlife photographers, fellow classic car owners, writers, product manufacturers, shops, brands, a few younger bloggers, students, world travellers, petrol heads, gear heads, car clubs, writers, novelists, journalists, teachers, photojournalists, professional bloggers, social influencers, religious followers, the list just goes on. (There is even ‘ahem’ some adult orientated content following me!) The full list makes for some amazing reading.

Just in case anybody is interested in some of the more selective stats;

I have a total of 2,700 followers, of which 871 are on WordPress, 2,300 on social media, just over 2000 on Facebook, which is not my favourite of all the platforms I must admit.

I have been visited by 199 countries and the top ten countries in order are; USA, UK, Canada, Australia, Germany, China, France, Netherlands, Finland and New Zealand.

There are stunning islands that have visited me, Mauritius, Seychelles & Maldives. Some of those Islands are so small they wouldn’t be able to fit a Mustang on them! My bucket list is to spend a few days on these islands to chill and take in some sun.

The more obscure countries with a single visit are: Burkina Faso, Falkland Islands, Kosovo, Tonga, Northern Mariana Islands.

To date I have posted 340 blogs including this one over the eight and half years I have been posting on this blog.

These figures are quite low compared to some of you mega stars out, there with you super popular blogs I know that. But for me, like I said earlier, I’m honestly humbled and grateful to every single one of you who wants to look at a blog all about one man and his Mustang!

A huge “Thank You” to you all.

Here’s to the next one million!

Share my Content