Over the course of the winter my pride and joy is tucked up in the garage with the dehumidifier and temperature controlled garage, which is vitally important. To supplement the car’s cosy environment is the next most important thing, the trickle charge to the battery. Couple of reasons being it keeps the battery at an optimum level and prolongs the life of the battery. I use the CTEK mxs5 which has served me well for the last eight years 24/7 and I haven’t had any problems, until now. The wall mounted charger showed that all was good and the unit was on the maintenance cycle as expected when I popped into the garage to check up and have a day messing around in there.
A couple of months or so ago I went to the garage and noticed that the unit’s quick connection (which has a traffic light set of LEDs) was flashing red, this is a visual sign of low power in the car’s battery. I just put it down to a recent power cut during a storm which had messed up the maintenance charge process. I reset the charger and the process started up again, and I thought no more of it. I went back in a couple of weeks ago and all looked OK. Something told me to check the battery level, I got in the car turned the ignition on and the volt meter was showing just over 11 volts not the 12.5 volts that should have been available. Those that know these old cars are aware that there is an ‘Ammeter’ not a volt meter in the instrument cluster. I didn’t like the idea of a direct battery feed going to the dash, it didn’t tell you a great deal either as they either didn’t work or just in the middle of the gauge. Safety in mind I swapped out the Ammeter for a volt meter which I made on my own. (If you want to know how I swapped the stock Ammeter to a modern voltmeter that also still looks stock, click here.)
I tried to turn the car over which was rather slow, but eventually she fired up before what seemed like an eternity of ever slowing turn overs until I reckon the last but one revolution of the starter motor managed to fire the car into life.
I ran the car for a few minutes to get a little power charge into the battery while I finished up what I was doing in the garage. After shutting the car down and reconnecting the charger back up, I closed up the garage and wandered back into the house where I assumed the horizontal position on the sofa to start researching the issue. I found a forum where it seems there is a generic failure where these units show the maintenance cycle, but it’s not actually trickle charging the battery, so the battery runs low. I got into some heavy reading looking for the replacement, and to see if anything new was on the market since I bought that last one. I have previously given the CTEK unit 10 out of 10 and after (nearly) nine years it’s still a deserved score, and they still make them. With that in mind I was certain that I was going to do a like for like CTEK swap out, but another brand ‘NOCO’ caught my eye. I did the usual comparison, review readings and there was virtually nothing in it between the two manufacturers for the price and functions. So I ordered the NOCO for one reason only. I have also reviewed the NOCO Genius 5 here or cut and paste this link to read it:
“Thermal Comparison: the new integrated thermal sensor automatically monitors and adjusts the charging cycle based on fluctuations of ambient temperature, limiting the chance of under-charging or over-charging, providing a more accurate and fully charged battery. Avoids under-charging in cold weather down to -4F and avoids over-charging in hot weather up to 104F.”
My garage can get hot sometimes in the summer, so this ‘Thermal Comparison’ for me was the winning function, just pipping the CTEK. To replace the CTEX with the same model would have been literally five minutes, going to another supplier was something I knew would take a little bit of time to get it nice and neat under the hood, back to how I wanted it, out of sight out of mind.
The NOCO doesn’t look as fancy as the CTEK, but it’s function for me at the end of the day, I don’t have to look at it all the time, so it’s not really an issue or is it?
Once unpacked there is a rubbish bracket that clips to the NOCO and is held in place by a rather tacky looking velcro strap. You have to thread the strap under the unit into the bracket’s loop all of which is a bit cumbersome. Perhaps it’s a quick release, but it would have been nice to have a wall mount without the velcro. For £80 I would have wanted something a little nicer looking to be honest. When I walk into the garage and see it, it just bugs me. Surely it would have been cheaper for a slightly longer bit of plastic for the all mount, than to make and brand a bit of velcro.
The cable length under the hood wasn’t long enough, so I had to cut the wires and splice a longer cable in (same amp rating), so that I could route the cable where I wanted it to be out of sight but also easy access at the front of the car once in the garage. This supposedly half hour swap of charger took me about three hours by the time I took the car battery out, remade the cable, re-routed the cable, cleaned the area thoroughly, reinstalled the car battery and clamp, mounted the unit on the wall and cleaned up.
So far the new unit looks to be doing it’s thing as I would expect. However, I did notice that the maintenance cycle (slow green pulse LED) took a while to initiate as I suspect the charger was stabilising the battery from what it had been left with from the CTEK.
The one function I’m missing though is the LED lights on the CTEK connector. This was a simple traffic light idea for the status of the battery charge.
It’s not the end of the world of course, but a rather nice to have which I think NOCO should investigate for an option accessory purchase, I’m happy to test and review the item if you are reading this NOCO. I’m yet to decide on the final position of the new charger, so it’s not the neatest of fittings I have done. But for now it will serve a purpose until I can fully trust the new charger.
It wont be long now before the first car show is ready, so I will need to get the car out, fill it up with fuel and give it the de-winterising of the products I applied for protection. That usually takes me about a day all in. Hopefully I will be a little more regular with the posts again once the car shows start.
I have more reviews to add so look out for those too. I can’t wait to get my car out and go for a drive.
The first post of the new year and it regards a little project that kept me busy over the holidays which is detailed below. But first, over the last couple of weeks I am yet again having issues with Facebook – my Nemesis. I created a second business page which is a couple of years old now, as my original page was hacked. That page is still up, but I can’t access it because they have blocked ME from it. The replacement page has NOTHING on it that differs from the original, apart from the heading picture and email address. The one man and his mustang Facebook page is only there for an exposure on Social Media – that’s it.
I have challenged Facebook about their decision and I’m waiting to see what utter garbage they come back with.
If they decide to uphold their ‘decision’ then they can go and do one. I will remove myself from Facebook as an individual as well. When I actually think about it – what does the platform do for me? Honestly, nothing. I just shows me what other people are posting. I hardly get any referrals to this website as a result, so I don’t need to be on it. Besides, I’m not that interested in seeing what people are eating, where they just checked into or what they just liked by somebody else. It would be nice to keep it running, but I’m certainly not going to miss it.
Rant over and apologies, but Facebook really does wind me up.
Back to sensible stuff now, what I got up to wasn’t much so I decided to pad it out a little with some hopefully useful information.
The key to an engines performance is the air fuel mixture. To much fuel and the engine runs ‘rich’. Not enough fuel and the engine runs ‘lean’. There are various things that can cause these problems, so I will try to highlight the symptoms of each. There are many sensors on new cars that can become faulty all of which will give the same symptoms. I will focus on the classic car scenario of a carburettor, as you don’t need a degree in computer science to tune an engine with a laptop on these cars. Instead you need to understand the dark art of engine tuning with a carburettor, screw driver, a good ear and how the car feels when driving. Of the two scenarios a rich running engine better than a lean running engine.
A ‘Rich’ running engine.
Possible causes; a clogged air filter will not allow sufficient air to get through to the carb. this will result in poor engine performance and leaving extra unburnt fuel behind. As the air filter can become clogged over time, the subtle loss of power may not be noticeable at first. Mixture levels on the carburettor need adjusting. Quality of fuel not burning correctly. The carb jets becoming clogged due to debris in the fuel or maybe the choke not opening fully.
The symptoms of a rich engine:
Smell: One of the common symptoms of a rich engine is a strong smell of fuel as the unburn gas is left lingering in the exhaust pipe(s).
Poor engine performance:this could be a series of problems which could be lean vs rich spark plug, ineffective combustion chamber, or inappropriate air-fuel mixture. If the compression and spark plugs are fine, then the problem is surely an inadequate air-fuel mixture.
Engine rough idling: improper air-fuel mixture could be responsible for engine stalling and vibrations. Rough idling indicates the engine running rich.
Less mileage: if you keep getting less fuel mileage on your vehicle regularly, it shows your engine is running rich and burning a higher amount of fuel.
Fouled spark plugs: when your engine is running rich, there will be black carbon deposits on the lower edge of the spark plugs, leading to low engine performance. It is an indication of unburnt fuel in the exhaust pipe.
Dangers of a rich fuel mixture.
Running excessive fuel into the cylinders is ‘bore wash’. This is where the fuel washes the lubrication from the chambers. You will notice increase use of oil. This can cause excessive wear on the pistons and cylinder walls.
This is bore wash is more common where an oversized carb is pumping in two much fuel to burn efficiently. The calculation for the correct sized carburettor to be used is as follows:
The engine size is the displacement in cubic inches.
The max RPM is the maximum speed of the engine in revolutions per minute.
The efficiency is the volumetric efficiency of the motor. Most engines have a volumetric efficiency of about 85%, or .85. It’s common to see standard engine efficiency values of 70-80%. Race engines can be 95-110% efficient.
So for a good engine you can use this calculation for this example:
Heat: the engine will tend to run hotter as not much fuel in the chambers. An overheating engine can cause all sorts of problems.
Clogged Fuel filter: Your fuel filter handles all the dirty particles within the fuel. Over time, all the deposits and dirt start building up and preventing adequate fuel passage to the engine. This can be a real issue in classic cars and E10 fuel attacking parts of the fuel delivery system.
Inefficient fuel pump or clogged strainer: lean vs rich engine issues starts from the fuel pump. Not enough fuel is getting into the chambers to be burnt.
Leaking fuel lines: Obviously this cause the engine to run lean as the fuel pump, mechanical or electric can provide enough fuel. Highly dangerous as it could cause a fire that could result loss of vehicle or in the loss of lives.
Vacuum leak: One of the problems happens when unaccounted air enters the system, creating an unbalanced air-fuel mixture.
Trouble starting your car: Many factors can cause your engine not to start as a result of little or no fuel getting into the combustion chamber. That’s why one of the most common symptoms of a lean engine is hard starting.
Poor performance and low power out: If you manage to start your car, you will have low power output and poor performance. Less fuel in the chamber means poor detonation of the mixture which is unable to push the pistons down on the power stroke.
White or Clean spark plugs: when everything is working at the optimum operating level, things get dirty. If you pull out your spark plugs and notice it looks brand new or white, you probably have a problem. there should be an element of dirt on the spark plugs as they are burning a fuel.
Stalling Engine: One of the common symptoms of an engine running lean is keeping it running. In some cases, it’ll continuously cough and splutter until the engine stops. When you’re exporting more gas into the system by accelerating the car, it should keep running easily but with reduced power output.
Dangers of lean fuel mixture.
Heat: As I mentioned before the overheating can cause all sorts of issues like, fluid leaks, burning smells, unexpected engine sounds, cracked engine block, warped cylinder heads, blown head gasket, exhaust damage to name just a few.
Hard seizure: This is where the chambers and pistons have heated up more than the engine can cope with. The Pistons may typically grind against the cylinder walls if you fail to fix the cause. The connecting rod can bend, or the crankshaft arm can snap or bend. The effect is a catastrophic engine failure and will require you to either replace or rebuild the engine.
Soft seize: Similar to the hard seizure which causes a dry spot between the cylinder wall and piston and excessive wear. Even with a correct air-fuel mixture the cylinder and pistons will work fine, but the damages will still be there.
With this in mind I noticed that I was getting a little uneven idling, especially after a sudden stop, which I try and avoid at all costs. I have been noticing the air filter was dirty and decided that perhaps it was time for a new one. I has been on the car for a few years but only done six thousand odd miles, but it was time for new one regardless.
There are arguments that my style of air filter is a restriction to airflow. Many of the higher performance filters are the large round styles, often with a top opening as well. Having a clogged or dirty air filter will make fuel mixtures matters worse. I was speaking to Mustang Maniac and they said to try their ‘Tall’ filters made by S&B. The height is now 2 1/4″ compared to the 1 3/4″ that I previously had. These tall filters are just like the K&N brand which are reusable and washable filters. So the initial outlay is quite a bit more expensive, but in the long run it will be cheaper. Saying that you will need air filter cleaning kit which consists of a cleaner which is flushed out with water. Then once the air filter is fully dried, a spray of air filter oil which will give the filter its ‘redness’ back.
The ‘tall’ filter on the right side by side with the original doesn’t look a like a lot of difference, but the extra half an inch will increase air filters potential air intake.
The material of the S&B filter is a much better quality and again this improve the airflow through the filter itself. A double advantage of more air flow capacity and better air flow throughput. That in turn means a few more horses let out to play when I want them. I may need to slightly tweak the air fuel mixtures but i would need to run the car for a while to find out.
As this is a tall filter you will need to make sure there is room under the hood. If you don’t you will have an air filter knocking the paint and causing a racket. I measured the gap clearance and made sure all was clear. The filter was a tight fit in the air filter casing itself which was a good thing.
Once fitted I really like the look of the filter as a contrast to everything else under the hood.
I hope that helps explain in very simple terms what goes on with air fuel mixtures, and that’s why you need to change your air filters on a regular basis.
With the sun making an occasional appearance towards lunchtime the show was in full swing with many cars parking up expanding the car show area. I wandered towards the main hanger where some swing music was the background throughout the day and was rather nice.
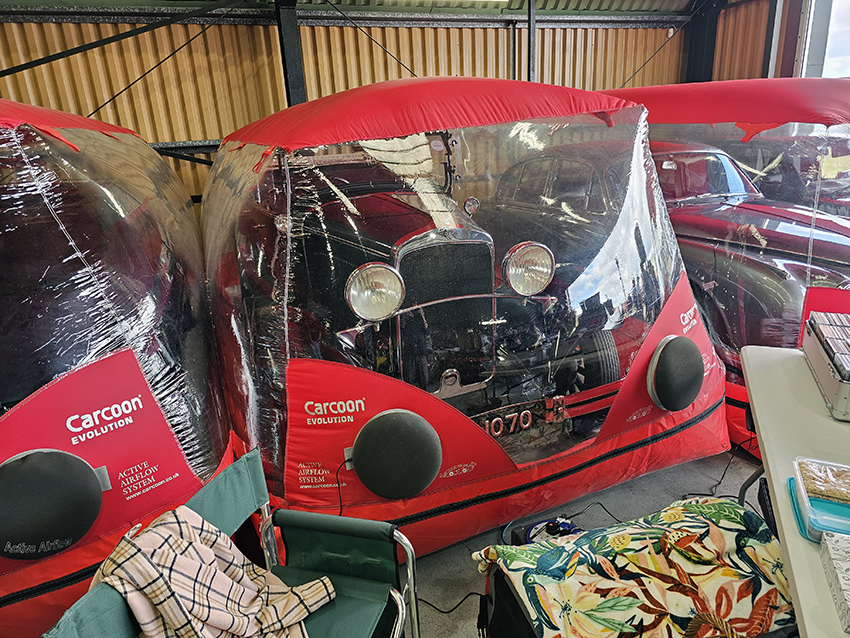
The main hanger has storage carcoons which are atmosphere controlled.
Within the hanger were some projects that could be purchased in various states of ‘project’.
Back to the cars that were around this side of the show area.
Here I hound Marts car of the show, this really nice Lancia Fulvia.
The rest of the cars seemed to be parked up, with a couple of cars being pushed into place as they seemed to have broken down. 🙁
I left at around three as I spotted some dark clouds looming the car show’s way. This photo was taken by Bridge Classics. The car’s colour looks a bit teal coloured, I sort of like it!
About ten minutes after I left the dreaded spots of rain hit the windscreen, I decided to go the longer route home, but would be faster as it was all dual carriageway. The rain stopped as I headed in a Westerly direction, but when the road twisted and turned it was as if I drove back into the rain again. I started to speed up in order to outrun the rain, it was sort of working with the wind buffeting which was drying the car going along. The roads were still dry so there was no spray to deal with. It wasn’t until I was a couple of miles away from home that the rain finally caught up with me. I drove straight into the garage where I dried the car and made sure the dehumidifier was on full pelt to take the moisture out of the air. The warm engine would help keep the garage moisture levels down too. I turned it back to normal a few hours later in the evening. I had almost gotten away with it, if I had of left quarter of an hour earlier I would have maybe missed it. But, then I would have gone the scenic route home and then I would have got rained on regardless. Lets just say that my journey was rather enthusiastic on the way home and a trip to the petrol station is certainly required for the next car show, that’s all I’m saying.
To finish up the rest of my ‘runway’ shoot!
A great show and I would go again for sure. Such a variety of cars without the pop and banging exhaust boys there. I spoke to some amazing people again and I even had an old friend from my old place of work come to say hello too.
Looking forward to the first car show of the year today so I spent yesterday afternoon giving my car a final wax and once over to check fluid levels, tyre pressures, lights working etc. as you normally do after a winter lay up. All was good except the fuel was a bit rubbish and was not running nicely. Over the course of the winter lay up, I tend to run the tank down low with some fuel stabilisers in it too. The car fired up second time around after pumpin’ a little more fuel into the carb from the first turn over.
The go to wax of choice is Mitchell & King ‘Lily’ which I love and used on her as a treat.
I went to bed fairly last night and thought I would look at the Stonham Barns ‘Kustom Kulture’ car show webpage to check what time I could get there for the gates opening; all was good, ten till four. The alarm was set and by the time the alarm went of I hadn’t had a great sleep. I looked out the window which was grey and overcast, but no rain was forecast, in fact the sun was due to come out. I was tempted to flop back into bed and grab a lay in. But, as it was going to be my first show of the year I made the effort to get ready and went to the garage. I turned on the dash mounted GoPro and fired her up. I needed some fuel on the way to the car show and headed to the planned stop at the Shell garage for some V-Power fuel. As I was filling the tank a rather nice McLaren 720s pulled in next to me. We were chatting about cars and the fuel we were putting in – we both agreed it’s more about the ‘smiles per gallon’. He told me he was off to a track day, where if he gives his car a thrashing around the track he gets 2mpg where he drain the fuel tank in 18minutes! But, he said he’s not looking forward to changing the ceramic brake set up as it costs a staggering £22,000. I took the picture below left handed as I was filling up, so it wasn’t a to bad an effort considering, although not centred as I would have liked.
I paid at the counter and looked for a packet of jelly babies to enjoy at the car show. I continued the drive to Stonham which was about ten minutes from the petrol station, enough time to have a quick blast to clear some of the old fuel out which helped, still not perfect, but getting better. Strange, not many cars near the village as I normally see, so I suspected that my timing for arrival was perfect. As I got near the show there was the expected queue but moving fairly quickly, just normal daily cars, not old school or pre 1973 as the requirement said. I pulled in the gates and there was a single bloke directing the traffic straight into a field for the car boot show. I stopped and said “No I’m here for the car show”, his couldn’t give a sh!t attitude was, “It’s cancelled mate.” Stunned and quite aggravated I turned around in the car park to start the journey home. There was a couple of chances on the way back to clear the carb a bit and the running was improving all the time.
I got home to park up on the drive and wiped the car down before moving her back into the garage.
So my first car show was cancelled and the sun was out. So why was it cancelled? I checked the website when I got in, nothing about it being cancelled, it was still on. I reluctantly logged onto Facebook to see if anybody mentioned it. Somebody had posted that it was cancelled due to a water logged field. Yet the cars were being parked up on field next to it.
I’m not impressed that they didn’t update their webpage, I HATE Facebook at the best of times so I don’t rely it – ever. Not everybody has a personal Facebook profile where they share what they had to eat this morning and other such trivial rubbish. (Rant over). I must concede that on this occasion checking Facebook would have helped.
Underside
A couple of weeks ago I applied some Lanoguard to the underside of the car and reviewed it here. Or, look for it under the “Rust Treatment” menu on the header with my other rust reviewed products.
The process is dead simple and took around half an hour to do the underside of the car. Just remove any old surface rust and spray on to coat and protect the car.
Before pics of the axle with the POR15 paint on it has a semi gloss look to it.
Then after the application had fully cured, about one week later or so according to Lanoguard, it looks like this:
The slightly rusty U-clamp bolts have changed back to their more natural colour without the slight surface rust on them now. So far I’m pleased with the results and how easy it was to do. In fact if you have somebody who wants to help out with your project car, this could be a great way as you can’t really go wrong with it. Tell them where to squirt and let them get on with it. In fact I’m now going to buy some more to treat the underside of the wife’s car too.
To sum up the day, I got up early so missed out on a Sunday lay in, I missed out on a car show and now I’m pretty sure that I’m gonna be asked to help my better half in the garden. 🤦♂️ I’m sure I can find something in the garage that needs cleaning to avoid that one! 😉
Next week another car show, in fact two on the same day so I will choose which one to go to, providing it’s not raining and not cancelled, so hopefully I can kick start my car show season properly.
As for the Jelly Babies, they’ve all gone now as I was eating them while typing this post up.
I was told about a ‘scratch hack’ many years ago that removes light scratches from car paintwork, within seconds and cost virtually nothing. Sounds to good to be true right? I’m talking about the trade (not so) secret of the commonly used product WD40. I often wondered if it was true but never had a reason to find out. If I had a problem with paint, I would correct and protect it properly.
A little about WD40 first.
I was first developed around the early 1950s by Rocket Chemicals based in California who later changed their name on the basis of their product. The name WD40 stands for Water Displacement 40(th formula). The actual formula is a trade secret and only been held in secure vault in San Diego California since 2018. The product has not been patented to this day, to do so the ingredients would have to be disclosed. So if you want to copy it you could, if you try and reverse engineered like many others have and call it a different name.
The actual product hasn’t been changed for many, many years. The product was initially developed for a company to protect the outer skins of a super delicate skin of a ballistic missile from rust and corrosion. It later went on to find a host of household uses such as lubrication, protection and cleaning when it became commercially available in the very late 1950s. I won’t go into that side of it, you only have to look at YouTube or TikTok for various household hacks, from removing sticky labels, worktops, hinges, freeing up bolts etc.
I just want to look at this product from a car detailing point of view. It can be sprayed under the car to freshen things up, stop squeaks, apply a coating prior to winter to stop door rubbers sticking, short term storage or just polish up a bit. There are other products out there can do these dedicated tasks better than WD40, but not all of them together like this versatile ‘Jack of all trades’ product can.
Now of course there will be pros and cons for this ‘hack’;
Pros
Cheap, cost of a cup of coffee
Quick to use
Instant results
Looks OK
Disguises light scratches
Forms a protection barrier
Can prevent rusting
Long shelf life
Cons
Temporary fix
Only light scratches disguised
Body shops hate it
Often used to make cars look better than they actually are
Can be messy
Oil based
It can mess detailing pads up
The fact is that if you are spraying WD40 on anything, you are spraying an oil based type of product. Like I said in the cons, it’s only a quick fix and the old scenario of the car lot salesman showing you a gleaming car gives this hack a bad name.
The opportunity I had to try this hack out was that I had to remove a couple or stuck on hard plastic sill protectors on a car. Once they were removed it had left a couple of light scratches on the paint, even with my gentle panel removal tools. They are difficult to see but they are there.
So the tip so simple; spray a little on the paint and wipe over. Nothing could be easier, you don’t even have to rub it in just spread it about a bit.
The result is a miraculous cover up so the exposed paint could be seen again without the scratches.
So, does it work then? Yes – sort of
On the deeper scratches it improves it, but it doesn’t wipe them out. On lighter scratches does.
How? It’s all down the way light is reflected from the paint. The oil settles into the scratch and makes the light ray dispersion more uniform thus it disguises the scratch or swirl. This is a similar principle to car paint glaze which is a more durable option which needs a wax to protect it. I explain this paint defect principle in much more detail here. or cut and past this to your browser: htts://onemanandhismustang.com/difference-between-waxing-polishing-and-your-paint-job/
The general rule of thumb is if you can feel the scratch with your finger nail, you have a problem. If you can’t feel the scratch then it can be buffed, glazed or hidden in one way or another.
As the WD40 is oil it will eventually disappear due to the elements if on an exposed area. If the product is rained on a lot, it will need regular applications. So, if you want to mask or ‘hide’ a light paint surface imperfection, then you could use this product on a temporary basis. If you are going to buy a car, gently feel the paint to see if there is a oily film to the surface.
Another down side is that dust can settle in the WD40 spray and stick to it, so wiping it away could introduce more problems. The reason body shops don’t like it is the fact it’s oil based and once on your hands can be transferred all over the workshop. To clean it up properly in order to spray paint anything properly, this makes it all the more time consuming.
I tend to carry a small ‘sample’ sized can for a couple of reasons;
If you get a stone chip and can’t get to fix it for a while, spray the area with the WD40 and it will form a temporary barrier until you can fully remove it later to fix the chip.
If you are suffering from damp in your distributor cap (back to old school cars now) or HT leads etc, you can spray this to disperse the water. After all that was it’s sole purpose for development.
Did you know?
To get those super smoky burnouts in Hollywood films easily, they used an application of WD40 on the tyres! Not that you should ever do that of course, as it could be frowned upon by the local law enforcement agencies. 😉
This year I have taken my car out for a couple of shows and I have developed a rather annoying squeak from the drivers side front wheel. I have taken the wheel of and greased everything that had a nipple on it. I squirted, white grease, silicon spray, Würth Water Dispersant, WD40 everywhere I could. Nothing. It was still there.
I spoke to Adam a couple of times about it and he advised me to bring it down and he would have a look at it. So I did just that.
The photo’s in this post I’m using have been given to me by Mustang Maniac and saved me taking the pictures; big thanks to Mustang Maniac for that. They told me they were probably going to use them this weekend. It looks like they beat me to it by posting first. So we have a little overlap although they have a couple of different pictures on their post.
Adam was walking to the yard and heard the squeak as I was turning into the yard’s driveway. I explained that I think the steering doesn’t feel right either. He listened intently and promptly jumped in my car and took it for a test drive up the road.
We swapped places for the driving seat as Adam need to swap a few cars around in order to get a clear run for my car onto the ramps in his workshop and I drove it in. Reinforcements arrived in the form of Yogi who had emerged from his workshop to help out with the diagnostics which is a two man job.
First thing they noticed was that the idler arm had some play. It looked like that over time standing in my garage the rubber had perished and broken down when the car came out for some shows this year.
You can see them when compared just how much the old one had broken down. The new one is on the left of each picture.
The guys checked everything else over on the suspension and I received my bollocking for a couple of other nuts that were loose. 🤦🏻♂️ Probably down to the play in the idler arm making things worse. Adam and Yogi both worked up and down under the car to check everything was tightened up as it should be. A couple of rear axle nuts were not as tight as they should be and Adam again tightened them up. I would like to say that in my self defence Adam does have a two foot long Snap On 1/2″ fitting breaker bar, to make sure things were properly tight.
They fitted the new idler arm and checked that the the locating bracket had no play with the arm fitted in place. Once they were happy I was sent out on another road test. Both Adam and Yogi told me that the steering would feel very different. The picture below is the new idler arm being fitted before full greasing.
I got out the main gate and and immediately the car felt different. I couldn’t believe just how bad it had gotten over a course of couple of years. You just get used to it and think no more of it.
I turned back into the yard happy, the squeak was still there, although not as bad now. Straight back onto the ramps and up in the air again. The guys decided that the wheel was to come off and have a look. They did all sorts of play checks and listened to the rotor spinning.
A decision was made fairly quickly. Yogi dropped the outer bearing out to check the look and feel of it. He wasn’t happy with it. Yogi then cleaned it up and Adam had a second look under the big lighted magnifying lens on his bench, nothing visibly wrong with it to look at. He stuck the bearing on his fingers and felt it, spinning it fast, slow and twisting it etc. Adam said “although it looks fine, I just don’t like how it feels, nope, I’m not happy with it”. With that he went of to the shop to go and get a new one.
In the mean time Yogi cleaned up the track of the bearing and made sure it wasn’t damaged by scoring or pitting. Luckily for me it was OK. The inner bearing was still fully packed. While we waited Yogi then proceeded to grease everything he could see, upper arms, lower arms, steering, bushes the lot.
Adam returned with the new bearing repeating his feel tests as he walked back to the ramps. “That’s better” he announced handing it over to Yogi. He repacked the new bearing with grease, rechecked it and fitted it back into the hub and adjusted it up correctly. He then replaced the retaining washer, split pin and the bearing cap. The wheel was put back on and retested for play and feel before letting the car back down.
I was then sent back out on the second test run to see how it was. I arrived back with a smile as big as my front grill. The noise had gone. Sorted 👍
Before I set off for my run I was told that if all was OK, to park out the front of the offices. Which I duly did as i was now well chuffed. They asked me if it was OK to use on the their blog posts. Of course I had not objections at all, they then took a number of pics of my car for their ‘Park & Pic’ section on their forth coming blog. Www.mustangmaniac.org
I love this picture as there is an early Falcon convertible, which of course was the Mustang’s immediate predecessor that shares the same chassis as First Gen Mustangs, and also a later Mustang all in one shot.
I sat in the offices with Adam and we had cup of tea, well he did and I had a cold can of pop. We put the world to rights, sorted out the bill before I left for home. The journey home was a pleasure until it started to rain. I was not impressed that my car had now gotten wet of course. But, considering the car was now in a another league, I wouldn’t mind.
I arrived home some hour and half later after filling with fuel (again). I just had to clean my car before I put her away and cover her up. I then plugged in the battery maintenance unit to keep the battery in tip top performance.
Again a huge thanks to Mustang Maniac (Adam & Yogi) for fitting me in and sending me home all on the same day. That is what I call “proper customer service.”
Before I sign off I just need to wish my friends on the other side of the pond;
Eight and a half years ago, way back on October 28th 2012 I wrote my first post on my little ol’ blog. I had nothing planned other than to share with a few friends what I was getting up to and how I was getting along with my Mustang restoration. Ultimately I could look back in a few years time and take a trip down memory lane with the photos I had taken a certain points of the restoration.
Delivery of my project car 17th September 2011, before it went to Mustang Maniac where I had professional help & guidance on my restoration over the years. Those guys have become some of my best mates of mine as a result.
When I attend car shows or via my blog and emails etc. I often get asked how I clean and detail my cars;
Some of the Car Shows and photo opportunities;
I get asked how I fitted things, how I upgraded this or that, I even get asked for advice on their own restoration projects.
That got me to thinking about adding extra sections like the tools (a selection of them here), that I used on project and since use, considering that I’m just a weekend warrior with a spanner.
Products that I used to keep our daily cars clean and the Mustang fully detailed.
My merchandise I bought over the years or have been given since I started my journey with the Mustang.
I even get requests to review items, all of which I buy if I think I could use them myself. As a result of all these things, my blog has evolved into an entity of it’s own.
Fast forward a number of years to 2021 where I my little ol’ blog has reached a massive milestone. This is not intended as some bragging rights by the way, but more like myself being proud of the result. Somebody within the USA this morning 15th May 2021 made my day:
My blog has just passed 1,000,000 hits!
I am absolutely amazed to think this could ever happen, I remember getting excited about getting ten hits in one day!
I value every single one of you that has followed me or just pops in for a quick read, like or even the odd comment. I would like to say a massive “Thank You” from the very bottom of my heart.
I don’t actually get anything from my blog/website on WordPress, other than some add money that goes straight to the hosting and my domain fees. It’s sort of self sufficient in a way. If anything I’m out of pocket, but reading the comments and seeing the views more than make up for it. Hopefully I can help somebody, somewhere with something.
My first follower was Debbie Nuessle (click here for her latest venture), from across the pond. We both started blogs within a few days of each other, both revolving around our love of American Muscle cars, especially Ford Mustangs of course. We keep in touch outside of the Blog circle and have become good friends.
I have a number of followers who ‘like’ the posts I put up after even after all these years, thank you all, it means a lot to me. I have such a range of followers; a very talented and well-known Soprano opera singer; Charlotte Hoather (click here for her blog), mechanics, engineers, oil rig mover, artists, photographers, builders, wildlife photographers, fellow classic car owners, writers, product manufacturers, shops, brands, a few younger bloggers, students, world travellers, petrol heads, gear heads, car clubs, writers, novelists, journalists, teachers, photojournalists, professional bloggers, social influencers, religious followers, the list just goes on. (There is even ‘ahem’ some adult orientated content following me!) The full list makes for some amazing reading.
Just in case anybody is interested in some of the more selective stats;
I have a total of 2,700 followers, of which 871 are on WordPress, 2,300 on social media, just over 2000 on Facebook, which is not my favourite of all the platforms I must admit.
I have been visited by 199 countries and the top ten countries in order are; USA, UK, Canada, Australia, Germany, China, France, Netherlands, Finland and New Zealand.
There are stunning islands that have visited me, Mauritius, Seychelles & Maldives. Some of those Islands are so small they wouldn’t be able to fit a Mustang on them! My bucket list is to spend a few days on these islands to chill and take in some sun.
The more obscure countries with a single visit are: Burkina Faso, Falkland Islands, Kosovo, Tonga, Northern Mariana Islands.
To date I have posted 340 blogs including this one over the eight and half years I have been posting on this blog.
These figures are quite low compared to some of you mega stars out, there with you super popular blogs I know that. But for me, like I said earlier, I’m honestly humbled and grateful to every single one of you who wants to look at a blog all about one man and his Mustang!
I admit it, I’m so bored of the lockdowns, no car shows and there is talk of longer lockdowns again. To cheer myself up I decided to do a bit of upgrading that I have been thinking about for a while.
The stock Mustang aerials are usually on the right side fender and cant be retracted. Not a problem most of the time, but if you are out and about there could be some jealous vandal who wants to bend it. Then 1) you lost signal for the radio, 2) it’s a whole heap of hurt to swap out for what it is. Hence often wire coat hangers are jammed in the hole after.
In my case it’s more the fact that I want to cover the car and not have to make holes in the cover. Plus I can raise or lower the mast as I see fit.
There are lots of styles of aerials, standard mast, push down mast, stubby aerials, rubber aerials, rear window integrated, shark fin, fully automatic, semi automatic etc.
The fully automatic aerials works via a pulse signal from the radio when it turns on that in turn activates the aerial up, and another signal to lower. This needs a radio outlet to work it, and once the radio is on, you can’t listen to a cassette or blue tooth without the mast being raised.
Semi Automatic runs of a positive and earth via a manual operated switch which will raise the mast, then reverse the poles on the motor to lower the mast. This way I can have the radio on, without the mast up, or only half up, a bit up almost up or any variation in-between.
Let me explain why I wanted the semi auto option; my radio is an original stock item for a ’66 from the USA. But, I had it modified to take a 3.5mm jack point when I press a certain radio pre-set. That means that I can run an mp3 player, my phone for sat nav or a blue tooth dongle to the radio.
I’m going on the assumption that you already have the hole in the fender. If you don’t have a hole, work out where you want the aerial to go and make that hole.
Removing the old aerial;
I managed to do this with the car jacked up on axle stands and with the wheel off. How you get to the fender aerial is up to you and what works for you.
We need to remove the old aerial from the fender. Unplug the aerial lead from the back of the radio and make if fall loose into the footwell.
Under my fender are the splash guards that I fitted during restoration. If you don’t have them then your task is that much easier.
There are four bolts that hold this splash guard in place. One from under the hood at he very top. Then there a two at the sides on the middle picture, finally one at the bottom that also holds the fender in place too.
To remove the splash guard undo the bolts and will pull towards you and free of the chassis. On mine there was a layer of silicon to stop water ingress between the gaps. I managed to scalpel the silicon away and the guard broke free.
Here the guard is removed and the chassis behind it on the right pic.
The rubber on the sides of the guard were still supple and could be refitted and they had not torn. On the right pic you can see the aerial mast and just to right where the grommet goes into the chassis which protects the wires.
On top of the fender undo the hexagon nut and the mast will fall away from the fender.
That’s the mast out, now you should be able to pull the aerial lead through the grommet from inside the car.
Assembly:
Here is the Harada HA-50D. There are only three wires brown and white which control the motor mechanism and the black one for the coaxial.
For the most part fitting the part its a reverse of the above. I threaded the aerial coaxial cable back through the grommet and also the two coloured wires for the up down operation of the aerial.
In the kit there is a bar which is used to support the bottom of the bracket and is pliable to be able to be bent where you need it. There is a switch, and mounting bracket. To allow the the wires to pass into the body the brown and white wires have been bullet connector separated.
I made a test fitting to see where the bottom of the mechanism will roughly be. I worked out that I could re-use the bolt to hold the back of the fender in place. In the pic below you can see that loosened it to show you.
With the Aerial’s soft steel bracket I fitted it to the bolt and then replaced the nut back onto the fender’s bolt.
Thread the two power wires brown and white into the body via the grommet.
Now we can thread the mechanism up through the fender hole and randomly place the caps and hexagon fixing bolts loosely to hold the aerial in place. That way when you can move it around to the correct position and clearance a little later.
With the aerial roughly in place I loosely fitted the aerial in place and held in place with the bracket for support. The mild steel will bend so a pair of pliers twisted the strip and bent it to the aerial hole, which is arrowed above.
It says on the instructions that the aerial will ground under the fender. I’m not happy to go to bare metal in this case, so I made a small solder joint to the case of the aerial mast and attached that single wire to the bottom bracket. The smaller of the two black wires above. This will then also provide an additional ground. But not essential.
Take the aerial coaxial inside the car now and fit to the back of the radio.
The two wires will now need to be connected to the switch. connect the switch’s brown and white wires to the aerials brown and white wires.
The switch to control the aerial is a “Double Pole – Double Throw – Momentary Switch”
A live feed which is the green wire and an earth which is black will need connections as well.
I have a similar switch to this in stainless which I thought would look good. But when I trial fitted it, the switch didn’t look right in the car, but I did use one bit from it! (More on that in bit.) Below is the wiring diagram from the box. Due to the age of the box and the tape some of the diagram was missing, it had been crudely re-drawn on for the missing bits back on.
There aren’t many diagrams on the net for the wiring of these switches. If you need to change the switch out for a different style or want to know how it works here is the diagram I made.
In the diagram the brown wire is obvious, but the white wire is shown as a grey.
A point to note is that the up and down poles are reversed on the switch. ‘A’ and ‘D’ are engaged when the switch is held up to make the aerial go up and spin the motor in one direction.
When the toggle is push down then ‘C’ and ‘F’ are used to spin the motor in the other direction. They can’t be wired the same or the aerial will only go up or only go down.
To overcome this, the switch will reverse the polarity by crossing the wires over; ‘A’ to ‘F’ and ‘D’ to ‘C’. Thus the “Double Pole” part of the switch. The “Double Throw” is the up and down movement, the “Momentary” is that the switch will only work while you activate it and drop to the off position in the middle of the switch.
Power to the switch is provided by the 6A fused green wire to ‘B’, and the ground to ‘E’.
I made a temporary fitting for the power and ground to raise the aerial fully.
Adjust the aerial to the correct verticals. Then tighten up fully when you are happy. Lower the aerial to make sure that it’s full functioning.
Now we can look inside the car for the correct positioning of the switch and the power you are going to use. This is your choice where you want it to be. You could make a feature of it or just hide it.
I decided that the switch would look best under the dash as I didn’t want to drill holes in the dash facia itself. The bracket supplied has two two holes for screwing up under the dash.
I found a hole right next to the aircon blower unit which I would use. As there would only be one hole in use on the bracket the air-con bracket could be used to clamp the bracket in place.
With such a large hole I didn’t need to drill that either. I found a course threaded screw and a matching self tightening clamp to put behind the dash itself to hold everything in place. It was at this point I now used a part of my stainless switch; the wording plate instead of the up and down arrows on the plastic. Screw on the retaining ring and all was in place.
(Now take the brown and white wires and connect them back up again, if you disconnected them after the test fitting.)
I wanted a switched live from the ignition. So with that in mind I need to remove the current open connector on the end of the green wire and replace it with a piggy back spade fitting.
The best place I could see was to junction of the heater motor. I connected the heater motor spade to the new fitting and connected both.
Now I could tidy up the wires, tape them with wire loom cloth tape to look like stock fitting.
The black on the switch matches the black camera case inside and the stainless wording label is not too intrusive on the inside.
Now everything is working and in place we can get back under the fender. There is one last thing for the aerial which is the drain pipe. This just pushes on to the bottom. Me being me didn’t want any water dripping inside the fender and accumulating with the tube which was only four inches long. I found the old radiator overflow rubber pipe which was a the same bore and I managed to squeeze it inside the polyurethane pipe. I heat shrink a sleeve over it to make sure it stayed in place. and now comes out at the bottom of the fender.
Now we can finish by refitting the splash guard. This will just press back into place, making sure the rubber edges are not pinched.. Replace the four screws.
The additional part is the silicon. Place a little on your finger and smear it into the gaps metal to metal.
That’s it all done.
I now have a working aerial which can be raised or lowered from inside the car. I won’t need to make a hole in the car cover and it’s protected from vandals or accidental bending.
The results are great and everything is subtle in appearance. I don’t know of any other classic Mustang’s have an electric aerial either full auto or semi auto. There will be others out there of course, but I hope it puts me into a unique club now.
On a side note a question; how often do I use the radio? Hardly ever, but I can put it up just for a car show for the original stock look if I want to.
I’m running out of things to do on the car, best I get the car back out and clean it yet again!
On my last post (rather a large post), I explained the critical settings of the spark plug and the benefits of quality ignition leads. That’s all well and good, but if you don’t have the correct pulses or power going down those leads at the right time then you will have problems. While I was checking and replacing spark plugs, I decided to strip down and rebuild the top end of the distributor.
Firstly what is a distributor?
A distributor consists of a rotating arm or rotor arm inside the distributor cap, which sits on top of the distributor shaft. This shaft has an insulated body to the vehicle’s ground or earth. The distributor shaft is driven by a gear on the camshaft on most overhead valve engines, and attached directly to the camshaft on most overhead cam engines. The distributor shaft usually also drives the oil pump. The metal part of the rotor contacts the high voltage cable from the ignition coil via a spring loaded carbon brush on the underside of the distributor cap. The metal part of the rotor arm passes close to (but does not touch) the output contacts of the distributor cap which connect via high tension (ignition) leads to the spark plug of each cylinder. As the rotor spins within the distributor, electric current is able to jump the small gaps created between the rotor arm and the contacts due to the high voltage created by the ignition coil. The voltage then travels down the HT leads to the spark plug where it again jumps a predetermined gap to ignite the air fuel mixture in the cylinders providing drive to the crank and thus power to the wheels via a transmission. (In a nut shell description.)
The principles are the same for a 4 cylinder, i6, v6, v8, v10, v12 etc. The rotors may travel in a different direction (clockwise or counter-clockwise), the number of leads on the distributor cap may be more, the firing orders will be different etc.
To show those principles of the spark, here is a simple 4 cylinder diagram with points. A v8 just more of plugs, more cap points, more cam lobes to open and shut the points etc. but you can see the idea on a less cluttered diagram.
Modern cars tend not to have points, but have electronic sensors to replace them. Latest technology has a sensor on the cam shaft which fires the spark plugs without the need for a distributor or even a coil, as the power for the spark is handled by ‘coil’ packs which are mounted on top of the spark plug lead fittings.
This post is a going to be a very cut down version of the whole process I have documented. The full rebuild with all the photos, explanation step by step can be found here. I will only be covering the Pertronix ignition process on this post, but I do cover the points process or refitting and setting as well on the full walkthrough.
* Disclaimer (just in case): If you are in any doubt on your ability to try this – DON’T. Get it wrong you and could damage the insides of the distributor, the car wont start or run properly. This is a guide on how I done it, I can’t held be responsible for your actions.
Dismantling:
First thing is to make a note of where the HT (spark) leads go and to what cylinder. Take a few photo’s if you’re not sure, label the leads up with a marker or sticky label of some sort. If you look closely the top of the Mustang distributor caps it has the number ‘1’ on the top, this is where you plug the lead for cylinder one. The diagram below right is for the firing order of 260/289/302 with a standard cam. Check your manual if you’re unsure.
Take the leads off and unclip the front and rear retaining clips to release the cap. The rotor arm can now be removed and the small usually oil soaked felt pad under it can be removed. Both my rotor and felt pad needed to be replaced.
Depending on your set up there will either be a set of points and condenser picture below left, the points gap is covered on the full process here.
An upgraded set of electronic points as mine (below right) will be set to the manufacturers recommended gap, more on that later once the rebuild is completed.
I removed the electronic set up, but once the condenser and points are removed (above left), the principle is exactly the same for dismantling and re-assembly up to the fitting of the Pertronix or points and condenser.
My Pertronix is held in place by a single screw at the bottom of the shoe which also pivots at the top where the original points screw would have held the top part of the points. Then remove the black sensor collar.
Disconnect the vacuum pipe to the front of the vacuum canister which goes to the carb. Check for any leaks or cracks on the pipe if you find some replace the pipe.
Next there is a metal lever that goes into the distributor (which will now be known as “dizzy” from now on). There is a tiny clip that holds the bar onto the pin. Remove the clip very carefully and make sure you don’t loose it. Remove the vacuum can from the dizzy.
Check for signs of perishing on the diaphragm on the inside. To check the function of the vacuum you can suck the can from the front and you should see the arm move towards the inside of the can, repeat a few times. If all is good you can clean it up and keep it safe, if not replace. Next remove the screw that holds the earth strap to the lower dizzy plate.
Next to the cam lobes there is another e-clip at the top of a pin. This holds a washer and under that a fairly strong sprung washer. Slip a small flat ended screw driver and gently tease it away. If you’re not careful it will ping up and be lost in the depth of the engine bay. Remove the washer, sprung washer and keep safe with the e-clip.
With the washer and spring washer out the way, you should now be able to lift the plate up and lift it up over the lobes of the cam.
The lower plate is now only held in place with a single screw the opposite side to where the cables come into the dizzy. Undo the screw and remove the lower plate.
Removing the lower plate there should be three raised points which separates the upper plate and should be smooth. I noticed one of mine was loose so I removed it then re-stuck it back on later.
With the lower plate removed you can now see the advancing weights and springs.
NOTE: The springs are different tensions. The one has less tension and and allows the weights to swing out under rotation to advancing the timing. The other spring is stiffer and at certain centrifugal force this spring takes over slowing down the advance. The larger and stronger spring is a loose fit to the anchor points and is normal.
On top of each weight there is again a an e-clip. Remove with a small flat ended screw driver and make sure it does not ping off. Make a note of which weight goes where and repeat for the other side.
Keep them separate or mark up a piece of paper and lay them on the paper so you know which pair go together and if they are the 13deg weight side or the 18deg weight side. Without taking the whole dizzy out this is about as far as you need to go.
You could possibly remove the springs, the two springs making careful notes on what one goes where. I decided against that just in case I stretched a spring putting it back on. This would have a detrimental effect on the timing and advance. My springs weren’t to bad so I decided not to chance it.
Now you need to clean the inside and remove any old dried grease and debris. Don’t go mad in here with the fluids, use just enough to clean. I found carb cleaner is good, and also sprayed onto a cotton bud to clean the springs and surrounding area.
You can move the move the weight plate with your fingers to clean parts that are partially covered. Don’t go mad with forcing open of the springs, you don’t want to stretch them. Make sure there is no bits of debris in the bowl or trapped anywhere.
The bowl should now be clean of all debris and old grease.
Assembly:
I started with the weights. take each weight and either clean with a degreaser or similar, or take some ‘000’ grade super fine wire wool to take the roughness of the weights.
Make sure that NO wire strands are left on the weights or fall into the dizzy bowl.
I used a small punch to wrap a little wire wool around and then clean the inside of the holes. You are lightly cleaning – not reboring the hole. Also clean the clip, any rough edges or rust could impede the movement of the weights.
With the weights and clips cleaned it was time to fit them back to the dizzy. You will need some proper lubrication. I researched a fair bit and the general recommendation is an engine assembly grease. Light smears not huge blobs!
If you examine the weights it easy to see where the wear marks are, apply a little grease to the weight. wear points and into the holes. Note that the whole weight doesn’t need greasing, just the hole, outside edges, the top where the clip holds it in place and the underside where it rests on the pin base.
Place the weight over the pin and lower it into position. There may be some excess grease, but that can be removed later. Make sure the weight is free to move and rests within the cradle. Apply a film of grease to the clip and place onto the weight.
You need to press the clip onto the post into the recess. I found again a small flat headed screw driver would do the trick. It can take a few goes to get right. Just make sure it doesn’t ping away. With both weights and clips in place it should look something like this.
Lower plate needed some love in respect that the plastic/nylon stop had worked a bit loose. Both the front and the back of the lower plate was cleaned with fine wire wool. You can see the slide pads are just hot pressed into the holes of the plate from the factory. With the plate now repaired I cleaned the yellowish and two red pads of the old grease and debris. I took some 5000grit and then 8000grit to remove any rough parts. Not sand it down, but more of a polish. Check the vacuum post has no wear and burrs.
Again make sure NO wire wool or cleaning material is on the plate before refitting. Place the plate back into the bowl area to cover the plate with the post side facing upwards. Align the hole and screw into place.
Take your assembly grease on a cotton bud and apply a film over the plastic pad areas and the post.
The upper plate may need a clean with wire wool or degreaser depending on the state of it. Pay attention to the brass bush which sits on the post of the lower plate. Brass is a soft metal and you don’t want to create a problem so be careful not to damage it with the small punch, degreaser with fine wool. Remove any burrs on the top side of the bush to allow the sprung washer to move without snagging.
On the underside of the upper plate you can see where the plate has moved across the slide pads over the years. Apply a film of the grease on these areas and into the brass bush and the vacuum post.
Place the upper plate onto the lower plate, locating it via the brass bushing. make sure it’s free to move all the way. Clean the components that hold the top plate to the bottom plate. Top washer, sprung washer and the e-clip all need to be clean and smooth in order to not snag the movement.
To refit a further film of grease over both sides of the of the sprung washer on top of the top plate brass bush with the curled edges facing up. Top washer with grease applied on the top and bottom, place the washer on top of the sprung washer.
Next refit the cleaned up earth strap for the top and bottom plates.
On the Pertronix setup, wipe over the plastic collar and slip it over the cam lobes with the recess facing upwards.
With the vacuum advance module clean the arm at the back and apply a film of grease on both sides near the hole and in the locating hole. The vacuum module can only fit on in one way following the curve on the outside of the dizzy.
With the arm located take the e-clip clip with some grease and again fit into place so that the arm is held down. Secure back in place with the two screws.
Setting up the Pertronix or points, don’t use grease here as you want the srews to hold in place. Place the Pertronix on the plate, and the other end of the earth strap that is attached to the bottom plate on top of the Pertronix while aligning the top pin to the other locating hole.
With the sensor and the collar in place you need to set the correct gap. A ‘tool’ is supplied with Pertronix which is a plastic strip to set the gap which is 0.80mm. Left pic shows the gap is to small. The right pic shows the correct way to gap the sensor. Keep the plastic gap tool flat to the sensor face and slide the the unit until there is a slight drag between the collar and the sensor. Tighten the screw fully.
In the centre of the dizzy where the rotor arm sits is a recess. This has a felt pad to oil which is to keep the cam lubricated lower down. I would recommend this is replaced with a new one and filled with fresh oil, or reuse the old one with the old oil it’s up to you. Most people use a drip of the engine’s dipstick at oil change. But my research leads to me to say that this should be a very light engine oil to allow the oil to run through the felt. It’s debated if this is still required. However, Ford wouldn’t have milled out the centre shaft and put a felt pad in there for no reason!
Place the rotor arm on top of the dizzy shaft and locate into place. These can only fit in orientation as there is a keyway on the inside of the rotor to match with the shaft cut out.
Now take your marked up HT leads or follow the chart and fit back onto the dizzy cap. Job done.
If you made it this far thank you. Another long post but still cut down a bit from the original page here.
I’m looking forward to using up some holiday and time off over the Christmas break, hopefully I will be posting some more, hopefully less technical or intense.
The ignition systems on modern cars is highly complex. Even on classic cars that technology has moved on, but you probably don’t realise it. The humble spark plug is a highly complex part of the engine and the plug leads that supply the power are no exception.
What started out as me showing you how I remade a broken lead and setting my spark plug gaps, turned into a bit of a monster research project. I didn’t realise that there was quite as much involved for a throw away part that only costs a few quid (bucks). From what I have learnt I will try to explain; cause of bad plugs, incorrect gap setting, how spark plugs and their leads are made, how they work and how you can make your own custom plug leads!
Costs:
HT ignition cable sets can vary from £15 to £150 (or more depending requirements).
Spark Plugs can very from £2 each to easily over £20 each
Crimping tool £5 to £25
Spark plug gap tool or feeler gauges £2 to £30
What is an Ignition, Spark Plug or HT lead?
It’s a simple, but critical cable which transfers the power from the distributor cap to the spark plug, where it then provides the energy to create a spark at the plug electrodes, which in turn ignites the air/fuel mixture to give you the power to turn a crank which will eventually drive the wheels.
The ignition lead is comprised of a conductive material surrounded by a silicone jacket. The primary purpose of the silicone surround is protection and looks to a degree. Ignition leads sit in close proximity to the engine itself and so are subject to dramatic changes in temperature, caustic chemicals and frequent abrasion. A silicone outer layer helps to protect the conductive core from external damage, extending its lifespan.
The core itself, which carries the current, will either be made of copper or carbon, depending on the age of the vehicle. Older vehicles used copper, modern ones carbon. Now days older cars can use the modern carbon style for better reliability and consistency and still look stock.
It’s a common myth that bigger and more elaborate HT leads will give you more horse power. What they will do is provide the optimum efficiency and stability that may have been lacking on older worn leads. They should last longer and keep performance at a constant level.
How do you know if the HT leads have gone bad?
1. Decrease in power, acceleration, and fuel efficiency
One of the most common symptoms of an issue with the ignition cables is engine performance problems. The ignition cables carry the spark from the coil and distributor to the spark plugs so that engine combustion can occur. If there is any issue with the spark plug wires the engine spark can be disturbed, which can result in engine performance issues such as misfires, a reduction in power and acceleration, as well as a reduction in fuel efficiency. In severe cases bad cables may even result in engine stalling.
2. Visible wear or damage to cables
Visible wear or damage are symptoms of issues with the ignition cables. Old cables may dry out or perish, which may lead to cracks in the insulation. There are also instances where the cables may rub up against a hot manifold or engine components, which may cause them to melt and burn up. Both of these issues may compromise the cable’s ability to transport the spark to the spark. This can lead to misfires and other performance issues, and in more serious cases may even lead to the cables shorting against the engine.
3. Check Engine Light comes on (modern cars)
Faulty cables can lead to engine misfires as well as excessively rich air fuel ratios, both of which can set off the Check Engine Light if detected by the computer. Many modern vehicles are now being manufactured without the good old fashioned ignition cables, however they are still found on a very large majority of older cars.
Process To Make Your Own:
Regardless of the vehicle, making the wire is the same in principle. Most of the time the ‘generic’ HT leads tend to have the spark plug boot already connected. Most kits will give you an option of metal crimp ends and rubber boots depending on application.
These can be straight, 90deg or 115deg angles (as below) etc. depending on the manufacturer, engine fitting, style, age and type of engine etc.
These HT leads can be single colours, multi coloured, cloth wrapped, silicon covered or custom variations of anything in between.
The spark plug boot fittings can be pretty much anything on top of the spark plug terminal, to nothing with just the thread or a simple screw down for the clamped earlier designs.
Or any of the following styles; stud, clip, screw, solder or crimp etc.
My Mustang leads are set to the 115deg from the plug with an open end which allows you to cut the wire and route where you want it. Or you could buy prefabricated leads without the hassle or making them of course. But you may be limited to the routing of the wires that you wanted.
Process to attach the fittings.
Making your cable connection will require a plug crimping tool, usually around £10 to £25 for a ratchet set. They have the main crimping section at the bottom of the jaws, outer layer cutting jaw and then the inner cable crimp at the top, if needed.
Measure the length of the cable you need and trim approx 1″ longer than you need, this will allow for trimming and crimping the core. Better to be a fraction to long than too short and put stress on the cable.
Depending on the connection you have you may need to trim to the inner core and crimp twice.
If there are no boot(s) on the cable you will need to put these on first. Make sure they are the correct way round. This is so often forgotten and will lead to a wasted crimp and an even shorter cable when you have to redo them. To make life easier to slide the cable through the boot is apply a little dielectric grease. this protects the rubber and also allows electrical current through it just in case it gets on the centre core.
My cables needed to expose the inner core only. Trim of the outer silicon and the inner layer to leave an exposed amount of core.
Fold the core cable over back on itself. making sure that the core is on the back of the fitting.
Place the fitting and cable into the crimps with the open side on the fold part of the jaws.
Slip the boot over the fitting and make sure it seats correctly. With both ends crimped and ready to fit test the integrity of the lead via a multimeter ‘ohms’ setting with a tester prong at each end of the cable. With everything in place you can fit the cable.
Note; the distributer cap boot fittings (male fit) tend to extend past the rubber as it has to sit deeper into the distributor cap as in this pictures here to make a contact.
Repeat for each lead you need.
Spark Plugs:
This is probably the least thought about part of the engine and least understood. Yet these relatively cheap disposable parts can make a huge difference to the running of the engine, and the designs behind them can get highly technical. i will try to break it down into smaller sections.
What is the Spark Plug?
This is the part of the engine that detonates the air fuel mixture in the engine’s cylinders to make the explosion to force the piston down to rotate a crank, which in turn drives a shaft to the gearbox.
Basics:
Design of the plug will dictated by the engine manufacturer, such as where it will be located how far from the chamber etc. things like centre mounted plugs on an over head cam tend to be thinner and longer to reach the top of the cylinder. Traditional side mounted mounted plugs can be shorter or fatter depending on where it needs to sit in the cylinder head.
A good rule of thumb for the correct depth is something like this, all the information will be in the manufacturers guides.
To shallow a plug and the spark will not ignite the fuel/air in the cylinders correctly. To long a plug and there is a danger that the top of the piston could hit the plugs. The incorrect depths could also play a part in heat dissipation, fuel economy, power and even the overall drivability of the car.
A selection of various designs from short to long, to thin to fat and marine application.
The firing end has a number of different ways to create the spark, single, double and even quadruple toe electrodes, angled etc. Each design will give a specific spark for a particular engine. Here is a description of the more common ones.
Standard spark plugs typically feature a traditional ground electrode.
Double fine wire electrode (DFE) spark plugs apply a fine wire pin to the ground electrode in addition to a fine wire center electrode. A smaller electrode requires less voltage to jump the gap, resulting in fewer misfires, which translates to increased fuel economy and horsepower. A smaller electrode also reduces flame quenching. Reducing the electrode size on a standard nickel plug would result in a drastically shortened life span, so smaller electrodes require exotic metals such as platinum or iridium to maintain (and at times surpass), the longevity of a traditional spark plug.
A flat ground electrode is shorter and closer to the metal shell and center electrode, providing a faster path to transfer heat away from the ground electrode. Its low profile design is resistant to vibration.
Developed for engines that tend towards increased carbon depositing as a result of their design, hybrid spark plugs have a standard ground electrode as well as two smaller ground electrodes on each side. When the insulator becomes clogged with carbon, the ignition voltage jumps over to the side electrodes, enabling the plug to operate even under severe conditions. Once the plug has reach operation temperature and the deposits are removed, it returns to “normal” operation, with the spark jumping between the center and main ground electrode.
A low angled ground electrode is shorter and closer to the metal shell and center electrode, providing a faster path to transfer heat away from the ground electrode. Its low profile design is resistant to vibration. A smaller electrode requires less voltage to jump the gap, resulting in fewer misfires, which translates to increased fuel economy and horsepower. A smaller electrode also reduces flame quenching. Reducing the electrode size on a standard nickel plug would result in a drastically shortened life span, so smaller electrodes require exotic metals such as platinum or iridium to maintain (and at times surpass), the longevity of a traditional spark plug.
Some engine designs require the spark plugs have the ground electrode placed to the side of the center electrode rather than below as on a traditional plug. This may be for combustion chamber design as in the case of a rotary engine, or a surface gap design as used in leaner air/fuel ratio’s on industrial engines. The side electrode design tends to wear faster than a traditional plug. Erosion at these points creates a larger gap between the center and ground electrodes, causing plug misfire. Thus, if the engine design requires a side discharge plug, more ground electrodes extend plug life.
Multi-Ground plugs are offered in 2, 3 and 4 ground electrode designs. It is important to note that multi-ground does not mean multi-spark, there will still only be one spark at a time. Caution should be made in selecting a “high performance” plug.
If your car came OE with a multi-ground plug, your engine will likely wear through single electrode plugs, especially fine wire plugs, at a rapid rate.
Projected square platinum electrode (PSPE) spark plugs apply a square shaped tip of platinum to the end of a shortened ground electrode.This ground electrode shape allows the spark to be focused between the fine-wire center electrode and projecting platinum ground electrode. A smaller electrode requires less voltage to jump the gap, resulting in fewer misfires, which translates to increased fuel economy and horsepower. A smaller electrode also reduces flame quenching.
In a semi-surface discharge design, the voltage path skims across the surface of the insulator. When the spark discharges, it burns off any carbon build-up. The wide gap improves ignition capability and is less sensitive to gap growth. Additionally the concave cut in the ground electrode promotes even gap growth.
A slant ground electrode is shorter and closer to the metal shell and center electrode, providing a faster path to transfer heat away from the ground electrode. Its low profile design is resistant to vibration.
A thin square pad of platinum is welded to some ground electrodes to ensure durability.
True surface discharge or surface gap spark plugs have no side electrode, instead utilizing the entire face of the plug shell as a ground to ignite. Thus the gap remains constant through the plugs entire life. They have no given heat range as the electrode design prevents the firing tip from overheating, and the insulator is flush with the metal shell to dissipate heat quickly. Therefore, these plugs are susceptible to fouling in cold applications.
Surface discharge plugs may be required in high compression applications or with high energy ignition systems. They are also used in rotary engines as they present a flush face to the combustion chamber, eliminating interference with an electrode tip and exposing the spark to the entire air/fuel mixture for improved combustion.
Many variations of the surface discharge plug exist, including the semi-surface discharge, intermittent gap, supplementary gap, and surface air gap plug. All designs create a spark along the insulator nose to remove carbon build-up.
A taper cut ground electrode serves a similar function to a cut back ground, fine wire ground and angled ground electrode. Also known as an inverted v-tip, tapered v-profile, trimmed side, v-trimmed or wedge shaped ground electrode, all trimmed designs have the same purpose: to reduce quenching and shadowing by reducing the surface area between the electrodes which could hinder the growth of the flame nucleus.
A trapezoid cut ground electrode is a variation of a taper cut ground, which serves a similar function to a cut back ground, fine wire ground and angled ground electrode. All trimmed designs have the same purpose: to reduce quenching and shadowing by reducing the surface area between the electrodes which could hinder the growth of the flame nucleus.
Heat Range:
When the air temperature is high, as in the summer, the inlet air temperature becomes higher, increasing the load on the engine. In times like this, it’s better to choose a plug with a higher heat range.
Various circumstances such as engine conditions and driving conditions are rough measures for choosing a plug. If you are doing lots of strenuous driving for a considerable time using normal plugs, the plug will overheat. This is why the idea of a Standard plug fits all for all car’s doesn’t work.
The heat is controlled by the design of the inside of the spark plug head More material that can be in contact with the cylinder the greater the cooling. (The dark grey shading represents a hollowed out area between the insulator and the thread.)
Each manufacturer has their own coding for heat ranges, this is a comparison of some popular plugs.
Horse Power:
If the horsepower has been increased through tuning, the increase in explosive power leads to an increase in combustion chamber temperature, making pre-ignition more likely; in such cases it is necessary to choose a plug with a higher heat range and a higher level of heat resistance provided by Denso. The same with other plugs of course just different numbering approach.
Types of Spark Plug Cores:
Sparks like to jump from the sharpest point on the center electrode to the sharpest point on the side electrode. Ideally you want a plug that retains its sharp edge for the most amount of miles covered. Precious metals like platinum and iridium are harder metals and have higher melting temperatures than the nickel alloy electrodes found in traditional copper spark plugs. The smaller the diameter of the center electrode, the lower the voltage needed to start the spark.
Copper Core:
These plugs have a solid copper core, but the business end of the center electrode is actually a 2.5mm-diameter nickel alloy. That’s the largest diameter electrode of all the spark plug types. Remember, the smaller the diameter, the less voltage required to initiate the spark. Nickel alloy is also softer than either platinum or iridium, so the sharp firing edge you get right out of the box tends to wear out quickly. Despite those shortcomings, copper spark plugs are still a good choice for certain applications. Copper spark plugs are best for older (pre-‘80s) vehicles with low voltage distributor-based ignition systems. Don’t use copper spark plugs in high-energy distributor-less ignition systems (DIS) or coil-on-plug (COP) ignition systems. They’ll wear out too quickly.
There’s one exception to that advice. Some late-model high-performance engines were designed specifically for copper spark plugs. In those cases, copper spark plugs are considered to be high performance spark plugs. If your owner’s manual calls for copper spark plugs, don’t upgrade to platinum spark plugs or iridium spark plugs.
Platinum Core:
A single platinum spark plug is basically styled after a copper spark plug with a platinum disc welded to the tip of the center electrode. Since platinum is harder than nickel alloy, it holds its sharp edge for as long as 100,000 miles. Platinum spark plugs also run a bit hotter, preventing spark plug deposit build up and fouling.
Platinum spark plugs are usually the best spark plugs for newer vehicles with electronic ‘distributor-based ignition systems’ (DIS). If your owner’s manual recommends platinum spark plugs, don’t downgrade to copper spark plugs to save money. However, you can upgrade to either double platinum spark plugs or iridium spark plugs.
Double platinum spark plugs were designed for “waste spark” DIS. In a waste spark system, the spark jumps from the center electrode to the side electrode for the cylinder that’s on the compression stroke. To return the electrical pulse back to the ignition coil pack, the spark jumps backwards (side-to-center) on the partner cylinder. Since the partner cylinder is on its exhaust stroke, nothing ignites and the spark is “wasted.”
You can’t use single platinum spark plugs or traditional copper spark plugs in these systems because the side electrodes aren’t designed to handle the reverse spark. But double platinum spark plugs, with a platinum disc welded to their side electrode, work exceptionally well. Both the center and side platinum discs remain sharp, allowing sparks to fly easily in both directions without causing rapid electrode wear.
If your owner’s manual recommends double platinum spark plugs, then those are the best spark plugs to use. You should never downgrade to single platinum spark plugs or copper spark plugs. However, you can upgrade to an iridium/platinum combination plug (an iridium center electrode with a platinum-tipped side electrode).
Iridium Core:
Iridium is harder than platinum, and in most cases, iridium spark plugs last approx 25 percent longer than comparable platinum spark plugs. Because iridium is costly, iridium spark plug manufacturers reduce the diameter of the center electrode to as little as .4mm. In addition to saving money, the “fine wire” center electrode on iridium spark plugs increases firing efficiency.
Many carmakers require iridium spark plugs or iridium/platinum combination spark plugs for coil-on-plug (COP) ignition systems. If your owner’s manual specifies iridium spark plugs, don’t downgrade to platinum spark plugs, or double platinum spark plugs, or even copper spark plugs. They won’t perform as well as the iridium spark plugs and cause some potential problems with running.
As the spark ignites the air/fuel mixture, the colder side electrode tends to “quench” the flame. To combat quenching, some spark plug manufacturers cut a “U” or “V” shaped channel into the “spark receiving” surface of the side electrode. The larger channeled area reduces quenching and allows the flame to grow more quickly. Other manufacturers split the end of the side electrode to reduce the flame’s contact with the side electrode and allow the flame to shoot straight down into the cylinder.
Are these type of plugs better? There’s no general consensus or conclusive evidence on whether these designs work better or not. However they will perform at least as well as a non-channelled plug, if not better.
Condition of the Spark Plugs:
These little pieces of technology can tell you an awful lot about the condition of your engine, at each service you could take them out and check, but you don’t have to. Many years ago when spark plugs were a standard core, they used to be replaced with every car service along with points. With modern computer controlled injection, you should be running ‘normal’ most of the time.
On carburettor cars the tuning and air/fuel mixtures are much easier to spot.
A visual inspection of the spark plugs could like the following;
Normal Condition
If the firing end of the spark plug is brown or light grey, the engine condition can be judged to be good and the spark plug is functioning correctly.
Deposits
The gathering of different deposits on the firing end is influenced by oil leakage, fuel quality and engine operating period. The deposits can come from Carbon, Lead, Bromine, Calcium, Sulphur, Barium and Zinc.
Dry and Wet Fouling
Dry and Wet Fouling is another way the firing end can be damaged. If the insulation resistance between the centre electrode and the “shell” is over 10M ohms the engine can start up normally, however if the insulation resistance drops to 0 the firing end is fouled by either wet or dry carbon.
Lead Fouling
If your spark plug firing end looks yellowish brown on the insulator nose, this is found on spark plugs that have been damaged by lead. Also, this particular type of damage cannot be detected by a resistance tester at room temperature. Lead compounds combines at different temperatures; those formed at 370-420 degrees Celsius have the biggest influence on the resistance.
Overheating
If your spark plug has overheated, the insulator tip is glazed or glossy. Deposits which have gathered on the insulator tip have melted, and there is a chance that the insulator will have blistered.
Breakage
Breakage is normally caused by a thermal shock due to sudden heating or cooling – replace immediately!
Normal Life
A worn spark Plug not only wastes fuel but also strains the whole ignition, this is because is requires a higher voltage. A worn spark plug can reduce the engine efficiency by reducing the fuel economy and increases the exhaust emissions. For your reference, The normal rate of gap growth is about 0.01 0.02mm/1,000 Km for four stroke engines and about 0.02 0.04mm/1,000 Km for two stroke engines.
Erosion, Corrosion, Oxidation
The electrodes have oxidized, and when the oxidation is heavy there will be green on the surface. The surfaces of the electrodes are also fretted and rough.
Abnormal Erosion
An Abnormal Erosion is caused by corrosion, oxidation, or reaction with the lead. This results in abnormal gap Growth.
Lead Erosion
Lead Erosion is caused by the lead compounds in the gasoline which react chemically with the material of the electrodes (nickel alloy) at high temperatures. Crystals of nickel alloy fall off because of the lead compounds permeating and separating the grain boundary of the nickel alloy. Typical lead erosion causes the surface of the electrode to become thinner and the tip of the electrode looks like it has been chipped.
Melting
If the firing end is melted, this means it has over heated. Mostly, this will result in the electrode surface being rather lustrous and uneven. As note, the melting point of nickel alloy is 1,200 – 1,300 degrees Celsius.
What’s important is to inspect the condition of your current plugs, and then choose a plug accordingly.
Fitting the wrong plugs could damage your engine.
Comparisons:
A chart for comparing different makes and designs of spark plugs.
Some cars run on better brands than others. In my past experience NGK were a great plug, but didn’t last long. Bosch platinum were great when warm on lots of motorway miles, but a little lumpy when cold. Trial and error depending on your driving style and engine will get the best results for economy and power.
Longevity:
Spark plugs are designed to last and give optimum performance for as long as possible. Racing plugs in racing engines tend to be designed to give the max for shorter periods of time. They wouldn’t necessarily make big performance gains in road cars, unless you intend to drive it like you stole it!
Copper cored plugs you can expect between 10,000 to 20,000 miles.
Platinum or Iridium tipped plugs can be expected to last 60,000 miles.
Some top quality branded plugs are expected to last 120,000 miles before changing.
You pay your money and take your chances. Buying cheap plugs where bits can break of in the cylinder could possibly destroy a good engine.
Setting the Spark Plug’s Gap:
The gap sizes are pre determined by the manufacturer to get the correct combustion in the engine’s cylinder or combustion chamber. These should be adhered to unless specialist tuning requires the changes.
Such an instance to increase the gaps could be changing from old school standard points ignition to a Pertronix electronic ignition. The sensor in the distributor cap does not have metal contacts to take the voltage. The sensor sends a signal to the ignition coil which can produce more voltage and power as a result. This in turn can allow a small increase in the spark plug gap to give a stronger more powerful spark. The theory is that the better spark gives better combustion of more fuel air mixture and could give you more horse power with the correct carb settings.
* Narrow Gap
When the spark plug gap is too narrow, or under specifications, the amount of room needed for the air-fuel mixture between the hot tip and the ground strap is decreased. The duration of the spark has less travel distance, thus not remaining hot enough with sufficient charge to ignite the air-fuel mixture. The symptoms of narrow gap include a noticeable (continuous) cylinder miss, hard starting if all the plugs have narrow gaps, rough idle and engine hesitation. A spark plug that does not fire, resulting from a narrow gap, will appear black or wet when inspected. The black or wet appearance indicates unburned fuel.
* Excessive Spark Plug Gap
Excessive spark plug gap results when the voltage has too far to travel. The increased length of the spark travel weakens it, robbing it of the hot, strong ignition charge it needs to fire the plug. Excessive plug gap also results in cylinder misfiring, a possible no-start condition, wet, black or fouled plugs, engine hesitation and rough idle. Excessive spark plug gap also happens as result of normal electrode wear and age.
Incorrect spark plug gaps as above can cause the following symptoms;
* Rough Engine Idle
An engine that has a rough, irregular engine idle is often due to spark plugs that are incorrectly gapped. Spark plugs that are gapped incorrectly it will upset the air/fuel mixture, which in turn affects engine combustion and idle.
* Engine Hesitation
If spark plugs are gapped too wide, the ignition spark loses some of its strength as it crosses the spark plug gaps. This can result in engine hesitation.
* Engine Missing
Spark plugs gapped incorrectly can cause an engine to miss, or run erratically, especially during idle. The incorrect spark plug gaps can cause uneven firing of individual spark plugs and delay engine combustion; both of which can cause an engine to miss or idle erratically.
* Poor Engine Performance
For an engine to run at optimal levels, its spark plugs have to be gapped according to factory specifications. Any spark plugs that are gapped incorrectly can result in poor engine performance by altering engine combustion, weakening the ignition spark, and delaying the arcing of the ignition spark as it crosses each spark plug diode.
* Engine Knocking
Engine knocking, or engine pinging, is a classic sign of an engine that has incorrectly gapped spark plugs. Engine knocking is the result of incomplete or delayed engine combustion, especially under acceleration.
To set the gaps.
Remove the spark plugs and inspect them for damage. Inspect the firing end for condition and to see how the engine is running.
Remove any loose fowling or oil on the plug first. Take a small brass wire brush and remove the deposits until the metal surfaces are clean. Brass is a softer metal than the spark plug and will not damage it, but should be strong enough to remove any build ups.
If your spark plug has a terminal cap, check that it is fully done up. Use a pair of pliers to pinch it tight. If the cap is loose this will cause issues for connection and will give you erratic sparks.
Use you spark plug gap tool of choice to set the gap if you need too. There are the disc styles, feeler gauges and open loop styles. I like feeler gauges or the hoop wire design. These can be metric or imperial measurements depending on your choice.
Once I know the current gap by placing the correct gap setting tool into the gap, I can either open or close the gap as required. To close you can gently tap the electrode on a solid metal surface, or use T-shaped part of a special plug gap tool to close it. In order to open use the tool again and lever it upwards. If you don’t have the tool, be careful not to damage the electrodes at the bottom when trying to open the gaps.
Two different ways to gap spark plugs. Remember that when tapping the electrode at the bottom, the weight of the plug itself is enough to close the gap.
DON’T over tap it when closing the gap, little and often. Check, repeat.
The gauge or setting tool that you use, should have a slight drag on it when you pull it through the gap.
When refitting the spark plugs back into the engine always tighten the first few turns by hand first to avoid cross threading. Don’t knock the spark plug when inserting it. This could alter the spark plug gap and give you problems as described above.
If in doubt – recheck it.
Replace the spark plug boot with a very thin smear of dielectric grease to stop the rubber boot sticking to the top of the plug.
I hope that helps with an understanding of a forgotten and abused part of the engine. If not please read if you are having trouble sleeping. 🙂