There is often a myth that keeping a car covered up with a dedicated fitted breathable cover in the garage will look exactly as it did when you get it out as when you put it away. Visually that may be true, apart from dust and visible debris on the dust cover. But what about the rest of the car? Providing the environment is ideal, like humidity, temperature, sunlight and wind all should be as it was and prevention is the better path than rectification. My dehumidifier which is always on, is set to the optimum range of 55% to 60%. In addition to that I have a dedicated radiator controlled by a thermostat valve in the garage which is set at a minimum low temp to keep damp and cold away in the winter. Some call it excessive or a waste of money, but it will help protect the car. It took me while to convince the wife, but she did see the point, in the end. The garage walls are insulated along with the roller door witch has a good rubber seal to the floor to stop drafts. Even insulating the concreate with dedicated garage floor tiles on the standing area can make a big difference to that prevent cold and damp rising up from the floor causing unseen damage under your car.
Humidity and temperature swings are two of the most underestimated threats to a classic car. Even when a vehicle is stored indoors like a garage or workshop, the air around it is constantly expanding, contracting, and carrying moisture. That moisture could settle on cold metal surfaces, creating condensation, the perfect starting point for rust. Brake lines, fuel tanks, exhaust systems, and even internal engine components can begin to corrode long before you see any visible signs. High humidity will accelerate the deterioration of rubber components, causing hoses, belts, and seals to soften, swell, or crack. Over time, this could lead to leaks, poor running from split vacuum hoses, or brake servos not working correctly, failures that seem to appear out of nowhere. The longer a car sits in these type of environments the more exposure to problems. Carburettors and fuel systems suffer as moisture mixes with old petrol, forming varnish and sludge clogging jets and making cold starts a nightmare. Electrical connectors oxidise, creating intermittent faults that are notoriously difficult to trace. Even interior components aren’t safe — dashboards can crack from heat and direct sunlight, vinyl can warp or split and adhesives can fail when exposed to repeated hot‑cold cycles. If there is no air movement in the car then you are inviting mould and damp to cause havoc. I always leave my windows a little open to allow the air to move. My dehumidifier not only keeps the humidity where it should be, but it also circulates the air and gives of a certain amount of heat from the motor, so my garages never gets cold as such. The main point is to avoid the extremes in your storage location what ever that may be. At weekends I open the garage door to either potter around or clean the cars, this will give a change of air and keep things fresh.
Classic cars have a charm that modern vehicles simply can’t replicate, the raw driving feel, the analogue simplicity, the unmistakable character ageless looks and even the smell. But beneath that nostalgia lies a truth that every classic owner eventually learns: these machines need attention. Not just the occasional polish or Sunday run, but real, regular mechanical care. Ignoring the mechanical side of a classic car is one of the quickest ways to turn a cherished vehicle into a costly headache. Just because you don’t use it, doesn’t mean things don’t go wrong. For reasons explained above being just some of them.
Even if a classic looks immaculate on the inside and out, its mechanical components could still decades old. Rubber hardens and cracks, seals dry out, and metal corrodes quietly out of sight. A very dear friend of mine, who has a one of the very first 64 1/2 Mustangs once said to me “Even with all this prevention in the garage, I can hear my car rusting in the house”. These problems are especially true with some modern and cheaper after market parts. A brake hose that looks fine at a glance can balloon under pressure and fail without warning sending you straight to the scene of an accident. Fuel lines can become brittle and leak, turning a simple start‑up into a fire risk. Gearbox seals could leak meaning no drive leaving you stranded. Suspension bushes degrade slowly, transforming a once‑tight ride into something vague and unpredictable. These aren’t dramatic failures, they’re the natural result of time, temperature changes, and materials that were never designed to last half a century.
It’s easy to assume that a classic car kept tucked away in a garage is safe from harm, tyres can develop flat spots, batteries sulphate and lose capacity, and clutches can seize to flywheels, brakes can get stuck to drums or discs. Even exhaust systems rust from the inside out as condensation collects and never burns off, the rubber hangers can perish and the next bump or pothole could dislodge the hanger and your exhaust is ripped from the car in the best case, in the worse case it cause huge damage under the car. The phrase “it ran perfectly when I parked it” is often the start of a long list of repairs.
After all those horror points above, the good news is that most of these issues are preventable with regular checks and a bit of mechanical sympathy. Running the car up to temperature, exercising the brakes, and keeping fluids fresh all go a long way. Replacing ageing rubber components, before they fail is far cheaper than dealing with the damage they can cause. Above all, driving the car — even just a short, gentle run — keeps everything moving, lubricated, and healthy.
Classic cars reward the owners who look after them. A little attention now keeps the big problems at bay, preserves the car’s value (which was the main winning point to the wife for the radiator), and ensures it’s always ready for that next drive making you smile and not grimace.

Why do I mention this again? Because a scenario happened to me. I always inspect my car, when cleaning it, especially before a new car show season and take my car down to Mustang Maniac for a full on once over and MOT. I a nice day was forecast during the week and the car was taken for the first drive this year. On the first drive out, it’s always careful and steady to make sure all is well before I start the sixty mile journey to Mustang Maniac. Over the winter I always run my fuel very low so it doesn’t go off or hold moisture. To get to the Mustang Maniac yard I would need a fill up at Shell V-Power which cost me £85 to fill up. Have I mentioned that our robbing government applies 53% ‘fuel duty’ onto every litre of fuel and then add another 20% VAT (Value Added Tax) onto that initial cost after the fuel duty as well, that’s tax on a tax!
The drive down was fine, a little clunk now and again on some parts of the road, every so often a little vague on the steering. A I pulled into the yard the car was lifted straight up into the air for the underside pre MOT checks.

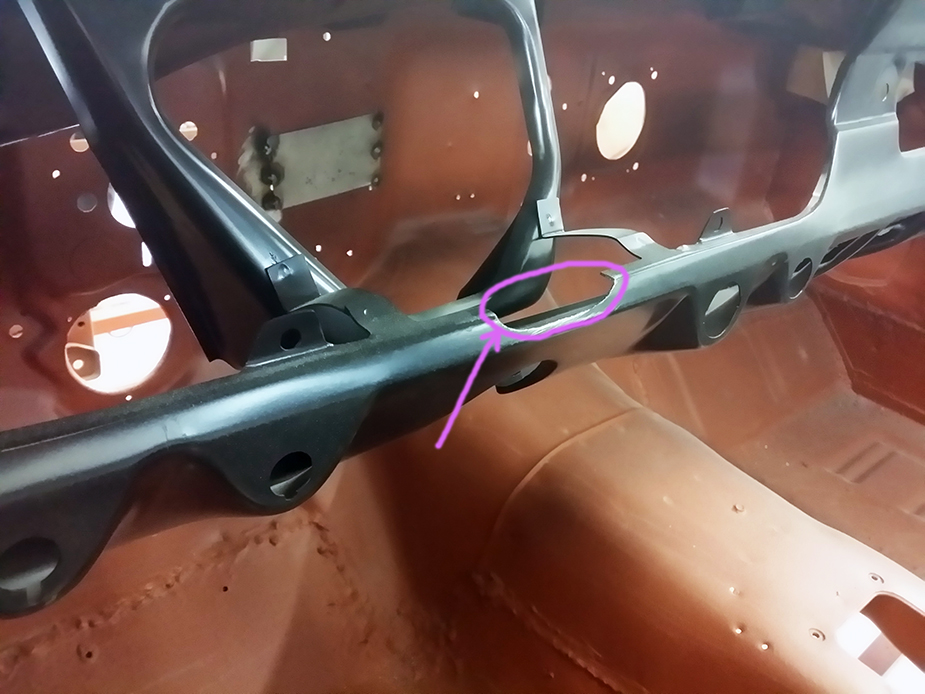
The car was now filthy underneath on arrival, Adam and Mark checked things over as I freaked out trying to clean around where they weren’t checking. Mark did make a comment, not that I can repeat his comment on a family blog, but it was along the lines of; please can you get out the way 😂 He was right though, I was getting in the way, dirt was upsetting my OCD and I had to clean the white bits and the more difficult bits to get to when the car is on the floor. A large bag of new car cleaning white towels were taken with me just for this purpose along with some degreaser and detailing products.

Meanwhile inspections moved from the back to the front of the car where Adam found some play in the lower control arm ball joint on the passenger side. It was a very short discussion to replace it. Adam returned a couple of minutes later with a new boxed one. Since being restored eleven years ago now, the car has only done 7,000 miles since then. Why this particular ball joint failed we don’t know, it has always greased and there was no reason for it to have failed, but it had. This goes a long way to prove a point that I made at the beginning, you can’t take it for granted that if it looks new and not used, the car is actually road worthy!


The lower arm separated easily and wasn’t too much of a job, this part doesn’t need a geometry reset as it can only go back in one place. The offending arm unceremoniously hanging in the wind here as the cross member had to be partially loosened to get the main bolt out.

While everything was being bolted back into place at the front, I started to work on the rear brakes. The drums came off where the shoes and drums were checked over for any unusual wear or damage. Things still looked great after a little brake cleaner and a compressed air blow through.

The rear shoes were backed off, the drums and wheels put back on. The car was be lowered to the ground onto it’s own weight so that all the wheels could be torqued up correctly before being lifted back up in the air to adjust the rear brakes properly.
After everything was adjusted I took the car for a little road test and back to the yard as the guys wanted to know all was good before they let me take a longer drive. Adam called the MOT guys to say I was on the way, a little later than expect due to the suspension fix. The MOT centre was a quick drive some fifteen miles away. I arrived and was directed straight into the garage where I handed the keys over to the MOT guys to do their thing.

The car passed the test with flying colours and I’m all set for another year of safe motoring. The car needs a proper good ol’ clean now and a service of oil and checking of fluids once again. After the MOT I called back into Mustang Maniac as I have to basically drive past it. Adam gave me an old box to put my failed control arm in as I wanted to take it apart when I get a moment which was today.
I cleaned the arm up noting there was plenty of grease about which you can see and around the top of the ball joint. The rubber was in perfect condition and not perished.


I cut the rubber off the ball joint which was still substantial and needed a few cuts all the way round to get it off.


I cleaned all the grease away to expose the top of the ball joint, nothing out of the ordinary struck me, apart from the fact it was extremely notchy and stiff.


The grease nipple was removed and I checked the grease depth with a thin screwdriver which was full of grease and fresh grease at that.


I tried to take a couple of photos to show inside where the grease can just about be seen.


I turned back to the rubber and spotted one small point, a section inside the gator was dry, no grease there at all, but there was full grease elsewhere. Very odd, you can see the dry part where I just happened to make the vertical and slanted cuts.


Reverting back to the control arm I had another up close inspection, There top of the ball joint was scared marked with the arrows on the stud at the base (left side of the pic below). To the right there are a couple of arrows that are pointing to a sharp lip which looks to have broken.

The tolerances on that side of the collar (below left) are bigger than the tolerances on the opposite side (below right).


All I can think is that perhaps I have jammed my car down a pot hole, which I don’t remember as I always drive around them. Or I have caused damage driving over a crappy field or two to park up for a show, that I do remember, frequently. I did squirt some Gibbs Brand Lubricant into the grease nipple hole and around the top of the ball joint. Letting Gibbs penetrate for a while I could start working it around which did eventually free up and was movable by hand again, but it did still feel very grindy.
The only thing I can think of is that a piece has lodge somewhere and cause a seizure that I can’t see causing the wear and the eventual failure. The movement was notchy and what felt does feel like a score mark somewhere. But I can’t really see any thing glaringly wrong with the part in the first place.
Tips for greasing the control arms.
Locate the grease fittings on the control arms, bushings and ball joints. Wipe each fitting clean before attaching the grease gun; forcing grease through a dirty fitting can push grit into the joint. Pump slowly until you see the old, dirty grease begin to purge out of the boot. That’s your signal that the cavity is full and fresh lubricant has displaced the old material. While you’re under there, look for cracked rubber boots, torn bushings, or joints that won’t take grease at all, those are signs the component may be worn or damaged.
Never over‑pressurise the joint; if you keep pumping after the boot is full, you can rupture the rubber and shorten the life of the part. Never use the wrong grease for suspension components which typically need a high‑quality chassis grease, not general‑purpose or lithium‑complex greases meant for other systems. Never grease a joint that’s clearly damaged in hopes of “quieting it down” as lubrication won’t fix a worn ball joint or bushing. It goes without saying that driving on a failing suspension component can be dangerous, potentially lethal.
_______________
Taking you back to the beginning of this post, older cars like to be driven. If these classic cars and not just American muscle, any classic car is standing for a length of time especially outside, don’t take it for granted everything is fine next time you get back in it. Always give the car a full check over before a new season starts, typically when many classic cars come out to play, or when you get the car out from any sort of storage. The annual oil change is an ideal time to climb around under the car, check the rubber bushing and grease everything. Check for oil leaks, or fluid leaks. Always check the brake fluid, transmission and radiator fluids, washer bottles etc. Take mechanical care to maintain your car and not just for the looks of it. Even with all that said, I still had a failure for no logical reason at all, as all initial inspections looked fine. Would driving my car help in this control arm failure instance? I very much doubt it, but something failed and a serious mechanical part at that. What I mentioned at he beginning is still very relevant and you really should pay attention to it and make it a best practice every year. After all that?
Bring on the first car show!