I was told about a ‘scratch hack’ many years ago that removes light scratches from car paintwork, within seconds and cost virtually nothing. Sounds to good to be true right? I’m talking about the trade (not so) secret of the commonly used product WD40. I often wondered if it was true but never had a reason to find out. If I had a problem with paint, I would correct and protect it properly.
A little about WD40 first.
I was first developed around the early 1950s by Rocket Chemicals based in California who later changed their name on the basis of their product. The name WD40 stands for Water Displacement 40(th formula). The actual formula is a trade secret and only been held in secure vault in San Diego California since 2018. The product has not been patented to this day, to do so the ingredients would have to be disclosed. So if you want to copy it you could, if you try and reverse engineered like many others have and call it a different name.
The actual product hasn’t been changed for many, many years. The product was initially developed for a company to protect the outer skins of a super delicate skin of a ballistic missile from rust and corrosion. It later went on to find a host of household uses such as lubrication, protection and cleaning when it became commercially available in the very late 1950s. I won’t go into that side of it, you only have to look at YouTube or TikTok for various household hacks, from removing sticky labels, worktops, hinges, freeing up bolts etc.
I just want to look at this product from a car detailing point of view. It can be sprayed under the car to freshen things up, stop squeaks, apply a coating prior to winter to stop door rubbers sticking, short term storage or just polish up a bit. There are other products out there can do these dedicated tasks better than WD40, but not all of them together like this versatile ‘Jack of all trades’ product can.
Now of course there will be pros and cons for this ‘hack’;
Pros
Cheap, cost of a cup of coffee
Quick to use
Instant results
Looks OK
Disguises light scratches
Forms a protection barrier
Can prevent rusting
Long shelf life
Cons
Temporary fix
Only light scratches disguised
Body shops hate it
Often used to make cars look better than they actually are
Can be messy
Oil based
It can mess detailing pads up
The fact is that if you are spraying WD40 on anything, you are spraying an oil based type of product. Like I said in the cons, it’s only a quick fix and the old scenario of the car lot salesman showing you a gleaming car gives this hack a bad name.
The opportunity I had to try this hack out was that I had to remove a couple or stuck on hard plastic sill protectors on a car. Once they were removed it had left a couple of light scratches on the paint, even with my gentle panel removal tools. They are difficult to see but they are there.
So the tip so simple; spray a little on the paint and wipe over. Nothing could be easier, you don’t even have to rub it in just spread it about a bit.
The result is a miraculous cover up so the exposed paint could be seen again without the scratches.
So, does it work then? Yes – sort of
On the deeper scratches it improves it, but it doesn’t wipe them out. On lighter scratches does.
How? It’s all down the way light is reflected from the paint. The oil settles into the scratch and makes the light ray dispersion more uniform thus it disguises the scratch or swirl. This is a similar principle to car paint glaze which is a more durable option which needs a wax to protect it. I explain this paint defect principle in much more detail here. or cut and past this to your browser: htts://onemanandhismustang.com/difference-between-waxing-polishing-and-your-paint-job/
The general rule of thumb is if you can feel the scratch with your finger nail, you have a problem. If you can’t feel the scratch then it can be buffed, glazed or hidden in one way or another.
As the WD40 is oil it will eventually disappear due to the elements if on an exposed area. If the product is rained on a lot, it will need regular applications. So, if you want to mask or ‘hide’ a light paint surface imperfection, then you could use this product on a temporary basis. If you are going to buy a car, gently feel the paint to see if there is a oily film to the surface.
Another down side is that dust can settle in the WD40 spray and stick to it, so wiping it away could introduce more problems. The reason body shops don’t like it is the fact it’s oil based and once on your hands can be transferred all over the workshop. To clean it up properly in order to spray paint anything properly, this makes it all the more time consuming.
I tend to carry a small ‘sample’ sized can for a couple of reasons;
If you get a stone chip and can’t get to fix it for a while, spray the area with the WD40 and it will form a temporary barrier until you can fully remove it later to fix the chip.
If you are suffering from damp in your distributor cap (back to old school cars now) or HT leads etc, you can spray this to disperse the water. After all that was it’s sole purpose for development.
Did you know?
To get those super smoky burnouts in Hollywood films easily, they used an application of WD40 on the tyres! Not that you should ever do that of course, as it could be frowned upon by the local law enforcement agencies. 😉
Last weekend I had the chance to use my new bit of detailing equipment. The particular item isn’t my first venture into this area of car detailing. I’m talking non-touch drying or air blow drying.
There are various methods to dry a car after a good wash and shampoo pampering;
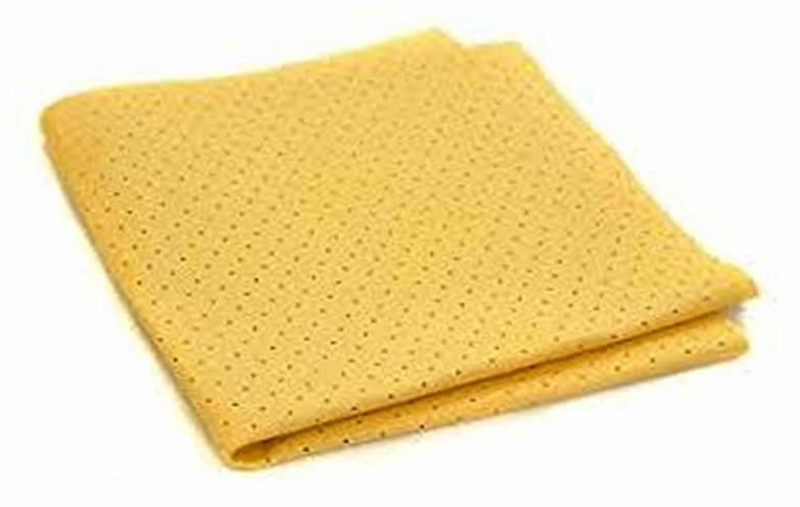
Chamois leather, old school method.
Pros:
Great for large surfaces
Very efficient at absorbing water
Only one is required to dry your entire vehicle.
Cons:
Requires water to use, not ideal for waterless eco-friendly sprays
Potential to scratch vehicle if used incorrectly
Dries hard, not as convenient to store
Synthetic Chamois Leather, modern take on old school
Pros:
Great for large surfaces and small areas
Very efficient at absorbing water
Softer than traditional chamois
Easier to store
Cons:
Needs water to work, not for waterless washing
Potential to scratch vehicle if used incorrectly
Needs regular rinsing and wringing to use
Micro Fibre Towel, modern technology
Pros:
Great for large surfaces and small areas
Super efficient at absorbing water
Comes in many various sizes
Varying levels of plushness
No need for water, ideal for waterless cleaning
Can be used inside and out
Cons:
Cheap cloths can leave small fibres
Can leave streaks
Easy to store
Air Drying, dedicated air stream (hence non touch)
Pros:
Great for large surfaces, gaps and small areas
Very efficient at drying
No water spots
Non Touch drying
Cons:
Needs electric power to work
Can blow lose debris on the car if used incorrectly
Bulky to store
Expensive
Can be noisy
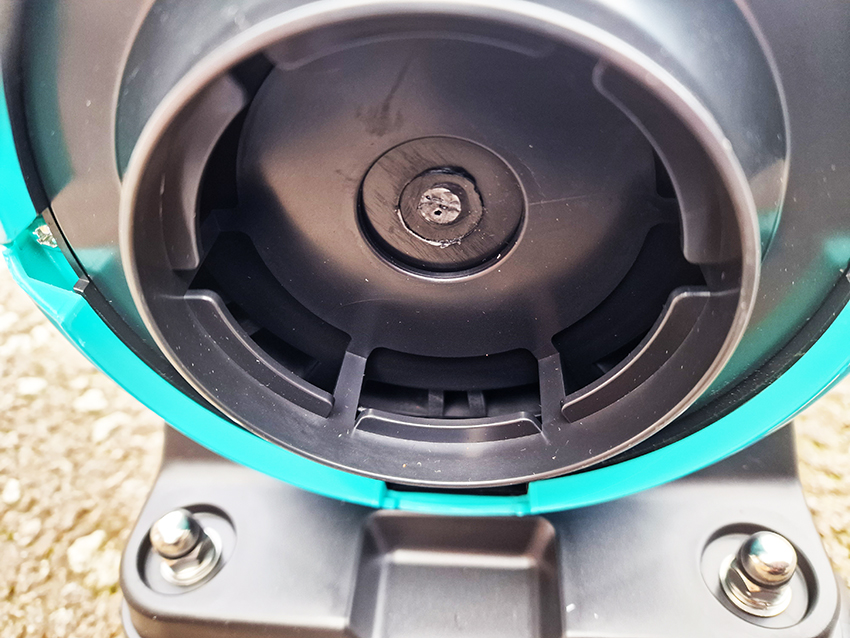
My new equipment is the Carbon Collective Air Force 1 Car Dryer Limited Edition (but only the colour) where I just completed a full in depth review. Carbon Collective are better known for their quality coatings and treatment products more than their accessories. This car drying unit of theirs is a cylinder design which is very similar principle to a follow along vacuum cleaner, but it blows air instead of sucking up dirt. The point of this unit is blow a filtered jet of air over the area to be dried. Not just a car, but anything that needs drying like; motorbike, cycle, household use, boat etc.
The forced air stream will dry the area without the need to touch the paint so it won’t cause any marks or swirls on the paint from the drying process itself, unlike a chamois or microfibre drying towel which could introduce swirls or marring. Not wanting to repeating myself too much (from the review here), there is a 5m mains cable, a generous reinforced 5m hose, adjustable air flow dial and an optional fan heated function. The base unit has lockable casters in each corner to stop or allow movement as required.
The nozzles are silicon tipped so any accidental contact with the surface being dried will not mark it. Each of the fittings has a bayonet style locking feature with a sealing ring to stop any unwanted air direction. With a maximum of seven cubic meters per minute being forced out through a small nozzle opening it needs to be securely held in place.
Perhaps the most important thing about this product is the filtration. Not one filter, but two, even though the accompanying book of words states one filter. If air is being sucked into the unit that low to the ground, then accelerated out with 900g of force, then any debris moved at that speed has the potential to be literally fired at the paint work. Think of hail stones, but on a much smaller scale. The removable filters are washable or cleaned with an air line.
Am I converted to this ‘non touch’ method? Well yes. Apart from the cost of running a 2800w motor and potentially a 600w heating element on top of that at the same time. The cost of running this for one hour (as this is published) will be approximately one British Pound per hour. Saying that when being caught out at a car show when it rains then the microfibre towel is still used of course.
I have lost count of the number of times I have gone to wax a car and found a water drip or a water spot left on the paint surface, it’s rather annoying at the best of times. This process does away with that as the air gets into the gaps and hidden areas where the water can sit. The down side is getting the equipment out, setting it up and putting it away again. Compared to taking a drying towel out the storage draws wipe over the car and put the towel in the washing basket when finished, there is more to it. But, the air drying is more thorough, providing you make it more thorough.
You will need to be careful with the air stream at the lower parts of the car not to blow loose debris around and potentially back on the car. Turning down the air force can be a real help under the wheel arches or on wheels etc. Once you master the technique is great. Probably not for the average weekend washer of the daily family car. But for a detailer this is a great addition to the detailing inventory. Not the cheapest of items, but I will get good use out of it.
I tried to film the process with hand on the phone and the other drying in the left hand video. The right hand video is just to show the force of the air from the wide opening nozzle blowing water around on the floor.
I do have another blower which is hand held MetroVac Air Force Blaster Sidekick SK1.
This is a 950w single hand held unit which has advantages and some disadvantages over the Air Force 1. I will get round to reviewing this bit of equipment very soon.
Nearly back to starting car shows again, and looking forward to that and getting some fresh air, well as much fresh air as you could get around classic car fumes! 😉
A few months ago I was approached by Jim Jeffrey from a car detailing website called World Of Shine. We got to talking about a topic that was a confusing international problem. We had some good chats and he liked my chart that I had put together in December 2019 and posted on my pages here. This was my big article explaining the actions of various dual action pads and why you need them. The DA colour comparison chart comprises of the big name manufacturers on the DA pad market. Jim asked if he could share my chart with his subscribers to which I agreed. He wrote that article called “pick A Color – Any Color” which was posted here august 7th 2022, where he referenced my chart.
To download my original PDF format of the DA Comparison Chart, click here.
Thanks to my friend over the Pond Jim for giving me a shout out.
Now that the car show season (in the UK) has now all but finished, the next few posts will be focusing on little upgrades, tweaks and a few more reviews. With that in mind, a good friend of mine Craig had just bought a new car for himself, a MK 7 Golf GTI (2.0ltr turbo in fact). He brought the car over for me to have a look at and an excuse for take it for a drive. Once he was here it was a good reason for me to have a little drive (OK thrash) around the relatively deserted roads of my village.
The car looked a bit grubby when we had finished, so we had an impromptu detail session. We got out the snow foam, Absolute Rinseless Wash, spray wax and final quick detailer.
I will be reviewing the new products we used very soon which comprised of a rather expensive sponge, spray bottle and P&S Absolute Rinseless Wash which has been making some good noises around the detailing circuits.
The finished result was pretty good for a day’s work. To do it properly we should have clayed the car first, clean slate removal of old products and layered up the waxes and protection. We didn’t have time for the full process, so we just made sure it looked clean on the way home.
No sooner had he parked up at home, it started to light rain on our hard work, but the beading was good to look at.
The only down side? Craig ate most of the donuts! 😂
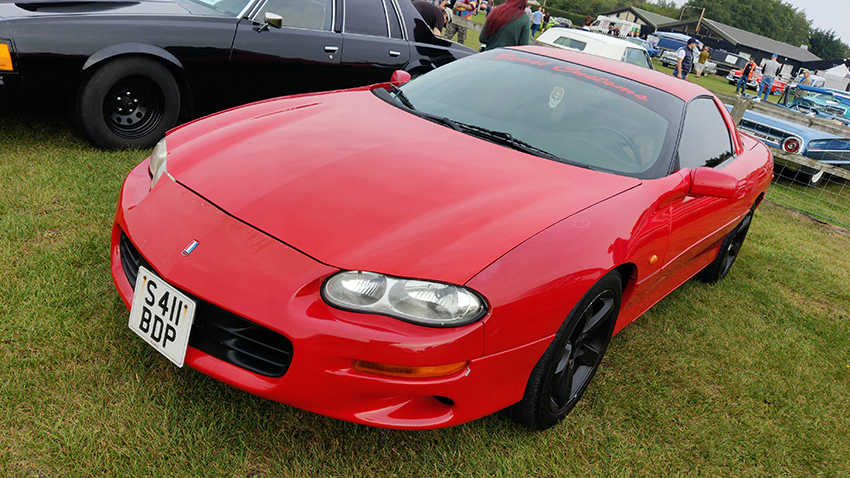
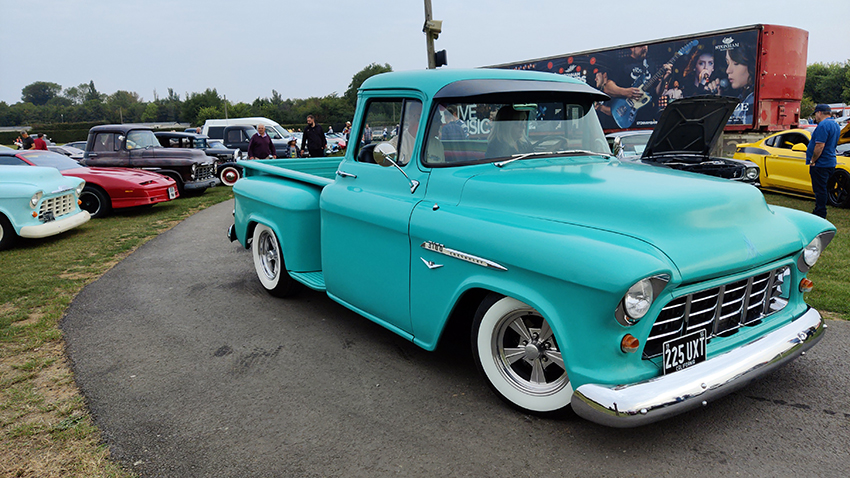
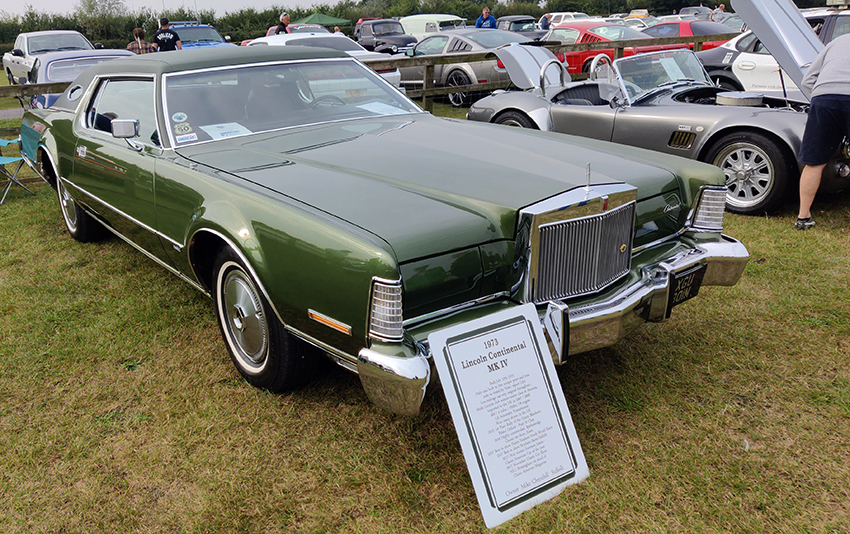
This show was held at Stonham Barns organised by the Knuckle Busters Car Club on the 19/9/2021. This particular car show was for American cars only and is usually well supported and this time around that was no exception. I arrived early and I was asked if I wanted to attend in the centre ring. Why not? Early bird gets the worm and all that. I parked up next to some stunning cars which made my car look like a Matchbox or Dinky toy!
I parked next to a massive Buick that could only be described as a ‘land barge’, such a nice car it was too. Me and the owner sat in our chairs and chatted most of the afternoon.
I decided to have a wonder round and take the pictures before the public came in.
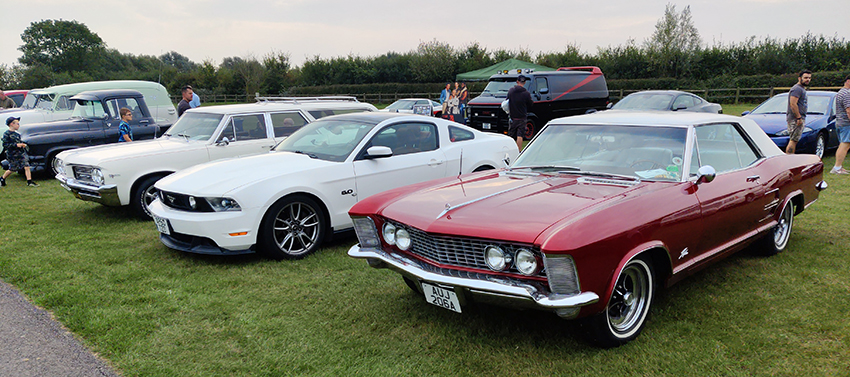
I thought I would batch the Mustangs together here, but there wasn’t as many as I thought there would have been.
A car I had seen a couple of shows earlier, but I couldn’t get that close to before. Another iconic car from Ford – the Torino. I wanted that car so bad as a little boy. My nan even knitted me a Starsky jumper. Thinking about it; I still want one!
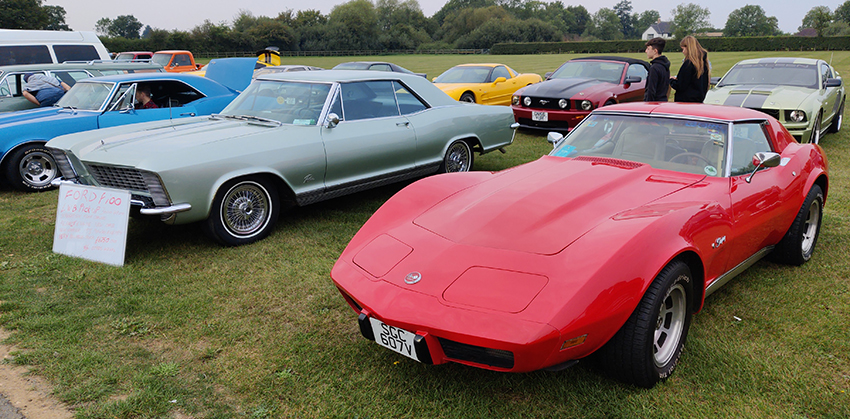
This Corvette was beautiful.
The ones next to it weren’t to shabby either.
Back to the other cars now and in no particular order.
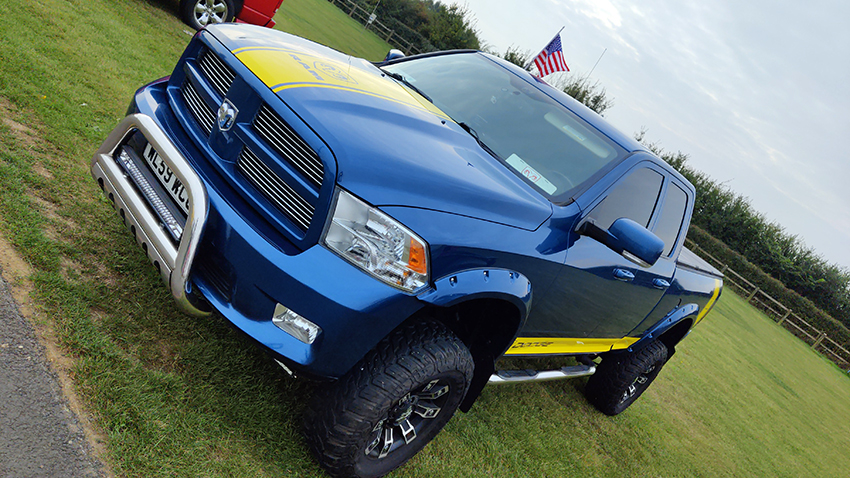
Truck Time. I was speaking to the guy who owned the Viper powered truck, he said it scared him on two levels; one the petrol it used and the other was that the truck wanted to kill him!
We have to pause and and look at what Pontiac did when they created this gorgeous and much coveted car.
And my no means least, I was also strangely drawn to the taxi as well.
Throughout the day there was music and a really good live band with plenty of 50’s rock & roll with a little dancing as well.
The day was dry and warmish and didn’t rain for a change. A great day and so much American iron I wanted to drive home. But, I could only drive one home and that was my little lady.
So that’s it, my last car show of the season and the drive home was the scenic route to make it last that bit longer. I was sad the shows were over. There are some New Years day runs, or Boxing day runs but I don’t attend them as the weather is usually bad or there is salt on the road.
When I got home the car was wiped over with a quick detailer that is carnauba infused. The chrome wheels were waxed but not buffed off, the wheels also got a squirt of Gibbs Brand into the seams to protect over the winter. The tyres given a heavy coating of tyre treatment before being put in the garage. Even though my car’s garage has a radiator to keep the frost out and a dehumidifier as well that runs day and night; the car still needs protection. I intend to get the car out over the next couple of months to give the car a polish and proper wax ready for next years shows, providing I have two clear days of dry weather to do it. The wax I use is recommended to leave on and cure as long as possible. Which in my case is overnight. The next day I will buff and shine up.
I will still be doing updates and I aim for some car detailing product reviews, so keep an eye out.
For Sale:
I have been selling a few of these ‘T Park Lock’ handles and the feedback has been good. I even sold out my first batch and now the second has arrived. I’m even throwing in a free little key ring as well now while the stock lasts. Click here to go to the For Sale page to buy one. Press to lock system and simple to fit with no modifications needed at all to your car.
It was a good year for 2021 car shows, let’s hope there is more of the same for next year. But, this is the UK after all and it rains – a lot! So I’m not gonna hold out to much hope that they will all be dry and sunny. We can live in hope though.
I have been asked a few times about snow foam when I have been to car shows. I do use it now, depending on the product and how you use it can make a nice difference or leave you bitterly disappointed. When i started out with snow foam I just didn’t get it, what was I doing wrong? Combinations of equipment and product trials I eventually managed to get results worth talking about. I decided to create a little article of my own which I hope will help and guide you through the pitfalls and hype between products, or why we even consider using it. I mean it wasn’t around fifteen years or so ago so do we need it and why?
Snow foam looks amazing from a distance and often gets a few looks when you use it. Before this step was introduced, you used to get as much car shampoo bubbles on the paint to wash it right? This cleaning process has now been separated out into two steps. The snow foam and the shampoo. We will only be dealing with the shampoo step here.
Put very simply snow foam step is there to reduce the likelihood of damage to the paint during the cleaning process, a “Pre Wash” non touch step. This snow foam process is not necessarily restricted to car detailers or professionals, but also the weekend washer.
When you wash a dirty car with a sponge or a single bucket wash, the chances are that you could introduce paint damage by microscopic particles damaging the surface of your paint as they cling to your sponge or microfibre wash mitt. The deeper the damage, the worse the paint will look. I have explained these principles in depth on another article here and how to fix them. The basics are highlighted in the picture below to show the varying degrees of damage.
Common Terminology:
Pre-wash: A treatment that helps to make contact washing your car easier and more effective.
Non Touch: Cleaning without any physical contact with the paint.
Contact Wash: Any part of the washing process that touches your paint.
Contact time: How long your cleaning solution is in contact with the dirt on your car.
Dwell Time: How long the product needs to be left in order to work its magic.
Foam Consistency: Thick snow foam clings to cars, so it has a high contact time. Watery snow foam will dribble off your car, less contact time and won’t be as effective.
Cling: The ability of the product to stick to the panels without falling off.
Dilution: Reduction of concentrate to make the correct mixture operate effectively without waste.
Canister: The container where the mixture is held.
Snow Foam lance: A special nozzle for your pressure washer that turns the snow foam liquid into a thick foam. Also referred to as Snow Cannon, Snow Gun etc.
Nozzle: The end of the lance/cannon/gun which controls the amount of product and how it applies the foam to the car.
pH neutral: A substance which is neither acidic nor alkaline but chemically neutral.
Water Spots: The marks left behind from the hard water drying out on the paint work.
We know that (contact) washing a dirty car will make it look better, but done wrong that short term cleanliness will be taken over by swirls, marring scratches etc. So before you even think about putting a wash mitt or similar cleaning item, the less debris that there is on the car, the better.
This is where ‘Snow Foam’ comes in. The snow foam is designed to cling to the paintwork, which will in turn moisten and loosen up any of the surface dirt. When you rinse and wash off the snow foam it should take the dirt and grime with it. This in theory will leave you with a much cleaner surface to clean with significantly reduced chances of damage to your car’s paint job.
The ideal scenario is a foam that will dwell on the paint for a while, then roll off the paint prior to rinsing taking the dirt with it.
How does a Snow Cannon work?
In a nut shell; the water pressure from the jet washer creates a syphon that lifts the snow foam mixture from the canister via a pipe into the pressurised water stream. The wire mesh inside the the cannon body agitates the mixture up into foam. More water the less dense the foam and will lasts longer. The nozzle is the key as to how the foam is sprayed onto the car, anything from a jet spray to a wide angle fan. These cannons can vary from £15 to £100 depending on style, fitting(s) and quality of build.
Misconceptions:
+ The thicker the foam the better.
To a degree this true, but what is the point of a great foam if it sticks to the car, but doesn’t clean it? If the snow foam is more like a bubbly water and bounces straight of the paint then again it has done no good. There is a happy medium based on the car’s requirements and is explained a little further down.
+ PH Neutral is a must.
If you start researching snow foams, at some point the chemical composition will show up. So all you really need to know is the difference between pH neutral and non-pH neutral (or alkaline) snow foams.
The pH obsession has arisen due to information propagated by self-professed experts on the internet. In actual fact, most damage to car finishes is caused by tiny particles stuck onto a road film or dirt that cause abrasive damage when being removed by washing with mitt or sponge. Thus inducing the swirls, hologram, scratching and paint wear depending on the severity of damage to the paint.
Even some manufacturers of ‘ceramics’, last stage products and waxes insist on a pH7 (neutral) shampoo or cleaners.
This intrigued me, so after a quick bit of Google research it showed me that the normal range for rain water is pH 5-6. (Look it up if you don’t believe me! ‘pH balance of rain water’.) This is one of the main reasons that your car wax/sealants tend to loose their effectiveness over time and need reapplication.
+ pH Differences
A pH neutral snow foam is generally gentler on your car’s paintwork, so it’s worth getting if your car is valuable or needs to look its best for a special occasion. This comes at a cost as heavy debris is still there.
A normal or regular alkaline snow foam isn’t quite as good for your paintwork, but it is more effective at removing dirt. However, you can easily mitigate some of the effects on your paintwork by giving your car a proper wash and wax, though, which will put a new layer of protective wax onto your car. If you have the protection on the car, the alkaline snow foam won’t remove the wax protection or touch the paint anyway. It’s certainly not a caustic mixture for your car.
The damage from a heavy alkaline product is; caustic soda (sodium hydroxide). This can dull and leave paint finishes matt and lifeless when used on a long-term basis.
Perhaps you may need two types of snow foam, regular maintenance wash for light soil using pH neutral product, and a stronger alkaline for the heavier soiling when needed.
+ You need a jet wash or pressure washer
Nope. The jet wash is not the be all and end all of the snow application to the car. Some snow foams are quite happy to be applied by a hand held pressure pumped bottle. As long as the foam product is the correct dilution, is applied to the paint and allowed to dwell before its removal – then its job is done.
+ All Snow Foam lances are the same
Nope. They come in all shapes and sizes. Some brass body, some made of cheaper metals or plastic. You get what you pay for.
Honestly, I had a Karcher cannon that could barely muster a lather no matter the product. The Autbrite snow cannon with the same mixture was an incredible difference. My only advise here is to make your choice wisely.
+ You must use Snow Foam
Well sort of. You could use some good quality shampoos at a push. But their pre-wash cleaning ability is not as good as the snow foams. Most car shampoos tend to have additives to allow slick washing and glide the cleaning applicator (mitt of sponge) over the paint and a level of protection. It’s best to get a product designed as a snow foam.
Types of Snow Foam:
Apart from the pH values as we have discussed above most snow foams are pH neutral. The main differences are the cost per litre when mixing for the dilution ratio. The cling properties which varies a great deal, their proclaimed cleaning properties, colour and the scent. Some of these scents are sublime; water melon, lemon, citrus fruits, strawberries, cherry, beer etc. Or nothing if just want a no gimmick product that does the job. I have used a few in my time:
Some have been worse than useless, some have been better than others and one is my now go to product.
Application:
Mix your snow foam as per the manufacturers recommendations. This is usually a ratio of around 1:10 or 1:20 etc. some are even 1:100.
Next attach the snow lance to the jet wash, adjust the mixtures and apply (if needed). This will take a little tweaking for the ideal balance between dilution ratio, the water pressure, size of the nozzle and the product you are using.
Different products on the same foam cannon will be very different and need further adjusting to suit.
Most of the products advise not to allow the product to dry out. The product can be affected by the Sun, warm paint, wind rain etc. Most manufacturers go on to say apply ‘in the shade’ and ‘apply to cool paint’ etc in order to mitigate the drying out process of the product.
Always start from the bottom and work up. The huge majority of debris and soiling is on the bottom half of the car. As you get to the top less show foam is needed.
Types of application.
A snow foam application will solidify into nothing eventually and slide off the car. If the snow is to thick it will fall of the car (no clinging properties) in clumps before it has had a chance to work. So, thicker is not always better. But it does look good below.
After a few minutes of dwell time it will look less impressive.
Some of the poorer week applications look half dead before they are applied and very watery. These products tend to run off and dry out very quickly.
If the product starts to dry out, there is no harm in reapplying more.
Some of the better quality products have ‘wetting’ agents in them to aid in keeping the product wet on the paint to avoid it drying out. This product application is a little thin now, but was taken after a few minutes. Although below looks less, it has in fact been doing it’s job well and was staying like this without additional applications.
Once the dwell time has elapsed, rinse of with a medium force jet wash. You can then wash the car as normal to avoid any water spots.
Results:
The results vary considerably by product. I have some before and after pics to show what it was before the application and what was there after rinsing.
Here is a very well known market leader product that has a very good cling and thick foam. But, it left a film of dirt and didn’t wash off the dirt.
Another very well known brand but is a cheaper product. Thin application, not very good cling and failed to wash of dirt. the dirt was still on their without being moistened.
A Premium brand, clings well, but failed to wash the dirt off completely. The dirt was moistened and was easier wipe off with a finger. So it did help.
This is well know brand to those in the detailing world. The foaming qualities not great and are to be desired. But when this runs of the paint it takes the dirt with it.
This is the result you want. The dirt and film is gone ready for a proper contact wash. It even cleaned some brake dust off!
Summary:
Don’t believe all the hype. The snow foam step is not a magical ‘foam the the car and it’s clean’ process. This foam step is to pre wash the car and should be treated as such. You need to manage your own snow foam expectations depending on the product. I have done a number of snow foam reviews on this website now.
I have been sceptical of the snow foam step even critical to a point. I saw it as the latest fad with no benefit to be honest. I have learned the hard way by working up the ladder. I tried the weaker brands which put a bit of foam on the car and emptied my wallet for no reason. I tried the big name brands which gave a great clinging foam but not much else. I tried premium brands which gave a good enough foam and decent moistening to the dirt. I tried the in the know ‘detailers’ brands. These later ‘detailer’ brands were by far the best performing of all the brands I have used so far.
Some brands are so much better than others to the point I haven’t even reviewed some of them, I used them up as a patio cleaner. After application of some brands, the dirt was not loosened and was still difficult to remove with a finger even after rinsing, like you shouldn’t do by the way. If the dirt is difficult to remove after the snow foam step then you are potentially going to washing a little harder to get the debris off the paint, in turn potentially introducing damage that you are trying to avoid in the first place.
If you are careful and use top quality shampoos with a two bucket method, then you can do away with this step as we have done for decades way before all this snow foam malarkey.
This snow foam step is trial and error which works for you. I have tried at least six products before I found something came close to something i could review or even partially liked. You may need to do the same, or look out for fellow detailer’s product reviews.
Eight and a half years ago, way back on October 28th 2012 I wrote my first post on my little ol’ blog. I had nothing planned other than to share with a few friends what I was getting up to and how I was getting along with my Mustang restoration. Ultimately I could look back in a few years time and take a trip down memory lane with the photos I had taken a certain points of the restoration.
Delivery of my project car 17th September 2011, before it went to Mustang Maniac where I had professional help & guidance on my restoration over the years. Those guys have become some of my best mates of mine as a result.
When I attend car shows or via my blog and emails etc. I often get asked how I clean and detail my cars;
Some of the Car Shows and photo opportunities;
I get asked how I fitted things, how I upgraded this or that, I even get asked for advice on their own restoration projects.
That got me to thinking about adding extra sections like the tools (a selection of them here), that I used on project and since use, considering that I’m just a weekend warrior with a spanner.
Products that I used to keep our daily cars clean and the Mustang fully detailed.
My merchandise I bought over the years or have been given since I started my journey with the Mustang.
I even get requests to review items, all of which I buy if I think I could use them myself. As a result of all these things, my blog has evolved into an entity of it’s own.
Fast forward a number of years to 2021 where I my little ol’ blog has reached a massive milestone. This is not intended as some bragging rights by the way, but more like myself being proud of the result. Somebody within the USA this morning 15th May 2021 made my day:
My blog has just passed 1,000,000 hits!
I am absolutely amazed to think this could ever happen, I remember getting excited about getting ten hits in one day!
I value every single one of you that has followed me or just pops in for a quick read, like or even the odd comment. I would like to say a massive “Thank You” from the very bottom of my heart.
I don’t actually get anything from my blog/website on WordPress, other than some add money that goes straight to the hosting and my domain fees. It’s sort of self sufficient in a way. If anything I’m out of pocket, but reading the comments and seeing the views more than make up for it. Hopefully I can help somebody, somewhere with something.
My first follower was Debbie Nuessle (click here for her latest venture), from across the pond. We both started blogs within a few days of each other, both revolving around our love of American Muscle cars, especially Ford Mustangs of course. We keep in touch outside of the Blog circle and have become good friends.
I have a number of followers who ‘like’ the posts I put up after even after all these years, thank you all, it means a lot to me. I have such a range of followers; a very talented and well-known Soprano opera singer; Charlotte Hoather (click here for her blog), mechanics, engineers, oil rig mover, artists, photographers, builders, wildlife photographers, fellow classic car owners, writers, product manufacturers, shops, brands, a few younger bloggers, students, world travellers, petrol heads, gear heads, car clubs, writers, novelists, journalists, teachers, photojournalists, professional bloggers, social influencers, religious followers, the list just goes on. (There is even ‘ahem’ some adult orientated content following me!) The full list makes for some amazing reading.
Just in case anybody is interested in some of the more selective stats;
I have a total of 2,700 followers, of which 871 are on WordPress, 2,300 on social media, just over 2000 on Facebook, which is not my favourite of all the platforms I must admit.
I have been visited by 199 countries and the top ten countries in order are; USA, UK, Canada, Australia, Germany, China, France, Netherlands, Finland and New Zealand.
There are stunning islands that have visited me, Mauritius, Seychelles & Maldives. Some of those Islands are so small they wouldn’t be able to fit a Mustang on them! My bucket list is to spend a few days on these islands to chill and take in some sun.
The more obscure countries with a single visit are: Burkina Faso, Falkland Islands, Kosovo, Tonga, Northern Mariana Islands.
To date I have posted 340 blogs including this one over the eight and half years I have been posting on this blog.
These figures are quite low compared to some of you mega stars out, there with you super popular blogs I know that. But for me, like I said earlier, I’m honestly humbled and grateful to every single one of you who wants to look at a blog all about one man and his Mustang!
As virtually all the car shows have cancelled or postponed this year due to the Covid-19 running riot there is a slight chance that two are still going ahead. Pre-booking has been essential and due to obvious reasons they have been over subscribed with people wanting to show their cars, or just get out for the day to look at cars. With this in mind I decided to give my little lady a check over as I always, tyres, levels, leaks etc. When I opened the hood there was a strange and a rather ‘funky’ smell. After each car show season has finished I take out my water washer bag, or colostomy bag as they are often referred to and empty it out and put it back to stop the water going bad. The reason being this is a breeding ground for bacteria, the engine bay gets hot, then cold, then hot again. The end of last year I forgot to empty it out and clean it. So, when I opened the lid on the bag it wasn’t good news.
I disconnected the bottom pipe from the bag, quickly put my finger over the drain hole and took out the bag to the drain where it was emptied out. There was some black algae in there, which needed lots of rinsing, some citrus cleaner and more rinsing in order to clean it out properly. It took a while, but in the end it ran clean and smelt a whole lot better.
The back of the bag also showed some signs of being dirty. I started to clean it and thought I would share it with you, so this is sort of a third of the way through it. I started then general wipe down with some Meguiar’s multi purpose cleaner. Spray on let it dwell, then with a brush work it into the bag. Rinse and repeat a few times.
After a few applications it came back to white again after being dried out.
The bag is now empty and waiting for a refill before the next show. I do add screen wash to the bag which stabilises the water a bit. If I have to use the screen jets I don’t want any of the mixture running onto the paint and leaving a stain which I would have to buff back out again. After all the screenwash has a mixture of chemicals in the product to cut through the dirt and grime. Also in order to help avoid water spots or marking I only use de-ionised water, it’s cheap enough and the de-ionised water is also much better for your car’s cooling as well. I always keep a litre of de-ionised water in the trunk, just in case.
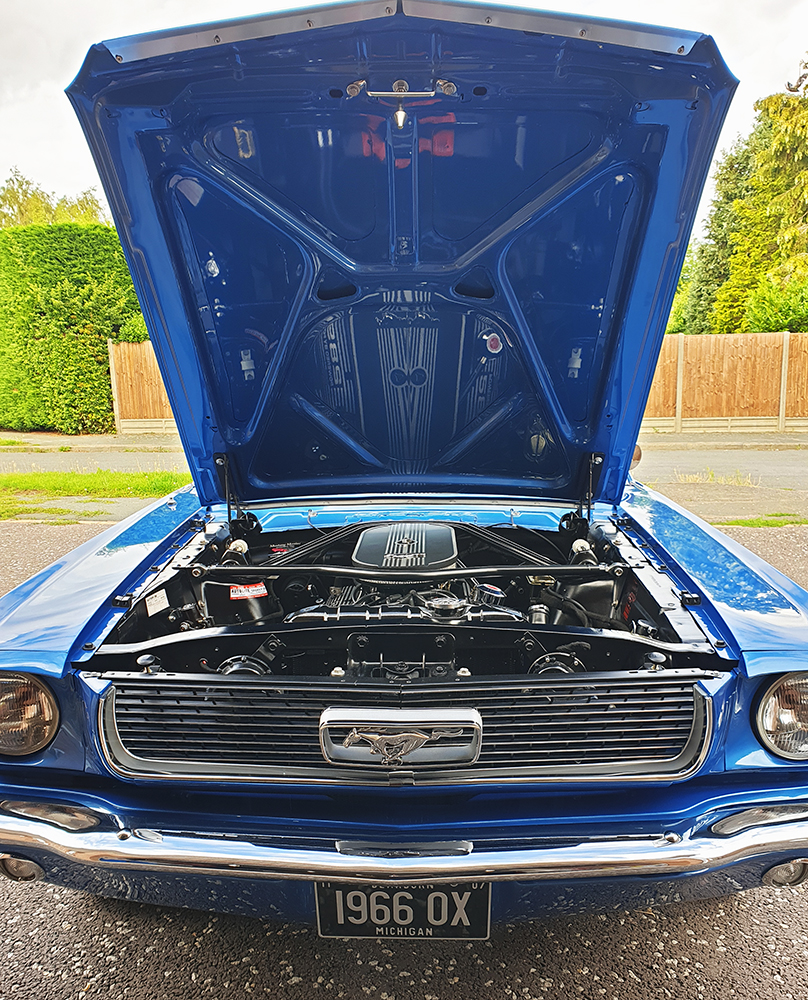
While I was waiting for the cleaners to dwell on the washer bag, I decided that my valve caps were also dirty. I didn’t realise just how bad they were. Only one of the caps here has been cleaned and waxed. Yes, I do indeed wax my valve caps too.
With the hood up I thought that the underside looked a little dull, so I waxed that as well, just because I can. I also think it’s quite a cool picture too.
What turned out to be an hour or so quick check up turned into a few hours of cleaning. Not that I mind really, just a bit disappointed with myself that I forgot to do it. It must be my age 🙁
Will I get to a car show this year? Will mother nature be cruel and rain on the day that one of the only car shows is due to take place next Sunday? Watch this space and find out!
During this lockdown I have been asked a number of questions about car detailing, which surprised me a little as everything I know is self taught, trial and error, research with an empty wallet as a result. I love detailing the Mustang so the questions are a pleasure if i know the answer. These questions are probably being asked because like me they can’t get to car shows, so they clean their cherished vehicles instead. I had been working on a little something a while ago and decided to finish it off for todays little article.
So what is the question that is often asked, but never really answered; is there a difference between big name brands and the much more expensive luxury hand poured waxes?
Just quickly before I answer the questions; a little while ago I had done a comparison test of ten products from the top manufacturers to find out what is the best. The results were not quite what I expected to be honest. You can read my comparison test here.
This article will not be a repeat of that testing, but more of an explanation why some waxes cost more than others due to their ingredients, performance, processes and of course that all important name on the tin, bottle, spray pot or what ever you bought. There’s even an amount of snobbery if should be so bold to say that.
I must state that trying to find out exactly what’s inside the products from anybody is a closely guarded secret, for obvious reasons. Although I will not be mentioning brand names, as in who has what in which product, the following information is from various sources that I have managed to find out about and collate myself with phone calls and research. I may not be 100% accurate, but it all makes perfect sense in a bigger picture.
Firstly a little about the main product used for car waxes; Carnauba.
Most car products contain some sort of carnauba percentage within their products, unless it’s fully synthetic of course.
Carnauba is also known as Brazilian wax and palm wax. Carnauba is a wax from the leaves of the palm Copernicia prunifera, a plant native to and only grown in the north eastern Brazilian states of Piauí, Ceará, Maranhão, Bahia, and Rio Grande do Norte.
Carnauba is also known as the “queen of waxes” when in its pure state it usually comes in the form of hard yellow-brown flakes.
The wax is obtained from the leaves of the carnauba palm by collecting and drying them, beating them to loosen the wax, then refining and bleaching the wax. It’s also used as a food additive, its ‘E’ number is E903.
Fact 1: Did you know that raw Carnauba can be harder than concreate.
Fact 2: Carnauba is used in many other products such as; candy (yes you can eat it, but the body can’t digest it), medication coatings to aid swallowing, dental floss, hair crème, leather to aid in waterproofness and is also used in explosives like TNT. For the ladies carnauba is used in many cosmetics formulas where it is used in eyeliner, mascara, eye shadow, foundation, deodorant, soap, to thicken lipstick, various skin care preparations, sun care preparations, etc. It is also used to make cutler’s resin and adhesive.
Fact 3: Carnauba wax is sold in several grades, labelled as; T1, T3, and T4, depending on the purity level. Purification is accomplished by filtration, centrifugation, and bleaching or not as the case may be.
Fact 4: It is practically insoluble in water, soluble by heating in ethyl acetate and in xylene, and practically insoluble in ethyl alcohol. (More on this as a percentage in the base carrier notes later.)
Fact 5: Carnauba’s Melting point is 82–86 °C (180–187 °F), among the highest of the natural waxes, considerably higher than beeswax which is 62–64 °C.
Fact 6: There is no synthetic equivalent for carnauba.
So to have a product based on say half carnauba, it would be incredibly hard to apply. Carnauba needs to be reapplied due to the natural product. The synthetic wax products have a longevity advantage and will adhere to the surface better, due to the chemicals designed just for that job. In fact it would be virtually impossible to have 100% carnauba product.
Big Brand Shop Wax.
Most of these products are price based and to keep the cost down there is one main ‘base’ ingredient. This carrier (base) is petroleum based usually Kerosene or paraffin or a combination of both. (I will just call it kerosene from now on). Other chemicals are added to the ‘base carrier’ in order to make it pliable, UV protecting agents, spreadable and even maintain a shelf life. Ever noticed that old wax tend to dry out and crack? The quickest way to tell the product is kerosene based is the smell. Some have that quite distinctive petroleum based smell, but most of the time that potent smell of paraffin, kerosene or aviation fuel or heating oils, an additive is used to disguise that base smell and make the fragrance much more appealing to the user, such as vanilla, apples, mint, roses, coffee or chocolate etc. What ever works best for various manufacturers. Often the fragrances are used to sell the product, but in actual fact the artificial fragrance is a disguise. How’s that for marketing?
Percentages of the product;
Most of the time base carrier tends to be around 70% (maybe more maybe less), and the rest made up with the actual performing ingredients for the product. For the majority of time the remaining 30% can be made up of Carnauba, beeswax, silicon, acrylic additives, cleaners etc. Now this is where things go a little bit fuzzy and grey areas appear should we say. The remaining 30% could be made up of 50% carnauba. Now that carnauba 50% is of the remaining 30% which will leave a remaining 15% for other additives which I will get to in a moment. The label stating that it has 50% or 54% Carnauba and so on for the carnauba content is not necessarily 50% of the total product by volume! In other words a 200g tin of product is not necessarily 100g of carnauba. But, this is open to interpretation should we say. What is the “50%” actually of within the product? Is that 50% of the total of waxes used with the other 50% being beeswax for example?
The remaining percentages can be beeswax, or silicon or microscopic aluminium particles for cleaner pastes, colourings, fragrances etc. Messing around with the mixture’s formula will obviously give different properties and products. The remaining percentage apart from the ‘base’ could then be made into a synthetic formula if no carnauba is used, replaced with the silicon content which could be increased, dyes for the wax, maybe fillers to hide minor swirl marks.
To make the liquid version of the product (see ‘Fact 4’ above), the base needs to be blended with other chemicals to make it pourable as you would expect. The original 70% may now be 40% / 30% mix of kerosene / ethyl acetate for example, or what ever the formula mixture requires. However, the carnauba content will still be the same as in the paste equivalent to keep the product performance the same. In fact Meguiar’s told me there is “no difference between their wax paste and liquid variation of the same product”. By pure definition there may not be a difference with the product ingredients formula as such, but the base carrier has to be different as one is a paste and the other is a liquid or crème as they prefer to call it.
Application;
The application from a tin is fine application to spread thinly. The main reason being the chance for the base to evaporate and leave the product behind on the paint to do its job. This evaporation is also known as the “flash point”. The flash point could be speeded up or slowed down depending on the requirements of the product. The haze or white misting of the product is what is left after the evaporation or flash point. In order to check the product has ‘cured’, or ready for buffing is the wipe of a finger across the product technique. If nothing is left behind then the product can be buffed to a shine removing the haze which in turn leaves the carnauba behind, which will leave behind the gloss shine you want.
Have you noticed that if you apply heavy layers of wax onto the paint it becomes a nightmare to remove it? This is due to the fact the base is unable to evaporate properly and you end up pushing around the base kerosene with the buffing cloth which will cause drag on the cloth. The principle is simple; the smoother and even layer the product can be applied, the better light will reflect from the paint surface, giving a better finish, impression of depth and overall clean look.
Synthetic blends.
These are predominantly more silicon based still using the carrier base which also gives a great shine and various additives to make the product bond to the paint. There is also a growing trend to use ceramic hybrids which provide exceptional hydrophobic properties and some nice gloss. The principles are the same for the base carrier, but obviously the formulas are heavily altered to make sure the ceramic, silicones and base carriers all stick together. Notice how you have to shake the product as they separate out when left standing?
Price;
The cost of the base carrier is much more affordable than the high end products (which I will get into later). The variations of the remaining product such as scent, carnauba content, colourings, fillers, cleaning agents, gloss enhancers, silicon etc. will all determine the cost of the raw materials. I am not including the marketing or the R & D in this, just the basic ingredient costs.
The better the quality of carnauba T1 or T3 etc. has the overall bearing on the costs.
Premium Waxes
These products can vary in costs wildly, from a reasonable £50 to £1,000 and more. The main difference here is that these products are naturally occurring oils base. The carrier base oil maybe something like melon oil or a coconut oil, maybe a mixture of both. Here is a view of natural Kalahari melon oil in the top picture and raw coconut oil in the picture below.
The remaining ingredients are then mixed into the base oil product for its desired results, gloss, filler, longevity etc. The most basic of base blend carrier of a premium ‘wax’ can be made from three base oils. The more complex blends having a formula of around twenty to thirty five ingredients.
To find out what’s in these products is very difficult due to the secrecy involved. However, I have it on good authority that these premium hand blended car waxes also have a lot in common with the beauty industry as well.
Carnauba has a naturally sweet smell, and it can be said that candy and carnauba smell similar.
Application:
You will notice immediately when you open these products that they feel very different. The wax feels greasy as you would expect from an oil and they smell very different. Very little fragrance is used unless a particular oil doesn’t smell to good, but could be great for reflection or a filler for example. Some oils when blended can thicken the formula and add shelf life or natural UV filters.
Again application is very much ‘little and often’, the more purest of waxes are almost clear on application and can only really be seen when the light catches the applied product on the surface of the panel. It’s sometimes recommended to use these waxes when they are warmed up slightly in the sun for a little while, which will allow softening of the wax and oils to aid in ease of application. These premium waxes can feel like spreading a soft butter with very little effort. The main difference between these natural products and petroleum based product is the ‘flash point’. The premium waxes and oils as such don’t tend to evaporate leaving the product behind in a haze. In fact the applied product is the majority of the product you buff to a shine. Again carnauba can be treated, reduced, added to or thinned out maybe, whatever the specification for the product needs to do in order to achieve the consistency and required formulas. I have been told (from my very reliable source), that there are better oil combinations for gloss than just carnauba alone. The down side is they are extremely difficult to harvest and cultivate and a single fluid ounce can be extremely expensive, much more than any precious metal comparison.
The flash point of the premium waxes could by design be a little carrier evaporation. So in theory, the longer these premium waxes are left on the car to ‘cure’ and bond to the paint, the more time they have to settle into the microscopic pits and troughs to form a smooth even barrier. It’s recommended to leave these premium waxes to cure for at least an hour. If you can apply in the morning and remove in the evening that would be ideal, or even overnight. However this may not be ideal depending on atmospheric conditions with dust and pollen flying around.
Percentages:
The carnauba used for the hand blended product tends to be the top percentage of the T1 classification for raw carnauba. filtering and decontamination is the highest priority as is the quality control. As I mentioned above the product you apply is the product that is applied to the paint, as there is very little if any flash point. So if for argument sake it is noted that the carnauba content is 30%, that is still potentially double that of the shop brands by volume in the example I gave above. Other ingredients could be added to make the oils last longer on the paintwork, hydrophobic properties, gloss, wetness, warmth of colour, or the other way around to make the exceptional gloss for car shows, but it may not last very long. So a balance is often dialled into the mix for the blend depending on the market it’s aimed at.
Some small fragrances like Jasmin can be used, just for the user’s experience or perhaps just to add a bespoke brand product fragrance.
For something extra during a hand blend there is the option to add some random ingredients such as gold or silver particles to give that glittery look. Some additives are used which can enhance the metallic fleck in paintwork.
Price:
The raw materials being a natural product, and only found or created in very small quantities drive the cost of these products. Some of the ingredients are very rare and sometimes unavailable for what ever reason maybe seasonal etc. The oils used tend to be super filtered and again the best of the best purest oils used.
Due to the availability and quantities of a number of the ingredients, some hand blenders make extremely limited batches or bespoke “pours” to order. In fact some of these top branded waxes are only made in a single 200g batch per year.
Additional points for waxes:
No mater what you choose the waxes are better when they are layered. This is especially true for the premium hand blended waxes, but the whole process of layering a premium wax and curing can take a long time for the reasons I mentioned above.
If you have a great quality paint job, and use the cheaper market brands the wax could in fact reduce the gloss refraction of your paint. Just as you can’t make rubbish paintwork glow with premium wax, but you will protect it.
So the fact of the matter is that most of the time, off the shelf or big name brand products are more than capable of doing their intended job. A great shine and longevity to protect the paint finish and there isn’t much to choose between them as I found out.
However, if you want to use the best of the best it’s all in the prep work. Cleaning, decontamination, correction, sealer and then the wax, then a couple more wax layers to get the very best results. Big name products tend to do most of the hard work for you, especially the cleaner waxes or the all in one products from multiple suppliers.
When paying big money for a top quality hand blended product, you may be disappointed if you don’t put in the prep work and blame the wax, it about the time and effort to get the rewards.
Is there a difference apart form the obvious price banding? Well yes, I have noticed the difference after a single application of a hand blend. The cost is the downside, but the results are visible and from my point of view, the money is worth it. I enjoy the whole car detailing thing so I want results from my products I use.
Conclusion:
For a daily run around, then big name products are perfectly acceptable. Even some hand blends made with predominantly silicon can be used for a daily. But if you have a show car, classic car or something you cherish, then perhaps treat yourself to some quality hand blended products. Work out what you want from your wax, gloss, beading, protection etc. before making your purchase.
I hope that answers some of the questions, and I learnt a bit from the research as well.
So here I am under government instructions to stay at home to stem the spread of the Covid19, as is the rest of the country. Some are taking this enforced lockdown more seriously than others I might add. All the car shows I had lined up to go to and have been looking forward to have been cancelled, I can accept that if it’s short term, as long as I can at least get a few in before the end of the year. But what can you do in the mean time? To while away the time I have just finished my mini project which I was going to make last when I have a little time over the weekends. Now I have more time than I actually planned for. So not only have I completed my project, I have written about it too. You will be pleased to know that it’s Mustang related of course, but in the form of Lego. So if you were wondering is it worth it and what’s involved let me explain;
The Sales Pitch from : Lego
Discover the magic of an iconic 1960s American muscle car with the LEGO® Creator Ford Mustang, featuring dark-blue bodywork with white racing stripes, bonnet scoop, printed mustang grille badge, GT emblems and 5-spoke rims with road-gripping tires. Developed with input from Ford, this authentic replica comes with optional add-ons for customization, including a selection of license plates, supercharger, rear ducktail spoiler, beefy exhaust pipes, front chin spoiler and a nitrous oxide tank. You can even adjust the lift of the rear axle for an extra-mean look! Remove the roof panel or open the doors and you have access to the detailed interior with handsome seats, radio, working steering and a mid-console gearshift. Store items in the trunk or lift the hood to reveal a detailed big block 390 V8 engine with battery, hoses and air filter detailing. This advanced building set has been designed to provide a challenging and rewarding building experience full of nostalgia and makes a great centerpiece for the home or office.
– Authentic replica of a 1960s Ford Mustang featuring dark-blue bodywork with white racing stripes, air scoop, 5-spoke rims with road-gripping tires, and a selection customization add-ons.
– Open the doors or remove the roof panel to access the detailed interior with handsome seats, radio, mid-console gearshift and working steering.
– Open the trunk to store items and lift the hood to reveal a detailed Ford Mustang V8 engine with battery, hoses and air filter.
– Includes a printed mustang grille badge and 2 GT emblems.
– Customize the Ford Mustang with the included supercharger, rear ducktail spoiler, beefy exhaust pipes, front chin spoiler and a nitrous oxide tank.
– Choose from a selection of license plates.
– Lift the hood to check out the realistic engine detailing.
– Adjust the lift of the rear axle for a real mean look!
– New-for-March-2019 special elements include 5-spoke rims, 2×8 brick with bow, 1×3 mustang logo tile, 2×4 bow with ‘GT’ Emblem.
Measures over 3” (10cm) high, 13” (34cm) long and 5” (14cm) wide.
You get a big box and a lot of smaller plastic bags inside, an instruction manual and a sticker sheet.
What’s In The Box?
You get eleven plastic bags of parts although they are labelled as one to six with all but bag five having a smaller bag with the same number. A total of 1471 parts for you to try and sort out.
TIP:
Don’t open all the bags at once, only open what you need!
Instructions:
The instruction book starts with a brief background to Ford and the Mustang with time lines. A nice little addition it must be said.
The start of the instructions tells you which packets to use for which section build.
The instructions are all diagram based with the parts you need counted out and shown to you before assembly. Where the similar looking parts and colours are used the instructions has a 1:1 check to make sure you get the correct part. Some of the differences are very subtle.
Building the Model
This is the first time I have touched Lego in about forty five years or so. Oh how it’s moved on. The tolerances are still perfect, things fit together and don’t fall apart. A huge leap forward to building cars and houses when I first played with it and stood on the bricks!
The hours just rush by when building this. I challenge anybody to spend only what they think is an hour doing a build without anything to tell you the time. When you think it’s been an hour it’s a lot more than that. I found it addictive to do a page, then think ‘I will quickly do that bit as well’, it draws you in.
You start at the back of the car building the suspension, lots of little cogs seem to be placed for no apparent reason, then a few pages later it suddenly comes together. The sense of achievement is well thought out and makes you want to come back for more.
I found it easier to get all the parts I would be using for that little build located into an area to save looking for the parts as I went along, which I found could delay my build of that little section. Find it, collate it, then build it and repeat. No matter how you do it, the whole process is enjoyable. It actually started to upset my OCD in the end and I had to line the bits up I was about to use and separate into little bub piles of parts.
Next you move to the middle of the car for the transmission tunnel, adding the gear shift, radio and dials to the bricks. Parts seem to be built modular style then applied to the overall model itself.
Steering and engine next, considering the level of detail in this model I found my first grump. The engine only has four spark plug leads. They could of made it eight and just gave it that little bit extra detail.
Nice detail touches on the engine due to the name and the oil cap etc.
Building the body work is interesting how it comes together.
The door hinges caught me out as I had a little bit round the wrong way. The supplied brick separating tool is great and saves digging your fingernails between the bricks.
The design of the model has taken a lot into account for the assembly. They get you to place some round white bricks under the front corners of the car. When you press the bricks onto the model, these corner blocks means that it doesn’t flex or come apart when you add the little sub sections of build. When the car is finished the round white bricks are then removed, fitted together to make the NOS bottle for the trunk, providing you want that of course. How cool is that to reuse bricks in order to make your build journey enjoyable?
Just like restoring a real car, seeing the seats go in and the rear ‘glass’ starts to show the model is nearing completion. The hood offers the option for the stock scoop look or the opening for the super charger. It doesn’t matter if you change your mind later, it only takes around five seconds to swap it over.
The roof is designed to be a single section so it’s easy to remove and see the detail inside the model.
The other options for the model are the side pipes, front spoiler, rear spoiler and NOS bottle.
The completed model looks just as mean as the real thing.
I mentioned earlier about the two engine options; the standard or the hot rod version. The super charger will poke out the opening in the hood, or use the stock pan and the scoop. I built both just because I could and can swap them as I want.
The Super charger option works well and looks in proportion to the rest of the car.
The underside of the model shows the level of detail you can’t see, it also allows access to the thumb adjustable wheel to raise up the back of the car’s stance.
The completed model looks quality and withstands being handled without falling apart.
There is a third party option to add LED lights to the model. It does involve some disassembly, but the instructions and video show you how to do that and only take fifteen minutes or so to upgrade. If you want your car to be on show with the lights then it could be worth fitting that kit at the same time to save a bit of hassle later.
Results:
An amazing model and sits nicely with my other model. I need to get a little case for this one as well I think
It was a joy to make, and is a pleasure to look at. The parts are real top quality as you expect from genuine Lego kits, everything just works together. I had no missing parts and everything was there.
Rating: 9 out 10
An excellent model as I said, but there was just the number of spark plug wires that let the detail aspect down a bit as a model for me.
The instructions are very good indeed and well paced, the printing was fine and clear. The colour definition between the lighter coloured parts could be confusing and I would liked to have seen a bit more colour definition. Those are the only two reasons I marked it down.
Ease of use – 8 out 10
Finish – 10 out 10
Conclusion:
A lot of money for a Lego kit, but I was impressed. On the other hand you do get a lot of good quality model for that money. The price may put this kit out of reach for many to buy and build. As with all things Lego the price seems to stay put and not vary much.
The age range to start this is suggested at 16+ which I personally think is a little harsh, perhaps a petrol headed 14 year old into cars would like it, 15 years old on should be fine. Sometimes the small fingers do help, rather than my big hands getting in the way. This build will keep you quiet for a good few hours either as a young adult or a middle aged man like me.
The instructions take you on a journey that you’re not aware of, and completing each little bit leads gives you a sense of achievement enough to make you want to complete the next section. The Lego look with the little bumps and strange lines works well on the model and certainly doesn’t detract from the over all look. You can see it’s Lego and will appreciate that somebody has gone to good lengths to complete it and enjoyed it at the same time.
When it was finished I was a bit gutted that I didn’t have any more to build to be honest.
Would I recommend it? Yes. But, it’s expensive.
So there you have it, a good many hours spent working on a Mustang, all be it a much smaller, modular version of the real thing. I will be writing some more car detailing reviews soon, so keep an eye out for those. If I can’t drive my my car at least I can still clean it, even though it’s already clean. It also keeps me out of the way being indoors with the wife. The more I get under her feet the more she will find me “jobs” to do. She is trying to teach me to cook as well, me and kitchens don’t go well it has to be said. Yet when I try and get her to clean, polish, wax and detail her own car, the same levels of (non) enthusiasm I showed to cooking is reciprocated and more.
I do know that my time is already being allocated to redecorating the house, even though it did some of it just over a year ago. I have spotted the delivery of a few large tins of paint. So I need to keep busy, keep scarce in order to put off the the job that I seriously detest – decorating.
I think I need to get another model though to keep me quiet in these unprecedented times of forced isolation. Or I may end up cleaning walls and applying paint rather than applying extra layers of top quality wax to my pride and joy. Who am trying to kid? It’s not if if decorate, it’s a case of when!
During the last quarter of last year, the UK had a few nice days of sunshine and as I had a few days off work owing to me, I decided to use my holiday up. That time was put to good use and completed a little project I wanted to try for myself. It’s often done on YouTube, but not to this degree, I think.
There are often a few car cleaning products compared on YouTube channels, but not ten side by side, with the same testing criteria by the looks of it. When I say “Top Branded”, I mean top manufacturers and their best selling products for normal weekend washing warriors on the street. Those of us who like the best products that work and at reasonable prices using traditional waxes, not the latest in thing of ‘Hybrid’ or ‘Ceramic’ waxes. Lets face it, there are some truly great products on the market at the moment, some of which are even essentials of my own cleaning routines, still. To put this into context there are waxes out there that are expensive for expensive sake, like Swizöl International’s Divine costing £2,150, Brough & Howarth’s Definitive Wax Marble costing £24,000, Zymol Vintage Glaze costing £2,400 or The Ultimate Shine costing an insane £65,000 which can be seen here: http://www.performancemotorcare.com/car-cleaning-product-news/worlds-most-expensive-car-wax/1808
However, there has been (a strong) rumour that the ‘Ultimate Shine’ wax itself is actually made by Mitchell & King in Scotland. I can’t verify this, but can only state what I have read so far. The original mix (allegedly) sold by M & K is called Gold Rush Rally at £75 a pot which is a mere 0.11% of the price! This brings me back to my point, although these ten waxes are (mostly) affordable and will last a good number of applications, they are not in that stupid silly money league. However there is an in-between level of Luxury car waxes such as Swissvax Crystal Rock at £300, BMD Prometheus £120, Auto Finesse Desire at £120 and Mitchell & King’s top of the range wax ‘Lily’ around £600 where only One pot is made a year, or anything in between from M&K for a comprehensive range of waxes between £45 to £600.
I will be reviewing Mitchell & King’s ‘Lily’ in a very special review coming soon. This was purchased with my wife’s very own money for a special Christmas gift. Before anybody asks – No, I’m not on commission or paid by them.
If you can afford those crazy sort of prices I suspect you will get somebody else to clean the car for you. I’m guessing most of those super high end waxes are being applied to Veyron’s, Ferraris or any other super or hyper car where money is no object. Then there is the other end where Poundland stores sell car shampoo for £1. Pure logic dictates that there has to be a difference right? But somewhere in the middle, there is a sweet spot and that’s these sort of products I have reviewed here.
Anyway, back to these standard off the shelf and top selling waxes, I have been very happy with most of these waxes and will continue to use them on my daily cars. Some do a great job and perform well after application. That’s why I really wanted to compare these particular mainstream products. Picking the best of the best that I like, then at a later date this summer step up to the ‘Real Luxury’ car wax to see the real differences, if any. But a couple of these waxes are getting close to treading on the toes of the ‘Luxury wax’ end of the market; Dat Wax and Illusion based on their cost to volume ratio. The scores I have given in the past to some of these products I stand by. At the time I didn’t know any better or had anything else better to compare them against until now that is.
Costs:
Multiple products which varied from a very reasonable £12 to a eye watering £75. All these products I purchased myself, no sponsorship to skew reviews. These are my own thoughts and findings for the products with my own hard earned cash I parted with for each of them.
Meguiar’s :
Gold Class paste £21 for 311g click here for individual review
Ultimate Wax Paste £40 for 311g click here for individual review
Mirror Bright Polish Wax £23 for 226g click here for individual review
Nxt Gen liquid Wax 2.0 £26 for 532ml
Auto Finesse :
Glisten £12 for 500ml
Illusion Show Wax £75 for 150g click here for individual review
Chemical Guys :
Butter Wet Wax £23 for 473ml
Cherry Dripping Wet wax £23 for 473ml click here for individual review
Instawax+ £16 for 473ml click here for individual review
The full video of this test can be found on my YouTube channel orherefor the shortcut or paste the link to YouTube. It’s easier to see what is going on rather than read about it. The video lasts for thirty two mins or so and has be trying to film, commentate, wax and buff all at the same time. I think I pulled it off after a bit of editing.
I have reviewed many products for detailing, especially waxes and quick detailers. Some have been rated 10 out of 10 by me when I tested them. Which at the time was correct as I used the product in isolation. However, there are always those nagging thoughts in my mind; what about side by side comparisons? Are the expensive waxes worth it? Can you tell the difference? I aim to answer these questions the best I can.
When you apply a wax on it’s own you can only gauge by what you are working with, application may be great and buffing at the time. But, you forget how others perform that you had previously used or reviewed.
So; I got my favourite waxes out and decided to compare them. That’s five hard paste waxes – old school and my preferred option. Then five soft or liquid waxes of similar products not made in a wax form.
The top three big boys are Meguiar’s, Chemical Guys, Auto finesse and a wild card of Dat Wax.
There are only really three actual ‘hard’ paste waxes which are the Meguair’s trio, Gold Class, Ultimate and Mirror Bright Polishing Paste Wax (made by Meguiar’s). The Auto Finesse Illusion and the Dat Wax are both very soft butter texture type waxes not quite liquid, but not a hard paste in comparison either.
The Sales Pitch(s):
These are found under each of the reviews I have done to date. See the links above. I still have a proper Glisten review to do and my latest purchase of the Butter Wet Wax.
Each of these products claims to have the best shine possible and protection, but they can’t all be right can they?
Instructions:
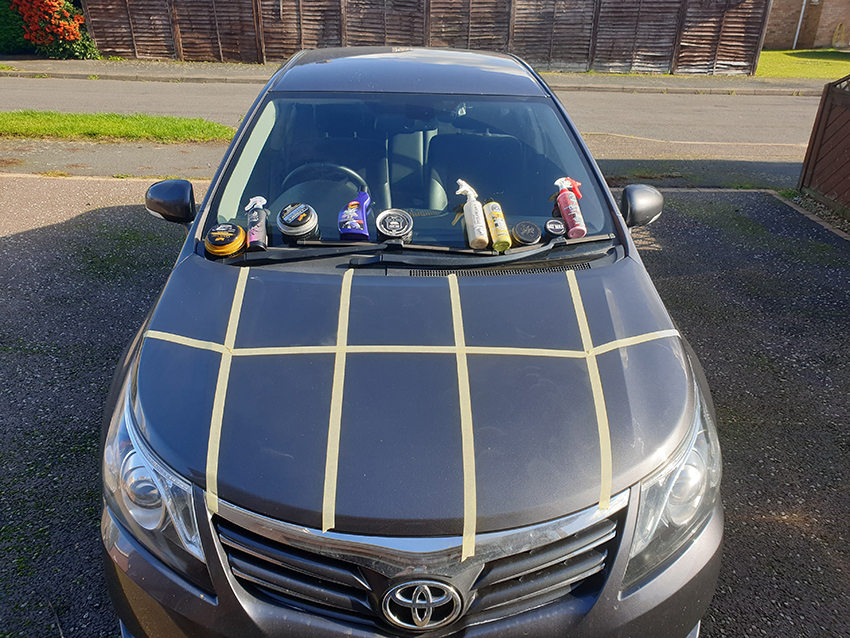
The instructions were followed on the tins and bottles of each product. The donor hood was my 2014 Toyota Avensis in a metallic grey. I divided the hood into roughly ten even sections via some masking tape. The day was overcast and sunny, but not enough to make the metalwork hot to the touch.
The top five sections were for the hard waxes, and the bottom five sections were for the soft waxes.
Top; left to right – Meguiar’s Gold Class, Meguiar’s Ultimate, Mirror Bright Polish wax, Auto Finesse Illusion, Dat Wax.
Bottom; left to right – Auto Finesse Glisten, Meguiar’s NXT Gen 2.0, Chemical Guys InstaWax+, Chemical Guys Butter Wet Wax, Chemical Guys Cherry Dripping Wet Wax.
Application:
The hood was first given a wipe down with quick detailer to get the light dirt off.
The hood was then clayed with Auto Finesse clay bar and a Megs Quick Detailer, not the greatest detailer it has to be said, it’s recommended by Meg’s as a clay lubrication product as well.
The hood was then given a good spraying with 99.9% Isopropyl Alcohol to remove anything left, which was quite a lot based on the clean white 100% cotton cloth.
My fingers dragged and squeaked across the paint, I knew then it was clean. The hood was the taped up ready to apply the products.
Each Product
Rather than going into pages and pages of what I did and how I did it, the video will show you each product as I went along.
Each product was applied with a clean applicator or cloth. The pastes and liquids were left to haze except for the Auto Finesse Glisten which could be buffed off straight away. It took around 15 minutes for all the waxes to cure / haze over.
Each buffing was done with a clean 280gsm microfiber cloth all from the same manufacturer for consistency, the only difference being the colours. I tried to apply each product in the same way, and buff off in the same way. The only difference being the Mirror Bright Paste as that required working into the paint as it was a polish as well. Failing to apply that correctly would have compromised the product. It’s interesting to note that the Auto Finesse Illusion and the Dat Wax never actually hazed over probably due to the oil content not evaporating.
I tried to apply the products to the paint for the same amount of time, and buff to a shine for the same amount of time for continuity.
Each product was only applied once to the cleanest of my paint work I could muster up. That way they all have a same starting point. It was obvious that some required additional coats to get to the desired levels of coverage. But, to be honest, you do need to actually build up the wax layers. It wouldn’t be fair to apply two coats of one and just a single coat of another.
The Video
This is a full half hour video I uploaded to my YouTube channel. The Video has me narrating (some say droning) on what I was doing and what I had found on the comparisons. Put thirty minutes aside and enjoy.
Results:
Don’t get me wrong, I like these products or I wouldn’t have bought them in the first place. I have previously given some of them 10 out of 10 for a review. They are all (mostly) great products from the top suppliers.
HOWEVER; when they are side by side there is a difference and I didn’t think for one second that the results I got were what I was going to predict below, that actually shocked me.
The results I decided to do in three categories. Touch, Shine, Water Sheeting/Beading.
The Touch Tests:
No matter where I go at a car show and my car is all shiny, somebody wants to feel the paintwork. Not sure why, but they do. So I decided to make that a test. No amount of photos will ever show you the feel of a wax.
Process: I had a single cloth soaked with Isopropyl Alcohol that I could wipe my fingers on between each touch test. That way I had no other waxes on my fingers to cross contaminate to the next touch test.
After a single application of the products and allowed to cure then buffed, touch test was ready. This was a simple feel for the surface, was it smooth, was it streaky or still there. My fingers really could feel a difference. The Meguiar’s Gold Class applied an adequate coating, but no doubt about it that it needed two or three applications to become a nice smooth barrier like the rest. It was really odd to feel the paint roughness still though.
I often refer on the video to a wet feel, of course it wasn’t wet, but just sort of feels silky or smooth buttery texture.
The touch test results are for the Pastes waxes:
1) Mirror Bright,
2) Dat Wax,
2) Auto Finesse – Illusion,
4) Megs – Ultimate,
5) Megs – Gold Class
Conclusion for Paste Waxes: The mirror Bright just felt like glass where as both the Dat Wax and the Illusion felt more oily which was to be expected by their constitution to be honest. Some may prefer that type of feel. Ultimate was in no way a let down and felt like the Mirror Bright but not quite as deep feeling as it were. The Gold class could be felt as a coating there but certainly not great on a single pass.
The touch test results for the Liquid waxes:
1) Chemical Guys – Butter wet,
2) Chemical Guys – Insta Wax+,
3) Megs – Tech wax 2.0,
4) Chemical Guys – Cherry Dripping Wet,
5) Auto Finesse – Glisten
Conclusion for liquid waxes: The CG Butter Wet Wax was the clear winner here with the Instawax+ with hardly any difference and a close run for top place. Megs Tech Wax 2.0 felt just like the Ultimate and a glassy feel to it. The CG Cherry Wet Wax was super smooth but just shaded a little by its siblings, a second coat and I would say it would be right up there with the winners. Glisten was on there but felt more watery based and you could feel there wasn’t much of a coating on the paint work, although a little better than then Gold class for a single application.
Overall: There is a difference between the feel of the waxes. The pastes are applying a thicker coating than the misting of Glisten for sure. Especially when you run a finger from bare paint to the waxed areas. It’s a very close thing between the Butter Wet Wax and the Mirror Bright. For a straight forward wax on the Butter Wet takes it, for a little cleanse and slightly harder work the Mirror Bright takes it. The Dat Wax and the Illusion over car show coatings feel like an oily coating to give that much desired consistent smooth look across all panels.
The Visual Inspection
Process: After the applications I was going to look at the colour and how the reflectivity, gloss, depth and warmth of colour of the waxes looked on a paint job. As my car has metallic flake this would be a real tell-tale of shine.
As I mentioned before this was a single application of waxes and inspected from their. The sun was in and out during the inspection. When the sun was out the metallic was made to pop by some waxes better than others.
The results are for the Pastes waxes:
You can clearly see from the top of this picture that the Meguiar’s has warmed the colour of the paint and clear to see.
The results for the Liquid waxes:
This picture shows the same warming glow to the paint from the Chemical Guys Butter Wet Wax.
Conclusion:
As each of these products are now applied they should be performing as a finished product as it were. That’s the look of the waxes once applied and the effectiveness of the waxes.
There IS a difference in the way that these waxes can effect the look of a paint, say on a white car using a yellowish based wax will give a warmer glow compared to a white wax for example. It not as immediately obvious on much darker colours. I picked my Toyota as an example to test for the metallic and the neutral grey. My hunch was correct as the colour differences can be clearly seen.
Consider the look of the paint you require if you are that into it, or not worry it’s up to you.
Overall:
The waxes either the paste or liquid made little difference in the end to the look of the paint. A personal preference obviously comes into play as it does all the reviews. But I found the liquid of the Butter Wet wax and the Ultimate wax paste was virtually undisguisable.
1) (Meguiar’s) Mirror Bright Polishing Wax
2) Chemical Guys – Butter Wet
3) Megs – Ultimate
One thing to remember here, the hard waxes will last way longer than the liquid versions just by the nature of how they are applied. This could be a major factor when considering a purchase – value for money.
Water Tester Sheeting and Beading
Process:
I filled a gallon pot with clean water and chucked it over the car. This would show the clearing capacity of the wax properties for sheeting and beading.
I did multiple tests of the water deluge on the video and it’s very easy to see the differences.
On a personal note: to see the beading looks great as there is a barrier between the paint and the water. But as the car moves it will run off anyway. I prefer to see the water run off the car completely, but ‘Bead Bragging’ rights is a huge thing in the detailing circles.
Why do I prefer to see it all run off? Well if dirt lands on the car or dust it will sit around the beads. Once the beads are gone it will leave a dusty layer looking like a moon surface. With sheeting it will at least be a uniform film of dirt.
For the hard wax beading I found the following;
Meg’s Ultimate Wax
Mirror Bright
Meg’s Gold Class
Auto Finesse Illusion
Dat Wax
For the liquid wax water beading I found the following;
Meg’s Nxt Gen
Chemcial Guys Insta Wax+
Auto Finesse Glisten
Chemical Guys Butter Wet Wax
Chemical Guys Cherry Dripping Wet Wax
For the Overall Sheeting ability I found the following;
Chemical Guys Butter Wet Wax
Meg’s Mirror Bright
Chemical Guys InstaWax+
Dat Wax
Conclusion:
Without a question some waxes bead better than others, Meguiar’s take that crown here with both the paste and liquids.
Large amounts of water should run of quickly, and small rain drops tend to form together until the beads are to big and run off.
A little misting and ALL these waxes will bead very nicely and there isn’t a lot in it at all. In fact I would go far as to say you wouldn’t be able to tell the difference.
Perhaps by full on pour of the water is a little unfair, but the sheeting tests is similar to those used on ceramic coating demos. I was just showing the same type of reaction from a well applied wax.
The difference between the hard and soft waxes is minimal if at all.
Overall:
Such a difficult thing to sum up.
It has to be preference for application. Traditional or old school – Hard wax on, cure and buff off. Great results and little goes a long way. New or time saver – Liquid waxes apply and buff off to a great result. This method tends to use more product, but is cheaper.
Beading / Sheeting, under heavy water its easier to see the ones that deal with it quicker, but allowing for beading they all performed well with the hard waxes being the more consistent beaders.
Scores:
Various out of 10 for these as I have reviewed most of the products before, but more to come soon.
Conclusions:
I’m not convinced that the fine mist spray waxes like Glisten are on a par with the liquids / hard waxes from the other suppliers. Personal preference is a huge factor for application, you either see it as an art form process – hard waxing, or an exercise to keep the car protected and looking good – soft waxes.
Costs between these waxes is insane – £75 for Auto Finesse Illusion that applies beautifully and smells nice looked no different from Chemical Guys InstaWax+ at £16 once both buffed off to a shine.
There is an amount of snobbery regarding brands between users out there. But the big boys vs the cheap end of the market there is a difference no doubt about it. However when you get to these high quality level of suppliers, all their great products in relation to each other there is virtually nothing in it.
Some prefer the wax of ‘So & So’ because it doesn’t streak, but on another car’s paint it may be difficult to buff to a shine. I found that I am using mixtures of brands to get what I want from a detail for a show. No one brand has everything covered better than the rest. You just have to try it for yourselves. If you buy it again then you have a product that works for you. I have a couple of friend’s Craig and David who are both as sad as me when it comes to detailing, we swap products between us to see what we like. I may like the look, but not the process, where as he may like the gloss that I don’t. We have different cars and they are very different colours, white, grey, black, dark blue, light blue etc so we can see the varying results.
I do need to mention that the waxes are dyed. Thats the Chemical Guys Butter Wet Wax after applying it to a car for two coats it looked like had been smoking 60 a day for the last twenty years. Same with the Cherry Dripping Wet Wax which left me with red fingers like I had been picking strawberries all day. Just saying!
So, when I go to a car show and a want a wax on the car not just a quick detailer, then it’s a liquid wax. At home with plenty of time it’s back to the hard waxes. I never thought I would hear my self saying that, but I use both types of waxes now. So I have moved on with the times, I think.
Would I buy them again?
To be fair most of them I would, but not the £75 Auto Finesse pot or the Auto Finesse Glisten, not my favourites to be fair, but both are at the opposite end of the price scales to each other. The hard waxes will last me a good few years yet and will probably still be some left to polish the handles on my coffin when I drop dead! Having to choose, the Butter Wet Wax I would buy again, as I would the Mirror Bright polish paste.
Would I recommend any of them?
Without a doubt some I would; such as the Meg’s Ultimate and Gold Class (when multiple layers applied), Butter Wet Wax and Mirror Bright. However, it’s hard to recommend a wax for £35 for few fluid ounces in a little jar or a £75 for a wax that don’t last long as it’s a “show wax”. Especially if there is no real difference that can be seen straight away after application.
Like I said earlier, I am looking forward to using a premium hand blended quality wax which I will review and apply before some car shows – weather permitting of course. To suppliment this post I have also created a Dual Action pad comparison & guide from the manufacturers. Once I have written that up I will also post that very soon before the car show starts again in earnest. This post may not all be exactly Mustang related, but it could be for any car and I hope useful. I have learnt a lot from speaking to the designers of the products and I will share a little of that information in the next forthcoming posts. I am really pleased to say that the blog is also attracting some car detailers to and not just Mustang fans.