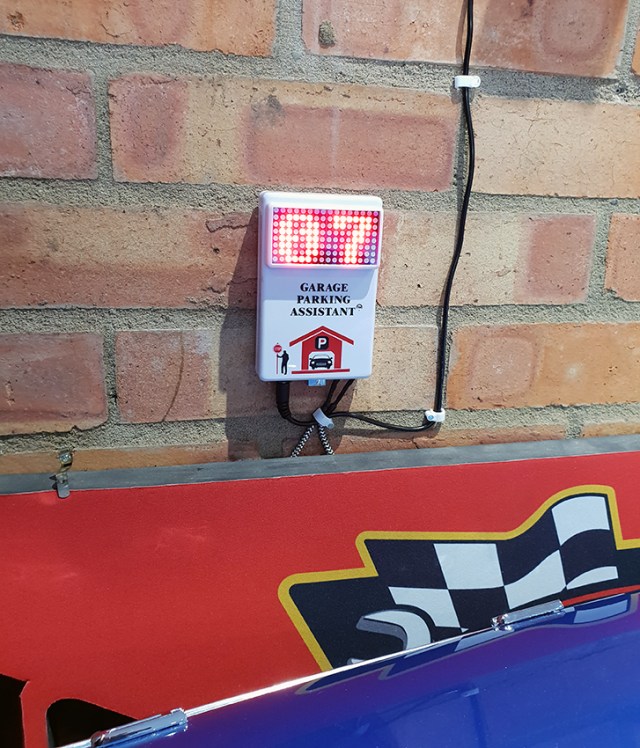
Lockdown

So here I am under government instructions to stay at home to stem the spread of the Covid19, as is the rest of the country. Some are taking this enforced lockdown more seriously than others I might add. All the car shows I had lined up to go to and have been looking forward to have been cancelled, I can accept that if it’s short term, as long as I can at least get a few in before the end of the year. But what can you do in the mean time? To while away the time I have just finished my mini project which I was going to make last when I have a little time over the weekends. Now I have more time than I actually planned for. So not only have I completed my project, I have written about it too. You will be pleased to know that it’s Mustang related of course, but in the form of Lego. So if you were wondering is it worth it and what’s involved let me explain;

The Sales Pitch from : Lego

Discover the magic of an iconic 1960s American muscle car with the LEGO® Creator Ford Mustang, featuring dark-blue bodywork with white racing stripes, bonnet scoop, printed mustang grille badge, GT emblems and 5-spoke rims with road-gripping tires. Developed with input from Ford, this authentic replica comes with optional add-ons for customization, including a selection of license plates, supercharger, rear ducktail spoiler, beefy exhaust pipes, front chin spoiler and a nitrous oxide tank. You can even adjust the lift of the rear axle for an extra-mean look! Remove the roof panel or open the doors and you have access to the detailed interior with handsome seats, radio, working steering and a mid-console gearshift. Store items in the trunk or lift the hood to reveal a detailed big block 390 V8 engine with battery, hoses and air filter detailing. This advanced building set has been designed to provide a challenging and rewarding building experience full of nostalgia and makes a great centerpiece for the home or office.

– Authentic replica of a 1960s Ford Mustang featuring dark-blue bodywork with white racing stripes, air scoop, 5-spoke rims with road-gripping tires, and a selection customization add-ons.

– Open the doors or remove the roof panel to access the detailed interior with handsome seats, radio, mid-console gearshift and working steering.

– Open the trunk to store items and lift the hood to reveal a detailed Ford Mustang V8 engine with battery, hoses and air filter.

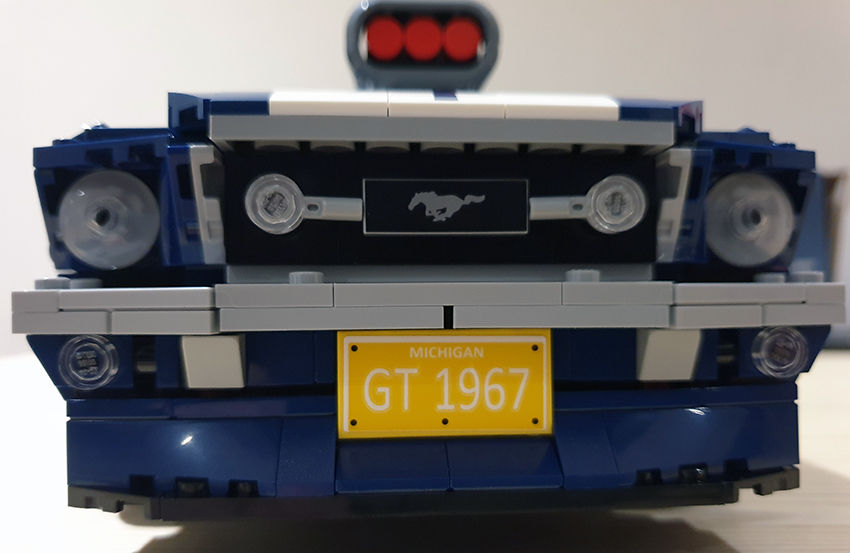
– Includes a printed mustang grille badge and 2 GT emblems.

– Customize the Ford Mustang with the included supercharger, rear ducktail spoiler, beefy exhaust pipes, front chin spoiler and a nitrous oxide tank.

– Choose from a selection of license plates.

– Lift the hood to check out the realistic engine detailing.

– Adjust the lift of the rear axle for a real mean look!

– New-for-March-2019 special elements include 5-spoke rims, 2×8 brick with bow, 1×3 mustang logo tile, 2×4 bow with ‘GT’ Emblem.

Measures over 3” (10cm) high, 13” (34cm) long and 5” (14cm) wide.

Source:  https://www.lego.com/en-gb/product/ford-mustang-10265

What You Get:

You get a big box and a lot of smaller plastic bags inside, an instruction manual and a sticker sheet.

What’s In The Box?

You get eleven plastic bags of parts although they are labelled as one to six with all but bag five having a smaller bag with the same number. A total of 1471 parts for you to try and sort out.

TIP:

Don’t open all the bags at once, only open what you need!

Instructions:

The instruction book starts with a brief background to Ford and the Mustang with time lines. A nice little addition it must be said.

The start of the instructions tells you which packets to use for which section build.

The instructions are all diagram based with the parts you need counted out and shown to you before assembly. Where the similar looking parts and colours are used the instructions has a 1:1 check to make sure you get the correct part. Some of the differences are very subtle.

Building the Model

This is the first time I have touched Lego in about forty five years or so. Oh how it’s moved on. The tolerances are still perfect, things fit together and don’t fall apart. A huge leap forward to building cars and houses when I first played with it and stood on the bricks!

The hours just rush by when building this. I challenge anybody to spend only what they think is an hour doing a build without anything to tell you the time. When you think it’s been an hour it’s a lot more than that. I found it addictive to do a page, then think ‘I will quickly do that bit as well’, it draws you in.

You start at the back of the car building the suspension, lots of little cogs seem to be placed for no apparent reason, then a few pages later it suddenly comes together. The sense of achievement is well thought out and makes you want to come back for more.

I found it easier to get all the parts I would be using for that little build located into an area to save looking for the parts as I went along, which I found could delay my build of that little section. Find it, collate it, then build it and repeat. No matter how you do it, the whole process is enjoyable. It actually started to upset my OCD in the end and I had to line the bits up I was about to use and separate into little bub piles of parts.

Next you move to the middle of the car for the transmission tunnel, adding the gear shift, radio and dials to the bricks. Parts seem to be built modular style then applied to the overall model itself.

Steering and engine next, considering the level of detail in this model I found my first grump. The engine only has four spark plug leads. They could of made it eight and just gave it that little bit extra detail.

Nice detail touches on the engine due to the name and the oil cap etc.

Building the body work is interesting how it comes together.

The door hinges caught me out as I had a little bit round the wrong way. The supplied brick separating tool is great and saves digging your fingernails between the bricks.

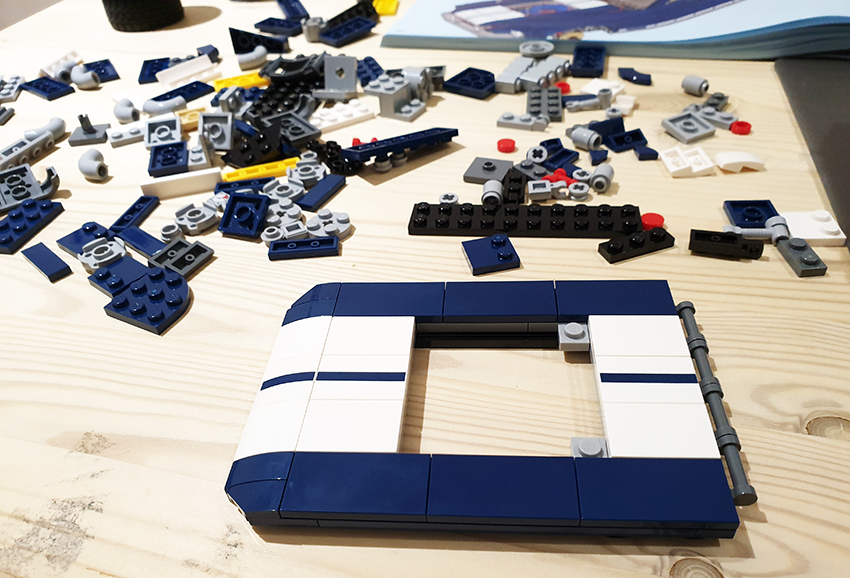
The design of the model has taken a lot into account for the assembly. They get you to place some round white bricks under the front corners of the car. When you press the bricks onto the model, these corner blocks means that it doesn’t flex or come apart when you add the little sub sections of build. When the car is finished the round white bricks are then removed, fitted together to make the NOS bottle for the trunk, providing you want that of course. How cool is that to reuse bricks in order to make your build journey enjoyable?

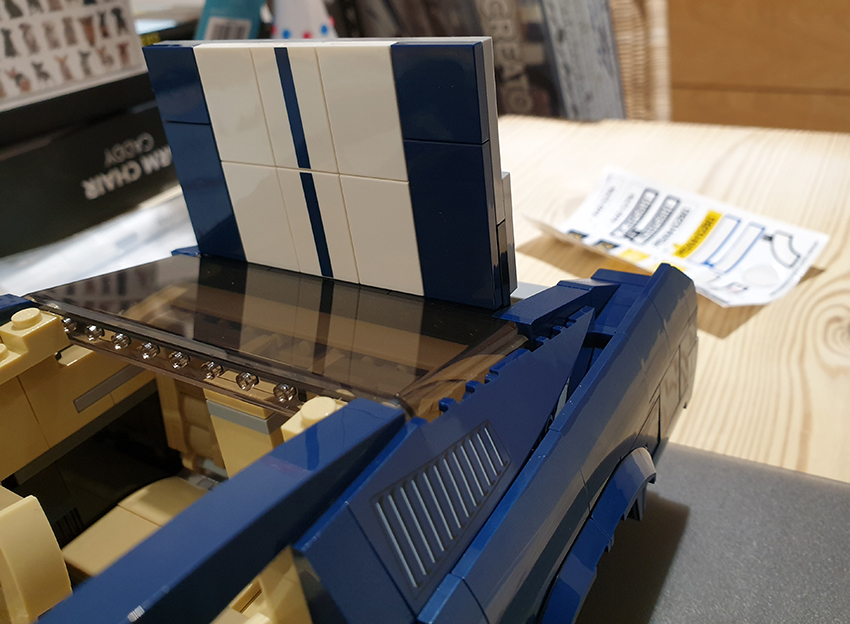
Just like restoring a real car, seeing the seats go in and the rear ‘glass’ starts to show the model is nearing completion. The hood offers the option for the stock scoop look or the opening for the super charger. It doesn’t matter if you change your mind later, it only takes around five seconds to swap it over.

The roof is designed to be a single section so it’s easy to remove and see the detail inside the model.

The other options for the model are the side pipes, front spoiler, rear spoiler and NOS bottle.

The completed model looks just as mean as the real thing.

I mentioned earlier about the two engine options; the standard or the hot rod version. The super charger will poke out the opening in the hood, or use the stock pan and the scoop. I built both just because I could and can swap them as I want.

The Super charger option works well and looks in proportion to the rest of the car.

The underside of the model shows the level of detail you can’t see, it also allows access to the thumb adjustable wheel to raise up the back of the car’s stance.

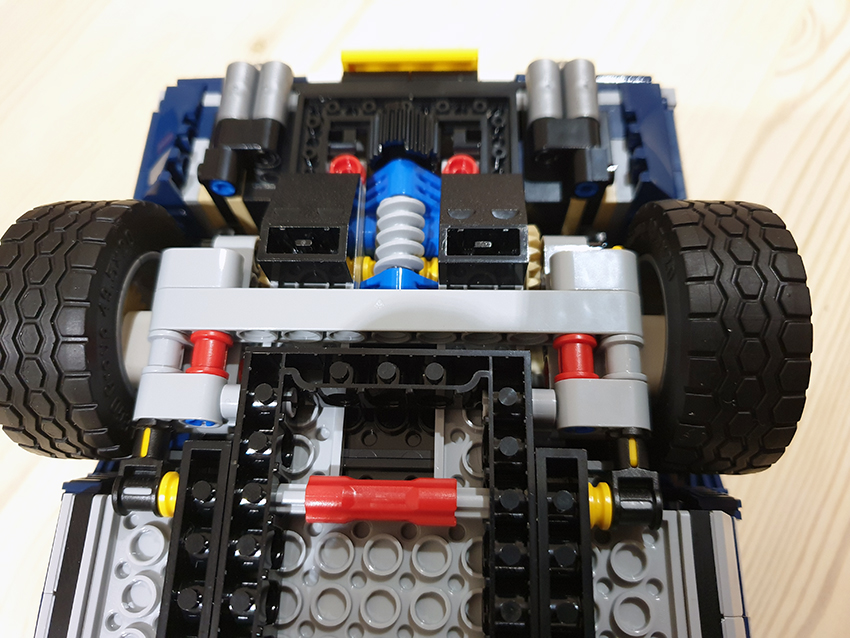
The completed model looks quality and withstands being handled without falling apart.

There is a third party option to add LED lights to the model. It does involve some disassembly, but the instructions and video show you how to do that and only take fifteen minutes or so to upgrade. If you want your car to be on show with the lights then it could be worth fitting that kit at the same time to save a bit of hassle later.

Results:

An amazing model and sits nicely with my other model. I need to get a little case for this one as well I think

It was a joy to make, and is a pleasure to look at. The parts are real top quality as you expect from genuine Lego kits, everything just works together. I had no missing parts and everything was there.

Rating:  9 out 10

An excellent model as I said, but there was just the number of spark plug wires that let the detail aspect down a bit as a model for me.

The instructions are very good indeed and well paced, the printing was fine and clear. The colour definition between the lighter coloured parts could be confusing and I would liked to have seen a bit more colour definition. Those are the only two reasons I marked it down.

Ease of use – 8 out 10

Finish – 10 out 10

Conclusion:

A lot of money for a Lego kit, but I was impressed. On the other hand you do get a lot of good quality model for that money. The price may put this kit out of reach for many to buy and build. As with all things Lego the price seems to stay put and not vary much.

The age range to start this is suggested at 16+ which I personally think is a little harsh, perhaps a petrol headed 14 year old into cars would like it, 15 years old on should be fine. Sometimes the small fingers do help, rather than my big hands getting in the way. This build will keep you quiet for a good few hours either as a young adult or a middle aged man like me.

The instructions take you on a journey that you’re not aware of, and completing each little bit leads gives you a sense of achievement enough to make you want to complete the next section. The Lego look with the little bumps and strange lines works well on the model and certainly doesn’t detract from the over all look. You can see it’s Lego and will appreciate that somebody has gone to good lengths to complete it and enjoyed it at the same time.

When it was finished I was a bit gutted that I didn’t have any more to build to be honest.

Would I recommend it? Yes. But, it’s expensive.

So there you have it, a good many hours spent working on a Mustang, all be it a much smaller, modular version of the real thing. I will be writing some more car detailing reviews soon, so keep an eye out for those. If I can’t drive my my car at least I can still clean it, even though it’s already clean. It also keeps me out of the way being indoors with the wife. The more I get under her feet the more she will find me “jobs” to do. She is trying to teach me to cook as well, me and kitchens don’t go well it has to be said. Yet when I try and get her to clean, polish, wax and detail her own car, the same levels of (non) enthusiasm I showed to cooking is reciprocated and more.

I do know that my time is already being allocated to redecorating the house, even though it did some of it just over a year ago. I have spotted the delivery of a few large tins of paint. So I need to keep busy, keep scarce in order to put off the the job that I seriously detest – decorating.

I think I need to get another model though to keep me quiet in these unprecedented times of forced isolation. Or I may end up cleaning walls and applying paint rather than applying extra layers of top quality wax to my pride and joy. Who am trying to kid? It’s not if if decorate, it’s a case of when!

Share my Content

Differences Between Polishing & Waxing

I wasn’t sure if I was to split this post into two or not. I eventually decided to keep it all in one place. It might be a bit of a long post but I think it’s worth it. As a follow up to my mega wax comparison test the write up for my comparison of Dual Action polishing pads is now completed. This post has taken me many, many hours to collate and put together, not only for my own sanity of product comparison all in one place, it will hopefully be a help for you as well. That’s regardless of being a Professional Detailer or a Weekend Washing Warrior like me.

There is a huge minefield out there when it comes to buffing pads by various manufacturers for similar products. Although they may look the same they can perform very different tasks. They can do the same things but are different colours, it’s all very confusing. It drove me mad, so what I have tried to do here is create a chart of the most well known manufacturers and their Dual Action pad products. I chose the ‘Dual Action’ variables for a couple of reasons;

1) I have a Meguiar’s MT320 Dual Action tool.

2) Rotary tools and pads are for the experienced user or professionals. Incorrect use can damage your paint job. You have been warned!

I am a weekend washer as I mentioned, I’m not quite up to the professional detailing standards yet, but I keep trying. If I take my car to show or just taken out for a drive, I clean it via quick detailer product when I get to where I’m going. When I get home the car gets a full waterless wash before it goes in the garage and covered up again.

I found many charts and explanations from many sources, but none that done a full comprehensive comparison side by side. My Pad Guide which I collated below is for reference and you really should get the right pad for the right job. The chart here is also downloadable in High Quality PDF as well. 🙂

I have tried to provide links to each manufacturer and the descriptions of their own pad products below. If you find any others that may be of use, just let me know and I will try and add them.

Clicking on the individual links below will take you to that company’s website for more details. Some are great pages with lots of info, some are rather shabby to say the least. I honestly recommend having a look at the links as they will explain in greater depth why you should use their products and for what tasks.

  • Lake Country Products and Charts click here.
  • Meguiar’s Products and Charts click here.
  • DoDo Juice Products and Charts click here.
  • Chemical Guys Products and Charts click here.
  • Mitchell & King Products and Charts click here.
  • Auto Finesse Products and Charts click here.
  • 3M Products and Charts click here.
  • Shine Mate Products and Charts click here.
  • Gyeon Products and Charts click here.
  • Menzerna Products and Charts click here.
  • Scholl Concepts Products and Charts click here.
  • Sonus Products and Charts click here.
  • Vertool Products and Charts click here.

I found a couple of images from the net (below) that are pretty good to explain some of the terminology of this coveted detailing skill. There are many, many books out there and plenty of ‘how to..’ videos on YouTube as well, so I won’t duplicate them here who are much better qualified to explain it than me.

Marks on the paint can be from poor washing routines, bird lime, tree sap, third party damage such as keys or car park dings, damage from hedges when driving to close or stone chips etc. These sorts of damage can spoil the look of your car may require the polishing step. The easiest way to remove these marks are with the DA pads.

First the misconception of ‘Polishing’ and ‘Waxing’ are the same thing! They’re not.

Polishing Pads or Cutting Pads or Compounding Pads,: Choosing your correct pad and polish combo is critical, using a waxing or ‘finishing’ soft or super soft pad won’t do much at all, and you will be there a while wasting your time. The courser polishing pads or ‘cutting’ pads are designed to work the product to the paint and not just apply it.

Waxing Pads or Finishing Pads: Most of the waxing or ‘finishing’ pads are soft or super soft, they are designed primarily to apply the product to the surface and not ‘work’ the product into the paint as such.

A little common sense; before you decide to polish, you must wash the car thoroughly. I won’t go into the full details of how to wash your car, but I will touch on the main points before the polish and the eventual choice of pads. You can use waterless washing if you want of course, but applying waterless washing tends to add an element of protection to the paint.

An ideal prep for a polish is to use a pre washing “Snow Foam” first if you can. This tends to remove the worst of the debris on the car as a touchless process. If you don’t have access to a snow foam, then at least rinse the car first and then wash the car using the two bucket method with a wash mitt, not a sponge. Remember that a good quality shampoo should nourish the paint and prepare it for a wax layering process, it shouldn’t remove the wax that is already on the paint surface. The least amount of contact with the dirty paint is desirable.

Remove any wax that is on the surface of the car’s paint. This is a separate step after washing using a specific product just for that wax removing job. However, some of the cheap and nasty car washing products will also remove the wax at the same time as washing, saving you that extra wax stripping step. Use a proper de-wax wash product like Chemical Guys ‘Clean Slate’ to leave the paint bare to the elements. Don’t be tempted to use cheap washing up detergents to wash the car, as they themselves can also be abrasive and often contain salt.

Once the car is washed clean, there is a step that is often overlooked before polishing; the ‘Clay bar’. This is as it sounds, a piece of soft clay which is flattened out into a thin pad and rubbed over the surface of the paint using fingertips. This clay lifts the stubborn contaminates and they in turn stick to the clay. Use the clay with a recommended lubrication and turn frequently to a fresh piece of the clay when it becomes dirty. If you drop the clay bar, Never Ever pick it up and re-use it on the car, get a fresh piece and continue. If you dive straight into the polishing stage you could end up dragging these foreign particles over your paint making things worse. It’s always best to try and get the paint as smooth as possible first before you tackle that polish stage. I have review links to a great clay bar from Bilt Hamber here and pretty poor clay bar from Auto Finesse here. Choose wisely, not all clay bars are the same, some work and some really don’t. A Clay Bar will also remove wax as well. Rinse the car and dry thoroughly.

Tip: Polishing is an acquired skill and shouldn’t be taken on with a slap dash approach. Go to a scrap yard, get an old fender or hood and practice on that first. Practice on an old car, or a favour to mates old car. With a heavy cutting compound, or an overly abrasive pad along with undue pressure being applied during the polishing process, there is every chance that such an abrasive combination could take the paint of your car. Rule of thumb is that a polish cleans the paint with mild to very abrasive product.

Some polishes are known to have fillers to hide imperfections and to give a richer look to the surface paint of the car. Auto Finesse ‘Tripple’ is such an example or Meguiar’s ‘3 in 1’.

Another step than can be used instead of a polish is a ‘Glaze’. This can be applied by hand or a DA machine. This product is a filler for fine scratches or swirl marks. This will only mask the problem of damaged paint. It certainly won’t cure or fix the problem like a proper paint correction or polish would.

What is Polish and Polishing?

Depending on the paint condition this will determine the pad and polish product you will need to use.

Polish, or sometimes referred to as a ‘compound’ is usually in the form of a liquid which contains a varying degree of abrasive content. The polish abrasiveness is also referred to as it’s ‘Cutting’ strength. During a polish you are in effect removing microns of your paint, the harsher the abrasive or cutting, the more of the paint or clear coat will be removed. Polishing can also restore the shine of the paint on your car from a faded or neglected surface. If you see some slight discoloration, damaged paint from bird lime or similar, or when you think there is a lot of dirt that has got stuck on the surface that won’t be removed after a wash with a good shampoo, it may be better to go for the polish. Small scratches can be reduced or removed after a polish. This can also be known as a ‘paint correction’.

The majority of the time a Polish will require multiple applications of finer or less course cutting polishes and softer pads to obtain that smooth mirror like surface. Rule of thumb, start soft. If nothing is happening go heavier and work back to the light combo again. If the paint is getting to hot – STOP. Many experienced detailers and car body work painters just know what they need to use.

Why Polish?

Simple answer is that if you see scratches or swirls the polishing step could remove them depending how bad they are of course. This would leave a mirror looking paint if done correctly.

How does it work?

The light hits our eyes at strange angles, which shows up as a scratch, blemish, swirl etc. on the paint work. If the paint is smooth with no marks the light is bounced in an even manor. This is explained a lot better with the help of a little diagram towards the end.

What is Wax (ing)

Wax is just a protective coat to protect the paint of your car from the elements, prolong the longevity and lustre. There are two main products, natural and synthetic. Natural tends to offer the best shine with not much longevity. Synthetic offers the best longevity but not quite a good a shine. There are of course mixtures of the two and hybrids. Some of the ‘hybrids’ are now incorporating the ‘ceramic’ technology which is creeping into the consumer market. Natural waxes are often found at high quality car shows or concours events to show the paint to it’s full extent. Synthetics are for generally for daily cars who also want a nice shine. Waxes have moved on with technology, these waxes often come with UV protection to help stop paint fading in sunlight. They last longer, apply easier and offer great value for money, well in most cases anyway.

There is also another step that can be applied, that is ‘Sealer’. this is applied before the wax as it says coats the paint job to protect it better than a wax – so it’s said. Sealers do one job only and not designed for pure shine. More to protect what you already have before the shine is applied.

Waxes come in two main application forms; liquid or paste.

Paste wax or hard wax, is more of the traditional method and often classed as old school. Often requiring application, curing and then buffing to a shine, often repeated to build up the protection or shine. Usually the enthusiasts or connoisseur’s choice. These products are best applied as ‘a little goes a long way’.

Liquid wax or soft wax, is the modern approach. They tend to be quicker, easier and generally don’t require cure time or additional applications, also know as ‘wipe on, wipe off’ products. The down side is that you tend to use more of the product.

Why Wax?

Waxing protects the car from elements and even sunlight. It also makes the car look good and helps to retain the vehicles value.

How does it work?

The wax forms a protective barrier between the paint job and the elements.

There is no right or wrong for the type of waxing you take, what ever suits you. I have it on good authority that there are no differences between the paste wax and the liquid waxes apart from composition. The only real choice you have is what you want the wax to do, last, shine or a bit of an all rounder?

Understanding the paint problems

I found these various diagrams to show what the polishing is designed to do. Make the paint as smooth as possible, then protect it with wax (or sealer).

They say a picture speaks a thousand words and I think these pictures do just that to explain it better way than I ever could.

This image has an empty alt attribute; its file name is paintlayersscratch4.jpg
This image has an empty alt attribute; its file name is paintlayersscratch3.jpg

Some examples of things that can damage the paint and how badly, and yes that does say ‘fingernails’!

This image has an empty alt attribute; its file name is paintlayersscratch2.jpg

As I mentioned earlier on how the eye sees the light. If light reflects badly and is distorted instead of a bouncing straight back, that is when you get to see the marks on the paint as shown here:

This image has an empty alt attribute; its file name is paintlayersscratch7.jpg

Various way to fix this is the buffing with pads to get to the bottom of the damage to leave a smooth even reflective area. As I have already explained, things likes glazes, sealants and waxes can help along with disguising these areas of damage to make the light reflect in a much more uniform manor. Thus making the surface look smooth and shiny again.

This image has an empty alt attribute; its file name is paintlayersscratch.jpg

Then we get a little more techy with the thicknesses of paint and how the paints are applied. Of course the different applications of paint (Single coat, 2 pack, water based, cellulose etc.), amount of paint applied, types of paint; solid, metallic, pearlescent, matte, special mix custom. The type of primer, fillers, top coats, clear coats all need their own types of care. For some one product may not work the same on another manufacturers paint etc. Some manufacturer paints are known as hard paints, while others are considerably softer. This diagram shows the generic application of thicknesses, these vary wildly depending who done what. Some respray jobs cost £2,000 and others £20,000 and that’s for a good for a reason.

This image has an empty alt attribute; its file name is paintlayersscratch5.jpg

The ‘basics’ of the paint application;

This image has an empty alt attribute; its file name is paintlayersscratch6.jpg

Don’t worry that is as technical as it will get about paint and the theories behind it. After all we are just looking at the comparison of pads to ‘fix’ the paint, according to my very own comparison chart above.

When I mentioned the combination of products and pads above, this is the visual representation of just that.

Not all these DA pads are for polishing or cutting alone. Oh no, Many people use the much softer pads to apply the waxes to the car for a much easier, smoother and even application of wax. I have a link here on 10 wax comparisons in a mega test.

Share my Content

Wax Comparisons

During the last quarter of last year, the UK had a few nice days of sunshine and as I had a few days off work owing to me, I decided to use my holiday up. That time was put to good use and completed a little project I wanted to try for myself. It’s often done on YouTube, but not to this degree, I think.

There are often a few car cleaning products compared on YouTube channels, but not ten side by side, with the same testing criteria by the looks of it. When I say “Top Branded”, I mean top manufacturers and their best selling products for normal weekend washing warriors on the street. Those of us who like the best products that work and at reasonable prices using traditional waxes, not the latest in thing of ‘Hybrid’ or ‘Ceramic’ waxes. Lets face it, there are some truly great products on the market at the moment, some of which are even essentials of my own cleaning routines, still. To put this into context there are waxes out there that are expensive for expensive sake, like Swizöl International’s Divine costing £2,150, Brough & Howarth’s Definitive Wax Marble costing £24,000, Zymol Vintage Glaze costing £2,400 or The Ultimate Shine costing an insane £65,000 which can be seen here:   http://www.performancemotorcare.com/car-cleaning-product-news/worlds-most-expensive-car-wax/1808

However, there has been (a strong) rumour that the ‘Ultimate Shine’ wax itself is actually made by Mitchell & King in Scotland. I can’t verify this, but can only state what I have read so far. The original mix (allegedly) sold by M & K is called Gold Rush Rally at £75 a pot which is a mere 0.11% of the price! This brings me back to my point, although these ten waxes are (mostly) affordable and will last a good number of applications, they are not in that stupid silly money league. However there is an in-between level of Luxury car waxes such as Swissvax Crystal Rock at £300, BMD Prometheus £120, Auto Finesse Desire at £120 and Mitchell & King’s top of the range wax ‘Lily’ around £600 where only One pot is made a year, or anything in between from M&K for a comprehensive range of waxes between £45 to £600.

I will be reviewing Mitchell & King’s ‘Lily’ in a very special review coming soon. This was purchased with my wife’s very own money for a special Christmas gift. Before anybody asks – No, I’m not on commission or paid by them.

If you can afford those crazy sort of prices I suspect you will get somebody else to clean the car for you. I’m guessing most of those super high end waxes are being applied to Veyron’s, Ferraris or any other super or hyper car where money is no object. Then there is the other end where Poundland stores sell car shampoo for £1. Pure logic dictates that there has to be a difference right? But somewhere in the middle, there is a sweet spot and that’s these sort of products I have reviewed here.

Anyway, back to these standard off the shelf and top selling waxes, I have been very happy with most of these waxes and will continue to use them on my daily cars. Some do a great job and perform well after application. That’s why I really wanted to compare these particular mainstream products. Picking the best of the best that I like, then at a later date this summer step up to the ‘Real Luxury’ car wax to see the real differences, if any. But a couple of these waxes are getting close to treading on the toes of the ‘Luxury wax’ end of the market; Dat Wax and Illusion based on their cost to volume ratio. The scores I have given in the past to some of these products I stand by. At the time I didn’t know any better or had anything else better to compare them against until now that is.

Costs:

Multiple products which varied from a very reasonable £12 to a eye watering £75.  All these products I purchased myself, no sponsorship to skew reviews. These are my own thoughts and findings for the products with my own hard earned cash I parted with for each of them.

Meguiar’s :

Gold Class paste  £21 for 311g  click here for individual review

Ultimate Wax Paste  £40 for 311g  click here for individual review

Mirror Bright Polish Wax  £23 for 226g  click here for individual review

Nxt Gen liquid Wax 2.0  £26 for 532ml

Auto Finesse :

Glisten £12 for 500ml

Illusion Show Wax £75 for 150g  click here for individual review

Chemical Guys :

Butter Wet Wax  £23 for 473ml

Cherry Dripping Wet wax  £23 for 473ml  click here for individual review

Instawax+  £16 for 473ml  click here for individual review

Dat Wax :

£25 for 100ml  click here for individual review.

YouTube video of this written review:

The full video of this test can be found on my YouTube channel or here for the shortcut or paste the link to YouTube. It’s easier to see what is going on rather than read about it. The video lasts for thirty two mins or so and has be trying to film, commentate, wax and buff all at the same time. I think I pulled it off after a bit of editing.

https://youtu.be/mfUyFS-hRk8

Date Of Review:

October 2019

Background:

I have reviewed many products for detailing, especially waxes and quick detailers. Some have been rated 10 out of 10 by me when I tested them. Which at the time was correct as I used the product in isolation. However, there are always those nagging thoughts in my mind; what about side by side comparisons? Are the expensive waxes worth it? Can you tell the difference? I aim to answer these questions the best I can.

When you apply a wax on it’s own you can only gauge by what you are working with, application may be great and buffing at the time. But, you forget how others perform that you had previously used or reviewed.

So; I got my favourite waxes out and decided to compare them. That’s five hard paste waxes – old school and my preferred option. Then five soft or liquid waxes of similar products not made in a wax form.

The top three big boys are Meguiar’s, Chemical Guys, Auto finesse and a wild card of Dat Wax.

There are only really three actual ‘hard’ paste waxes which are the Meguair’s trio, Gold Class, Ultimate and Mirror Bright Polishing Paste Wax (made by Meguiar’s). The Auto Finesse Illusion and the Dat Wax are both very soft butter texture type waxes not quite liquid, but not a hard paste in comparison either.

The Sales Pitch(s):

These are found under each of the reviews I have done to date. See the links above. I still have a proper Glisten review to do and my latest purchase of the Butter Wet Wax.

Each of these products claims to have the best shine possible and protection, but they can’t all be right can they?

Instructions:

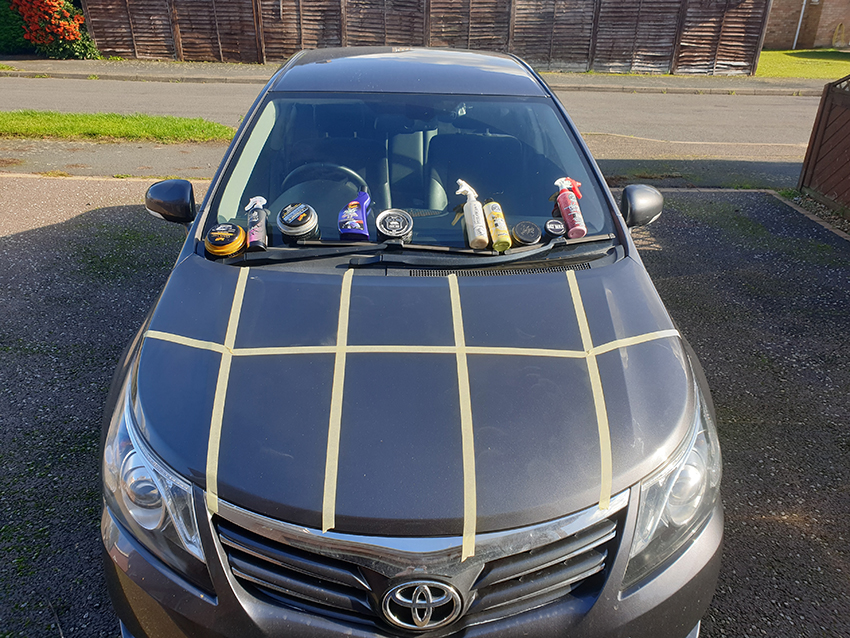
The instructions were followed on the tins and bottles of each product. The donor hood was my 2014 Toyota Avensis in a metallic grey. I divided the hood into roughly ten even sections via some masking tape. The day was overcast and sunny, but not enough to make the metalwork hot to the touch.

The top five sections were for the hard waxes, and the bottom five sections were for the soft waxes.

Top; left to right – Meguiar’s Gold Class, Meguiar’s Ultimate, Mirror Bright Polish wax, Auto Finesse Illusion, Dat Wax.

Bottom; left to right – Auto Finesse Glisten, Meguiar’s NXT Gen 2.0, Chemical Guys InstaWax+, Chemical Guys Butter Wet Wax, Chemical Guys Cherry Dripping Wet Wax.

Application:

The hood was first given a wipe down with quick detailer to get the light dirt off.

The hood was then clayed with Auto Finesse clay bar and a Megs Quick Detailer, not the greatest detailer it has to be said, it’s recommended by Meg’s as a clay lubrication product as well.

The hood was then given a good spraying with 99.9% Isopropyl Alcohol to remove anything left, which was quite a lot based on the clean white 100% cotton cloth.

My fingers dragged and squeaked across the paint, I knew then it was clean. The hood was the taped up ready to apply the products. 

Each Product

Rather than going into pages and pages of what I did and how I did it, the video will show you each product as I went along.

Each product was applied with a clean applicator or cloth. The pastes and liquids were left to haze except for the Auto Finesse Glisten which could be buffed off straight away. It took around 15 minutes for all the waxes to cure / haze over.

Each buffing was done with a clean 280gsm microfiber cloth all from the same manufacturer for consistency, the only difference being the colours. I tried to apply each product in the same way, and buff off in the same way. The only difference being the Mirror Bright Paste as that required working into the paint as it was a polish as well. Failing to apply that correctly would have compromised the product. It’s interesting to note that the Auto Finesse Illusion and the Dat Wax never actually hazed over probably due to the oil content not evaporating.

I tried to apply the products to the paint for the same amount of time, and buff to a shine for the same amount of time for continuity.

Each product was only applied once to the cleanest of my paint work I could muster up. That way they all have a same starting point. It was obvious that some required additional coats to get to the desired levels of coverage. But, to be honest, you do need to actually build up the wax layers. It wouldn’t be fair to apply two coats of one and just a single coat of another.

The Video

This is a full half hour video I uploaded to my YouTube channel. The Video has me narrating (some say droning) on what I was doing and what I had found on the comparisons. Put thirty minutes aside and enjoy.

Results:

Don’t get me wrong, I like these products or I wouldn’t have bought them in the first place. I have previously given some of them 10 out of 10 for a review. They are all (mostly) great products from the top suppliers.

HOWEVER; when they are side by side there is a difference and I didn’t think for one second that the results I got were what I was going to predict below, that actually shocked me.

The results I decided to do in three categories. Touch, Shine, Water Sheeting/Beading.

The Touch Tests:

No matter where I go at a car show and my car is all shiny, somebody wants to feel the paintwork. Not sure why, but they do. So I decided to make that a test. No amount of photos will ever show you the feel of a wax.

Process:  I had a single cloth soaked with Isopropyl Alcohol that I could wipe my fingers on between each touch test. That way I had no other waxes on my fingers to cross contaminate to the next touch test.

After a single application of the products and allowed to cure then buffed, touch test was ready. This was a simple feel for the surface, was it smooth, was it streaky or still there. My fingers really could feel a difference. The Meguiar’s Gold Class applied an adequate coating, but no doubt about it that it needed two or three applications to become a nice smooth barrier like the rest. It was really odd to feel the paint roughness still though.

I often refer on the video to a wet feel, of course it wasn’t wet, but just sort of feels silky or smooth buttery texture.

The touch test results are for the Pastes waxes:

1) Mirror Bright,

2) Dat Wax,

2) Auto Finesse – Illusion,

4) Megs – Ultimate,

5) Megs – Gold Class

Conclusion for Paste Waxes: The mirror Bright just felt like glass  where as both the Dat Wax and the Illusion felt more oily which was to be expected by their constitution to be honest. Some may prefer that type of feel. Ultimate was in no way a let down and felt like the Mirror Bright but not quite as deep feeling as it were. The Gold class could be felt as a coating there but certainly not great on a single pass.

The touch test results for the Liquid waxes:

1) Chemical Guys – Butter wet,

2) Chemical Guys – Insta Wax+,

3) Megs – Tech wax 2.0,

4) Chemical Guys – Cherry Dripping Wet,

5) Auto Finesse – Glisten

Conclusion for liquid waxes:  The CG Butter Wet Wax was the clear winner here with the Instawax+ with hardly any difference and a close run for top place. Megs Tech Wax 2.0 felt just like the Ultimate and a glassy feel to it. The CG Cherry Wet Wax was super smooth but just shaded a little by its siblings, a second coat and I would say it would be right up there with the winners. Glisten was on there but felt more watery based and you could feel there wasn’t much of a coating on the paint work, although a little better than then Gold class for a single application.

Overall: There is a difference between the feel of the waxes. The pastes are applying a thicker coating than the misting of Glisten for sure. Especially when you run a finger from bare paint to the waxed areas. It’s a very close thing between the Butter Wet Wax and the Mirror Bright. For a straight forward wax on the Butter Wet takes it, for a little cleanse and slightly harder work the Mirror Bright takes it. The Dat Wax and the Illusion over car show coatings feel like an oily coating to give that much desired consistent smooth look across all panels.

The Visual Inspection

Process: After the applications I was going to look at the colour and how the reflectivity, gloss, depth and warmth of colour of the waxes looked on a paint job. As my car has metallic flake this would be a real tell-tale of shine.

As I mentioned before this was a single application of waxes and inspected from their. The sun was in and out during the inspection. When the sun was out the metallic was made to pop by some waxes better than others.

The results are for the Pastes waxes:

You can clearly see from the top of this picture that the Meguiar’s has warmed the colour of the paint and clear to see.

The results for the Liquid waxes:

This picture shows the same warming glow to the paint from the Chemical Guys Butter Wet Wax.

Conclusion:

As each of these products are now applied they should be performing as a finished product as it were. That’s the look of the waxes once applied and the effectiveness of the waxes.

There IS a difference in the way that these waxes can effect the look of a paint, say on a white car using a yellowish based wax will give a warmer glow compared to a white wax for example. It not as immediately obvious on much darker colours. I picked my Toyota as an example to test for the metallic and the neutral grey. My hunch was correct as the colour differences can be clearly seen.

Consider the look of the paint you require if you are that into it, or not worry it’s up to you.

Overall:

The waxes either the paste or liquid made little difference in the end to the look of the paint. A personal preference obviously comes into play as it does all the reviews. But I found the liquid of the Butter Wet wax and the Ultimate wax paste was virtually undisguisable.

1) (Meguiar’s) Mirror Bright Polishing Wax

2) Chemical Guys – Butter Wet

3) Megs – Ultimate

One thing to remember here, the hard waxes will last way longer than the liquid versions just by the nature of how they are applied. This could be a major factor when considering a purchase – value for money.

Water Tester Sheeting and Beading

Process:

I filled a gallon pot with clean water and chucked it over the car. This would show the clearing capacity of the wax properties for sheeting and beading.

I did multiple tests of the water deluge on the video and it’s very easy to see the differences.

On a personal note: to see the beading looks great as there is a barrier between the paint and the water. But as the car moves it will run off anyway. I prefer to see the water run off the car completely, but ‘Bead Bragging’ rights is a huge thing in the detailing circles.

Why do I prefer to see it all run off? Well if dirt lands on the car or dust it will sit around the beads. Once the beads are gone it will leave a dusty layer looking like a moon surface. With sheeting it will at least be a uniform film of dirt.

For the hard wax beading I found the following;

  1. Meg’s Ultimate Wax
  2.  Mirror Bright
  3.  Meg’s Gold Class
  4.  Auto Finesse Illusion
  5.  Dat Wax

For the liquid wax water beading I found the following;

  1. Meg’s Nxt Gen
  2.  Chemcial Guys Insta Wax+
  3.  Auto Finesse Glisten
  4.  Chemical Guys Butter Wet Wax
  5.  Chemical Guys Cherry Dripping Wet Wax

For the Overall Sheeting ability I found the following;

  1. Chemical Guys Butter Wet Wax
  2. Meg’s Mirror Bright
  3. Chemical Guys InstaWax+
  4. Dat Wax

Conclusion:

Without a question some waxes bead better than others, Meguiar’s take that crown here with both the paste and liquids.

Large amounts of water should run of quickly, and small rain drops tend to form together until the beads are to big and run off.

A little misting and ALL these waxes will bead very nicely and there isn’t a lot in it at all. In fact I would go far as to say you wouldn’t be able to tell the difference.

Perhaps by full on pour of the water is a little unfair, but the sheeting tests is similar to those used on ceramic coating demos. I was just showing the same type of reaction from a well applied wax.

The difference between the hard and soft waxes is minimal if at all.

Overall:

Such a difficult thing to sum up.

It has to be preference for application. Traditional or old school – Hard wax on, cure and buff off. Great results and little goes a long way. New or time saver – Liquid waxes apply and buff off to a great result. This method tends to use more product, but is cheaper.

Beading / Sheeting, under heavy water its easier to see the ones that deal with it quicker, but allowing for beading they all performed well with the hard waxes being the more consistent beaders.

Scores: 

Various out of 10 for these as I have reviewed most of the products before, but more to come soon.

Conclusions:

I’m not convinced that the fine mist spray waxes like Glisten are on a par with the liquids / hard waxes from the other suppliers. Personal preference is a huge factor for application, you either see it as an art form process – hard waxing, or an exercise to keep the car protected and looking good – soft waxes.

Costs between these waxes is insane – £75 for Auto Finesse Illusion that applies beautifully and smells nice looked no different from Chemical Guys InstaWax+ at £16 once both buffed off to a shine.

There is an amount of snobbery regarding brands between users out there. But the big boys vs the cheap end of the market there is a difference no doubt about it. However when you get to these high quality level of suppliers, all their great products in relation to each other there is virtually nothing in it.

Some prefer the wax of ‘So & So’ because it doesn’t streak, but on another car’s paint it may be difficult to buff to a shine. I found that I am using mixtures of brands to get what I want from a detail for a show. No one brand has everything covered better than the rest. You just have to try it for yourselves. If you buy it again then you have a product that works for you. I have a couple of friend’s Craig and David who are both as sad as me when it comes to detailing, we swap products between us to see what we like. I may like the look, but not the process, where as he may like the gloss that I don’t. We have different cars and they are very different colours, white, grey, black, dark blue, light blue etc so we can see the varying results.

I do need to mention that the waxes are dyed. Thats the Chemical Guys Butter Wet Wax after applying it to a car for two coats it looked like had been smoking 60 a day for the last twenty years. Same with the Cherry Dripping Wet Wax which left me with red fingers like I had been picking strawberries all day. Just saying!

So, when I go to a car show and a want a wax on the car not just a quick detailer, then it’s a liquid wax. At home with plenty of time it’s back to the hard waxes. I never thought I would hear my self saying that, but I use both types of waxes now. So I have moved on with the times, I think.

Would I buy them again?

To be fair most of them I would, but not the £75 Auto Finesse pot or the Auto Finesse Glisten, not my favourites to be fair, but both are at the opposite end of the price scales to each other. The hard waxes will last me a good few years yet and will probably still be some left to polish the handles on my coffin when I drop dead! Having to choose, the Butter Wet Wax I would buy again, as I would the Mirror Bright polish paste.

Would I recommend any of them?

Without a doubt some I would; such as the Meg’s Ultimate and Gold Class (when multiple layers applied), Butter Wet Wax and Mirror Bright. However, it’s hard to recommend a wax for £35 for few fluid ounces in a little jar or a £75 for a wax that don’t last long as it’s a “show wax”. Especially if there is no real difference that can be seen straight away after application.

Like I said earlier, I am looking forward to using a premium hand blended quality wax which I will review and apply before some car shows – weather permitting of course. To suppliment this post I have also created a Dual Action pad comparison & guide from the manufacturers. Once I have written that up I will also post that very soon before the car show starts again in earnest. This post may not all be exactly Mustang related, but it could be for any car and I hope useful. I have learnt a lot from speaking to the designers of the products and I will share a little of that information in the next forthcoming posts. I am really pleased to say that the blog is also attracting some car detailers to and not just Mustang fans.

Share my Content

Am I Cursed Or Jinxed?

This car show is how it should be, cars that are at least twenty years old with nothing before 2000 was allowed in. I hate to say it, but a few still sneaked in! Some recent car shows I have been to there are three or four year old cars on show. If I wanted to see cars like that I would just walk around a superstore car park on a Sunday! Anyway, rant over; this car show was held at Stonham Barns which is about twenty minutes drive from where I live. The weather forecast was promising with only thirty percent chance of rain. The sky looked good, so I decided to go for it. The show was packed and there was lots of variation of cars still arriving at the cut of point of ten o’clock. I parked up and decided to go for a look around before the general public was allowed in.

There was some nice auto jumble stalls which I spent a little while looking around. It’s funny, that when I was looking for stuff like this – I could never find it!

So as is the norm now, in no particular order except that I started at the furthest end of the field and worked back towards my car.

There was a nice club that was showing some nice UK Fords,

Plenty of Americana represented as well,

Some old school beauties,

On the way back to the car there it was, a spot of rain. I walked quicker and it seemed the faster I walked the more it rained. I bumped into a friend of mine David who was walking towards me on his way back to his car, he said “I’m not coming to any more car shows where you go, it always f…..g rains where you turn up.” Said in the best of humour and we laughed as we passed. As I got back to the car it was pouring quite hard and I spotted this;

I checked my app and it said it would rain, it wasn’t wrong. I hung around for about half an hour with no signs of it stopping. With that decided that I had had enough of looking at my car getting wet.

The only good thing is that my Chemical Guys P40 Quick Detailer was beading brilliantly. I have reviewed it here, if you are interested.

Now here’s the thing, I had the right hump and got in my car and started the drive home. This is no word of a lie here, as I pulled into my own village the sun came out and started to pour heat rays all around. I pulled straight onto the drive and watched the sun cast shadows everywhere as I dried the car from the remaining few spots of rain. So I arrive at a show it rains, I leave a show and the sun starts to shine. So who ever has the rain cloud effigy of me, please can you give me a break (not literally obviously). I’m really starting to get a complex now.

Am I cursed or jinxed? I honestly think so! 🙁

The remaining part of the day wasn’t wasted as managed to do a bit of work on my car in the sun which I will go into on the next post.

The best part of the day, while I was there that is, was that I spotted my local Meguiar’s products retailer. I was speaking to them and they said that they had some samples. Great, so I had one of each of course, so what do you do with the samples?

You pour the samples into the products you already have. Most samples don’t give you enough for what you want to do with them to be honest, but this way you can make proper use of them.

You saw it hear first 😉 

Share my Content

A New Venue

I know this post is a bit late from the day but I just haven’t had time to get round to it all. So apologies and I have reprimanded myself quite severely. Anyway, the new venue was a generously sized field at Barnham Common in the lovely area of Thetford Forest. The best of which is the drive through that beautiful forest area to get there. Considering the previous shows have been a wash out with rain, this was Father’s Day and the weather apps said only a few percent chance of rain. Awesome I was going. I arrived fairly early and was expecting the Bury Retro Car Club to be there so I could park up with the guys, considering I missed out at the previous show in Elveden. Pullin’ into the field there was not many people there, in fact some of the stall traders also turning up to get ready. I was directed to park pretty much where I liked near the other lines of cars. I found a nice Ford Orion and parked next to him and I was pleased to say that a Ford Granada parked the other side of me. A Ford sandwich with USA muscle for the filler.

Checked app – no rain forcast. I started a wander around before it got to busy.

About twenty minutes later the car club turned up and parked a line down form me.

A good mixture of cars on the day.

UK Fords

USA Muscle

Later on the sky clouded and thought felt it, surely not. A few drops to start with then it stopped, not enough to bead on the car. However, half hour later, nowhere to hide except to sit in the car – it happened.

It only lasted for a few minutes, but it was enough. once it stopped it had to dry the car, the first of a few times that day. then the sun came out as quickly the rain feel. that was the pattern for the day. A rain shower for a couple of minutes then sun. I still manged to get sunburn on my face, don’t know how. But I was pleased with the beading though from my new quick detailer from Chemical Guys which I reviewed here.

Around the field spirits were high still and nobody seemed upset about the rain. The entertainment for the kids was great with bird handling and few live shows even.

But an hour after the start of the show to the public this old lady came in. Next year this traction engine will be a century old. I think this was the favourite of the show for me.

A great day in fact although the rain has been 100% for every show. This time it didn’t seem to bad.

Next time sunshine? We can only hope I guess. 🙂

Share my Content

Elveden Car Show 2019 (part 2)

Continuing from yesterdays post this is part two where I took more photo’s from the other walled area of clubs stands. By this time we were creeping into the afternoon, there were some clouds in the distance, but it was still warm.

Elveden is an estate where they have local produce for sale, a very nice restaurant, some local craft shops etc. One of those little stalls crept into the main car show area. I had to laugh at this as the men looked totally bored while the wives and girlfriends had a good look around. The situation soon reversed when the men started looking at the cars and the women started playing with their mobile phones! 🙂

In the interests of equality as you have to be now days, I think that all wedding and bridal shows should have a car stands for the men!

Hot Rods;

Some more American muscle;

Small and sporty cars;

For road cars I am more of a Lamborghini fan than I am of Ferrari, but my all time favourite Ferrari has to be the 308 – the Magnum PI TV show car. I had posters of this car on my bedroom wall as a kid. The Ferrari club was well represented, I tried to talk to one guy but he was very up his own a$$ to be honest so I didn’t bother with the rest of them to be honest, a bit of a shame.

Bury Retro Car Club where I should have been.

The rest of the cars that took my eye;

On the way back to the car I felt it, a single drop of liquid falling from the sky. I walked faster back to the car, the faster I walked the faster it started to fall. While putting my show board away the single drop had started to turn into hose-pipe sprinkler.

Within a few seconds it was carnage, not much time to do anything it was that sudden. I just love this photo of improvised damage limitation.

For what seemed like a minute or so it was falling, the for the remaining ten minutes of so the rain slowed to a gentle drizzle. Not enough to wash my sun cream of though!

It stopped as quickly as it started, the sun came out and there was no more rain for the rest of the day. However the rain did enough to make a mess of the cars that were covered in a fine film of pollen and dust.

As it was near the end of the day I thought that I would leave the clean up for when I got home.

While waiting for the gates opening again I took a couple of artistic pics while sitting in my now slightly damp chair. Using the Ford truck’s hub caps to capture an unusual angle of my car.

A couple of hours later when we were allowed to leave I the show and enjoyed the trip back home. I gave the car a quick detail before I put her back in the garage.

So it has been four out of four car shows where it has rained for me, although the Elveden show wasn’t nowhere near as bad as the previous shows. All four apps said no rain as I said in my previous post, I’m even beginning to think there is a conspiracy against me. Either that or the wife has learnt how to do the rain dance so I stay at home and do some jobs around the house! I was supposed to go to a car show yesterday, but the rain was relentless so I didn’t go at all. I had intentions of popping over in the afternoon if the rain held off, which it didn’t. So technically that’s five shows that have been affected by rain. Surely it must improve.

Share my Content

Double Wash Out (part 1)

Last weekend sees the start of the car show season for me with a double show weekend. Starting on the Saturday was the Fast & Loud show held at the West Suffolk College. Sunday was the Stonham Barns Spring break.

Saturday was looking to be a good day with a chance of rain. As I was itching to get to a show I thought I would risk it, when I left it was overcast, but importantly still not raining. I left early to be there before nine and I arrived some fifteen minutes later. No sooner had I pulled into the car park it started to spit with rain. Baring in mind I had just had a Day in the Bay at Meguiar’s I was not happy. The show was to be for four hours ten till two so my car wouldn’t be exposed to the rain. I meet with my car club Bury Retro Car Club and parked next to their allocated spaces which just happened to be under a tree. Reluctantly I parked up.

Shortly after parking a huge Chrysler 300 pulled in next to me. Now I thought my car was long, but just look at the extra length on this land barge! That is a seriously big car and it sounded amazing too.

This car show was catering for the younger cars and mainly Japanese car scene with wheel cambers that looked like the suspension was collapsing and exhausts the size of my wheelie bin (garbage can for my American readers) that I put out each week. There was a period of around fifteen minutes where they started the cars up and revved them hard to see who could make the most noise, with over run back fires added for the final touch of aggravation on progressively worsening rain cloud.

The funny part was that the Chrysler 300 was louder on tick over than the cars trying to be loud. Not that I was laughing, much. However, I can appreciate the time and effort they had put into their cars, although it’s not my scene at all. The rain started to hammer down now and I was getting rather angry and wet to say the least, my car had been looking the cleanest it had ever been, now it was the dirtiest within same time it took the loud scene to finish their little audio scores to be settled.

Leaves and tree sap were now trying to eat their way through my multiple layers of wax, this was now starting to give me the hump. I started a little walk around to look at the other cars before I decided to leave early from the show. The fast fords was fairly well represented and well-behaved I might add, and they were at the other end of he car park.

You don’t often get to see the Ford Capri now days, but here we had three line up together. These UK Mustangs, did look pretty cool and I think they were my favourites for the day.

On the way back to my car I spotted some visitors which the kids seemed to love;

Just as I was thinking of leaving the big Chrysler was leaving too, but he decided to leave his mark, literally.

Pretty spectacular leaving statement I must say. 👍😉

The rain also did me a bit of a favour as I have just reviewed a couple of products and the water would help me test the resilience of these newly applied products.

The first being the Mirror Bright Wax Paste which can be found here, or cut and paste the link;  https://onemanandhismustang.com/mirror-bright-wax-paste/

The second was my first tentative steps into ceramic coatings, this was from Auto Finesse for the Caramic range for glass, which can be found here, or just click the link;  https://onemanandhismustang.com/auto-finesse-caramics-glass-protection/

Then finally Auto Finesse product Iron Out which can be found here, or again paste the link;  https://onemanandhismustang.com/auto-finesse-iron-out/

After arriving back home I pulled straight into the garage and put my dehumidifier on dry while I started to dry and clean the car again ready for the next days antics. It took me two hours in total, which included the wheels.

First car show was a wash out, surely it had to her better?

Share my Content

A Mirror Bright Finish

A big day for me had arrived early on Friday morning, I had taken the day of work and just for once the Friday alarm woke me up and I was in a good mood. The day trip was a visit to go and see the guys at Meguiar’s for a ‘Day In The Bay’. I had been emailing Dale much earlier in the year and we arranged a date for me to attend on the 29th March. Before we start, and you make any assumptions, this is not a sponsored post by Meguiar’s. This is a genuine member of the public’s personal opinion. It’s no secret that I am a fan of Meguiar’s products. I have used other brands to try them out, but I always seem to come back to Meguiar’s.

The journey up to Davenport was little over one hundred miles away, my sat nav told me that it would take a little over two hours to get there. I set of at seven in order to get there for ten as arranged. The extra time contingency was for road works on the A14, it was just as well as I got held up in them, but at least I was moving, all be it slowly. The funny thing that I saw was a sign that said, “a lot of work is out of sight”, it probably is, they were hard at work making tea, sitting on their backsides reading the paper, or posting on Facebook instead of building the roads to minimise the carnage to the motorist. (rant over).

I arrived at a quarter to ten and parked up. The whole place was buzzing as there was deliveries being made and the forecourt had lots of products on pallets awaiting their delivery and stock allocation.

I buzzed into the main offices where I asked to see Dale, he in turn was then called. Within a few seconds Dale greeted me, then if summoned by some divine intervention the local mobile coffee guy arrived and Dale asked if he could get me a tea, coffee or cold drink.

With the refreshments out the way Patrick arrived as he was going to do the video and camera work for the day. This was also going to be an instructional video to go on their YouTube channel shortly. (I will place the links at the end of the post). Like all good trainers I was asked what I wanted from the day what could they do for me. No scripted you must do this, you must do that scenario. My response was that I wanted to know how to use their products correctly and for tips and tricks with my paintwork and wheels. We had a look around the car and I pointed out some ‘pig tail’ marks that were on the hood from a previous mop a long time ago. There was some minor swirls that I wanted to address as well. Dale looked at the paint work intently, listened to what I was saying and recommended their Mirror Bright range for the colour of my car, and particular paint.

Next was the worst nightmare for a classic car owner, water. Again I was asked if that was going to be OK before they started. As it was a beautiful day, sun was out and it was warm I agreed, the mandatory two bucket wash method was given the go ahead. The jet wash came out and the buckets were being filled.

For the next stage I was going to be very much hands on with the training and I didn’t get much chance to pick my phone up for some photo’s. Although I know Patrick was taking plenty as we went along.

We rinsed the car over with the jet wash to wet it over and remove the worst of the road grime.

The wheels were sprayed with the Mirror Bright wheel cleaner. The mix is left on for a minute or so to see if it changes to purple. Once the product has done its job rinse of with a gentle jet wash.

Tip: Use the jet wash at a forty five degree angle to the paintwork. The reasoning being that you are not blasting water directly into and stone chips.

Tip: Fill the wash bucket with warm water and the rinse bucket with cold. This way you can feel which bucket is wash or rinse when they both have foam on the top.

Using a soft wash mitt like the lambs wool mitt to gently wash over the paint with the product allowing the shampoo to do the work.

The car was dried with the new Meguiar’s supreme drying towel. After we had dried the car I was directed into the Detailing Bay, or as Dale described it; ‘the tunnel of doom’. When I asked why, he switched the high intensity lights on, then I realised why. I could see things I hadn’t noticed before in the paintwork. Every minute imperfection was holding a sign up saying look at me.

The main issue was to address the pigtails in the paint I mentioned earlier to Dale. Patrick was filming Dale explaining the process of what he was going to do. He showed me how to use the Dual Action (DA) MT320 correctly. I was shown how to prep the rotary pad, how to prime the pad before using it, and how much product to use. A common mistake by not priming the pad prior to the application of the products. The hood was sectioned into four smaller workable areas. Dale did one side and I did the other with him giving me guidance. Patrick was getting some close up action shots as we were going along.

With the hood corrected and cleaned it was now looking smooth and flat. Again I was asked my preference for wax type, so I said it has to be the hand applied hard wax rather than the liquid form. Dale then started on the application of the Mirror Bright hard wax paste, I wasn’t sure about the results I would get as I was expecting results like the Ultimate wax for my preferred results that I liked. My expectations were surpassed, Dale was right, this wax suited my car.

Tip: Pinch the top of the applicator pad and place flat onto the wax, twist half a turn and that will be enough for a complete panel.

Tip: A small overlapping circle with fingertip pressure is all you need.

It soon became pretty clear that I was using the wax quantities all wrong in the past, using way to much product.

Once the wax had cured it was a simple wipe of a microfibre was all it took to bring the shine out. The wax came straight off. No buffing, no elbow grease required. Just like dusting a car over in fact.

Tip: check the wax has cured by wiping it with your finger. If it leaves a clean mark behind then it’s ready to come off. If it has a greasy smear behind it, leave it little longer and check again.

Tip: With the car freshly waxed, use a light misting of quick detailer. This will stick to any left over wax that hasn’t been removed leaving a pristine slick paint job.

With the car buffed over I stood in amazement as the car looked as good as it did the day it was painted and still wet.

I drove the car outside and the sun made the car transformed yet again in natural sunlight.

As the Meguiar’s warehouse were still taking out and receiving orders, I had to move the car out of the road after the main pictures were taken, the lorry driver even jumped down from his cab and joined in for a chat too. As Patrick was using the professional camera, I let him do his thing and I kept out the way.

With the photo shoot completed I asked Dale and Patrick for a picture of them with the car. Dale in black and Patrick with the stripped top.

I would like to say to Meguiar’s, especially Dale & Patrick who looked after me;

Thank You So Much!

I had the best day ever cleaning a car, and nothing was to much trouble for these guys. They answered my endless barrage of questions, they also showed me the answers too. In fact everybody I spoke to there was amazing.

There was only one thing left to do, purchase some goods. I didn’t have to at all and they never tried to sell me anything. However I needed a bag that could hold the largest of Meguiar’s bottles, so I grabbed their brand new to the market Extra Large Kit bag, which is huge. The other products are what I used on the day, but I hadn’t got in my arsenal of detailing products. The Ceramic Wax I am very intrigued about and wanted to try.

However, once I got the car home I had to give it a gentle clean before I covered it up in the garage.

Patrick is going to be uploading a video of the day to the Meguiar’s YouTube channel:

https://www.youtube.com/user/meguiarsuk

Check out the ‘Detailing 101’ where they show you how to use the products, it’s very useful.

The products I used for the day were all Mirror Bright except for the Meguiar’s Compound stage of the hood treatment. Again, I am gaining nothing from showing you what I used, but if you want some amazing results try these. I will be doing some reviews of the products a little later on of course. But, I can say one thing, they will get scores.

All of the products can be found here:  https://www.meguiars.com/mirror-bright

Patrick has said that they will be sending me the high resolution photos of the day, which I am so looking forward to getting hold of. I will then do a follow up post of some proper photos taken on the day.

Later that evening on social media platforms I spotted these posts:

Yes that is me with the polisher!

Be sure to follow ‘Mequiarsuk’ on Instagram to see their latest posts or follow ‘dale_mast’ himself who really does know what he is talking about.

Thanks again guys. I’m a very happy chap.

Share my Content

Bookings

The car show season is almost upon us now and I must admit that I’m suffering from PMS, that’s ‘Parked Mustang Syndrome’. I would like to take credit for that, but I can’t as I had seen it on a Meme and thought I would reuse it.

Over the last couple of years a source of frustration trying to find car shows and what needs to be done to get into them. It used to be a case of turn up on the day, show your car and talk to lots of lovely like-minded people. Now to get in the shows – you have to fill in forms, pay upfront, provide your insurance details and sign all sorts of stuff to say you won’t leave before a given time etc. Is it just me or have things gotten very busy? I have booked three car shows so far that are local to me and particular favourites of mine. I have a list of a few more that I want to attend so I hope I can get into them.

I have one booking which I am looking forward to very much and has taken a few emails to arrange, however it’s not a car show as such, but obviously will revolve around my car. The booking will be at the end of March this year and I hope to bring the full story on that for you shortly after. It should be a good post with lots of pics maybe a video or two.

I have not been idle in the mean time, I have been reviewing lots of car cleaning and detailing products. All have been listed under the ‘Car Detailing Reviews’ menu at the top. Snow foam, glass cleaners, wheel cleaners, decontaminate, glue removers and more all under each manufacturer’s name. As you can see, the reviews are not done just in the Mustang, but also our daily drivers. Some reviews have been great, and there has even been the odd over rated product too. Remember all my reviews are independent and purchased with my own hard-earned cash.

Hopefully the post should be more regular now the show season is ready to roll.

I can’t wait. 👍🙂

Share my Content

Stopping With The Times

First post of the year so I wish you a Happy New Year, also hoping that you had a great Christmas and well-earned break too. This year my wife and I decided to ask each other what we wanted for gifts and that we would stick to a reasonable agreed budget between us. The simple reason is that we have spent most of our cash trying to sort our house out and trying to pay some bills off for the materials we used. The wife’s list was around the usual girly pampering lotions and potions as expected. Mine revolves around the Mustang with its own lotions and potions for its pampering. My list only had a couple of bottles from Auto Finesse I wanted to try out, which I will review throughout the year with the other products I have to review, around twenty in fact that I haven’t as yet reviewed. To make up my options for the list I wanted to update the garage and a little gadget for the car, both of which she bought for me. 😀

As my Mustang just fits in the garage with about an inch at the front and just a few inches to the rear. I can park the car pretty well, but I am paranoid about hitting the back of the garage wall for obvious reasons. To try and protect the car from such an event the wall now has foam pipe lagging stuck on the wall with a large Snap On floor pad on top of that. To stop in the right place I normally rely on the good old-fashioned hanging ball to touch the windscreen and works perfectly every time, but it doesn’t look pretty.

I have been looking on-line for parking aids; tyre ramps, laser, twin lasers and ultrasonic variations. Lasers looked like to much of a hassle and didn’t give much of a visual aid. Tyre ramps would get in the way and could be moved when the car wasn’t on them, so that left ultrasonic. There are so many variables on the market, traffic light style or single red LED varieties. I liked the look of was the twin sensors and a box mounted at eye level that gave a count down to the final position.

The set up needed a flat surface or bumper to work correctly. The mustang has very little in the way of a truly flat surfaces. The only relatively flat surface I could think of was the number plate. Some of the other sensor styles need a minimal distance of 12″ or so. This particular model needs a minimum of 6″ inches and takes the closest of the two readings. The sensors will activate when they detect movement and the count numbers display. So you park the car where you want and a number will be displayed. You then drive to that number and stop. Simple.

I made a few test locations and pushed the car out and back in again a few times. Each time the box did exactly what it was supposed to do, counted down. From the back of he car I pushed the car forward and stopped at the mark ’07’ (inches). Perfect. It doesn’t look neat at the moment as I want to make sure the positioning is correct before I tidy it up properly.

How close do I have to park to the wall? This close!

I have written a review of the product and installation here. Or it can be found under the Accessory menu.

Now my sense of direction is legendary, it’s so bad I get lost going home! Honestly it’s true. With that in mind, the other item I wanted was a something quite common in modern cars which is a bluetooth connection, but not that common on a classic Mustang. There are multiple ways around my little issue, a new technology radio made to look old – an expensive option. A new modern replacement radio that needs a hole cut into the dash – a lot of damage to the original dash, but can be cheaper. Or a halfway house that I have; an original Mustang radio adapted. My particular radio was sold to me as working when I bought it from the USA via Ebay. By the time I got the radio and was able to test the unit it certainly didn’t work anymore. 😠 Anyway, a contact of Mustang Maniac helped me out by connecting an input from a 3.5mm jack plug wire. This means that an ipod or phone needed a physical connection. It worked fine, but I wasn’t a lover of having a wire from the dash, blame my OCD for that. Then a friend of mine then told me about this gadget that connects a bluetooth dongle receiver and then inputs that signal into the radio, a similar setup to what I had, although he had a modern radio. This means that I could connect my phone for music, or more importantly, a Sat Nav turn by turn prompt. I already have a great Tom Tom Sat Nav which I could stick on the window, again my OCD didn’t like it and so I had it mounted on the centre console, the trouble with that is that I had to look down at it now and again as I couldn’t hear it over the engine noise, not exactly safe. With this new option I could have my radio on connected via bluetooth to my Samsung S9+ phone using Google Maps with voice turn by turn. The built in dash speaker is much louder than the Tom Tom unit so I would be able to hear what direction I needed to now. I could have speakers in the door, in the kick panels or in the rear parcel shelf. Again all of which my OCD won’t allow of course. Now I have a tiny receiver hidden in the glove box that just needs to be turned on and off I go.

It works and I love it. I have also written a review of it here.

So my old school Mustang still looks stock, but now the media function has been upgraded into the modern world again. This latest upgrade goes with the other modern goodies like my LED lights front and rear, modern wire loom with blade fuses, electronic ignition, LED dash bulbs, voltmeter etc.

Any other good gadgets out there I need to know about? Please let me know. This List idea works great as you get what you want and not a pair socks to go in the draw with the rest. In fact I got a pair of socks as well – but they had the Shelby Logo on them so they are acceptable. 😀

Share my Content